Stunning mountain views. Endless wildflowers. Old-growth forests. One of the best ways to see the beauty of Mount Rainier National Park is to take a hike.
But with over 250 miles of hiking trails in the park, how do you choose what hike to add to your Mount Rainier itinerary?
This guide covers the 25 best hikes in Mount Rainier National Park, from easy forested strolls to challenging all-day adventures. Plus, I’m sharing tips on what you need to know before hiking in Mount Rainier.
By the end of this post, you’ll feel ready to conquer your first hike in Mount Rainier National Park!
This post may contain affiliate links, where I may receive a small commission at no additional cost to you. Read more in this disclosure policy.
Mount Rainier National Park At-A-Glance
Before diving in, here are a few highlights to help you plan your trip:
- Best Time to Visit: Late July to September is the best time to visit, once the snow has melted and all roads in the park have opened. Snow can stick around until mid-July each year.
- Where to Stay: Two lodges inside the park, Paradise Inn and National Park Inn, provide excellent access to the Paradise area. Outside the park, consider staying at Mountain Meadows Inn or Nisqually Lodge in Ashford, WA.
- How to Get There: The closest airport is in Seattle, 3 hours away. Use Expedia to browse flights and find the best price.
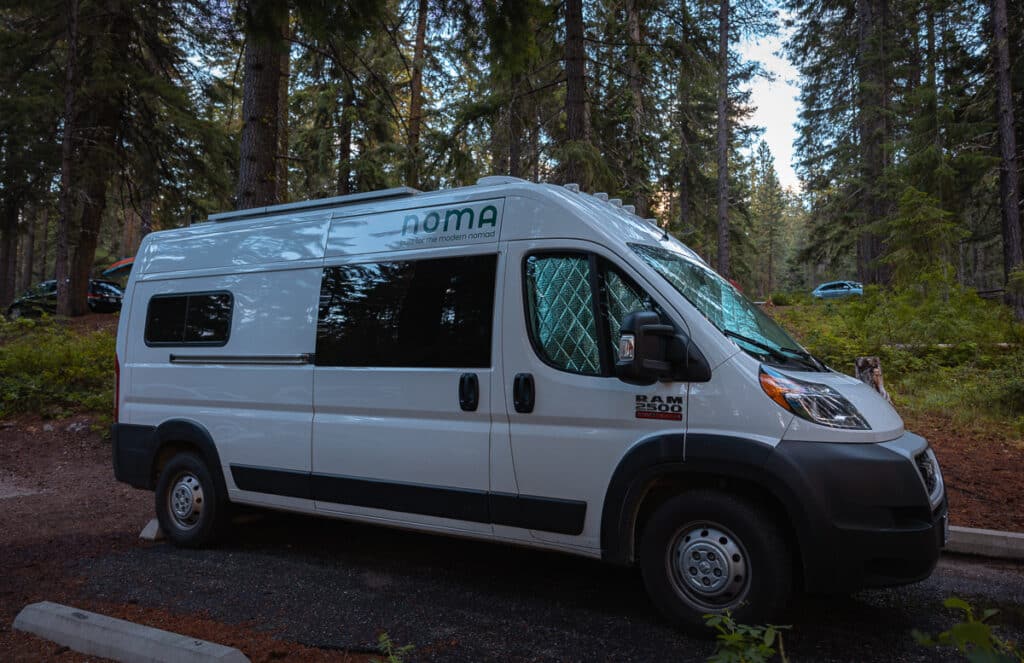
- How to Get Around: My favorite way to see Washington is by campervan. I had a fantastic experience renting a luxury campervan through Noma Vans on Outdoorsy. You can also quickly get around by car. I recommend using Expedia to browse for deals.
- Don’t Forget: Be sure to get an America the Beautiful National Park Pass ahead of time. This $80 pass is valid for 12 months and gets you into all 400+ national park sites (including all 3 Washington parks).
Overview of the Regions in Mt Rainier
Before diving into the best hikes, it’s essential to understand the layout of Mt Rainier National Park and discuss the five park regions. This blog post summarizes the best hikes by region to help you prioritize your time.
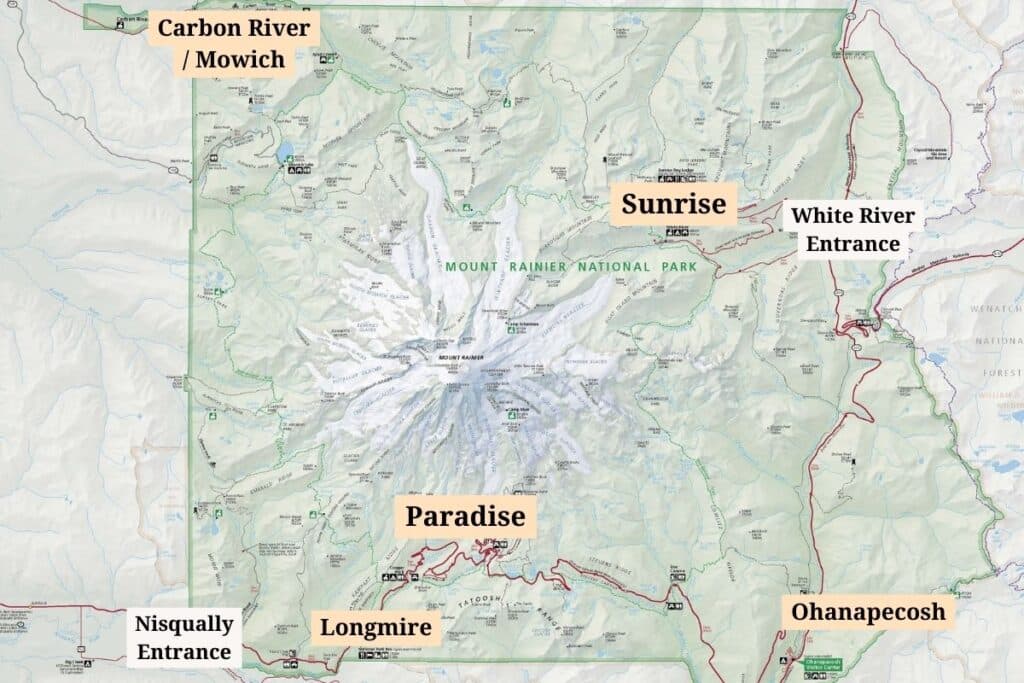
Mount Rainier National Park has five main sections, starting on the northern side and moving clockwise:
- Sunrise: Located on the northeastern side of Mount Rainier, Sunrise is known for its stunning mountain views and challenging, high-elevation hiking trails. As the highest part of the park you can drive to, it offers a unique vantage point of the surrounding peaks.
- Ohanapecosh: In the southeastern part of the park, Ohanapecosh offers unique forests reminiscent of the Olympic Peninsula. Visitors can explore wooded trails, hot springs, and the Ohanapecosh Visitor Center.
- Paradise: As one of the most popular regions in Mount Rainier National Park, Paradise lives up to its name with its breathtaking scenery. It features lush meadows filled with wildflowers, stunning vistas of glaciers and waterfalls, and iconic trails like the Skyline Trail.
- Longmire: The historic district of Longmire, located in the southwestern part of the park, offers a glimpse into the park’s past. Visitors can explore the Longmire Museum and more leisurely scenic trails near the Nisqually Entrance.
- Carbon River / Mowich: On the northwest side of Mount Rainier, the Carbon River and Mowich region showcase a remote part of the park, requiring navigating a 20-mile unpaved road. Carbon River / Mowich is an excellent region for hiking and camping away from the crowds.
The two most popular areas of the park are Paradise, on the southern side of the mountain, and Sunrise, on the northeast side.
The Nisqually Entrance (closest to Paradise/Longmire) is open year-round, while the White River Entrance (closest to Sunrise) is only open in the summer.
How to Get to Mount Rainier National Park
Mount Rainier National Park is about 2 hours away from Seattle and 2.5 hours from Portland. Visitors outside the Pacific Northwest can fly into Seattle-Tacoma International Airport (SEA) or Portland International Airport (PDX).
You’ll need a car to get to the park as public transportation is limited.
I highly recommend renting a campervan if traveling to multiple Washington national parks. I recently rented from Noma Vans on Outdoorsy, and it made it so easy to see the very best of Washington’s national parks on a road trip!
Here are the approximate driving times from the nearby major cities:
- Seattle to Paradise: 107 miles, 2 hours 30 minutes
- Seattle to Sunrise: 96 miles, 2 hours 15 minutes
- Portland to Paradise: 156 miles, 3 hours
- Portland to Sunrise: 184 miles, 3 hours 45 minutes
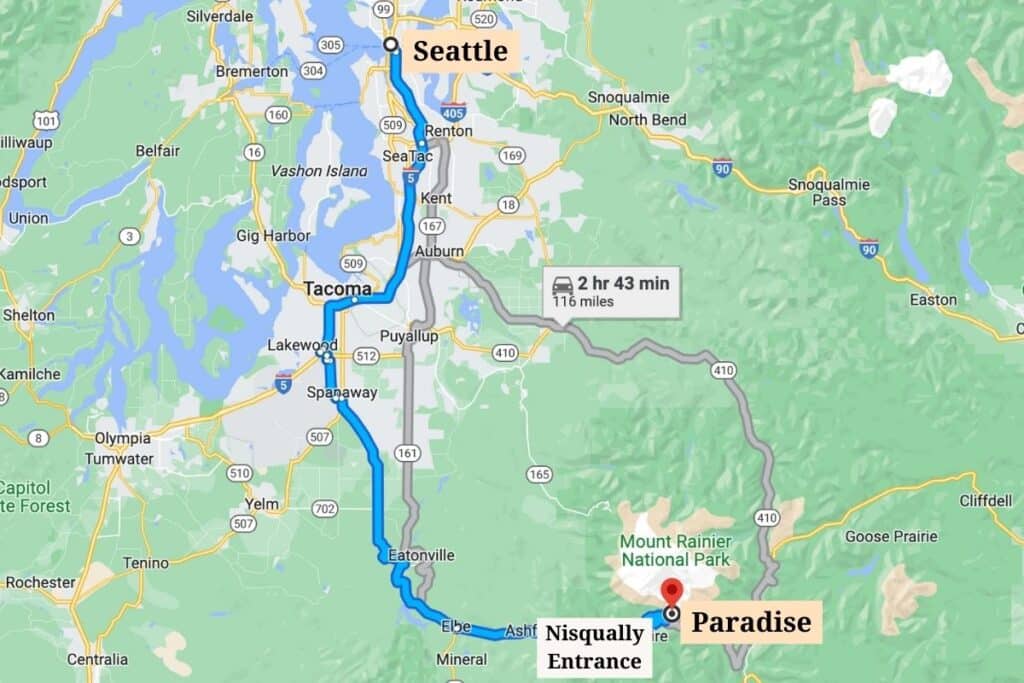
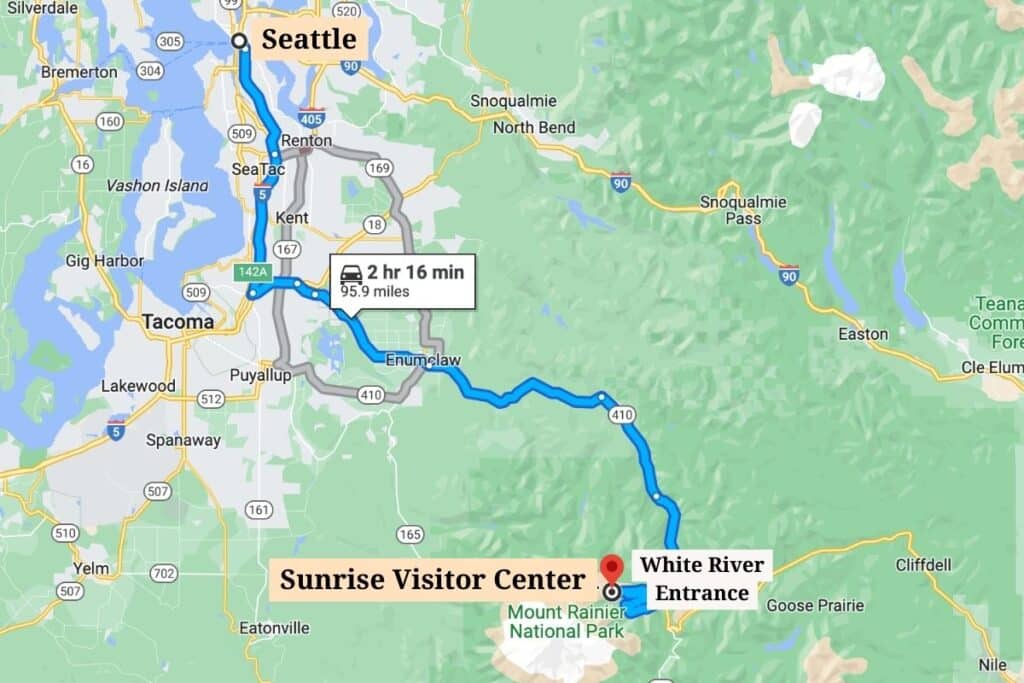
Once inside the park, the best way to get to the trailheads is by car since the park does not offer a shuttle service.
Most park areas are accessible by 2WD vehicles, like a sedan. However, the exception is the Carbon River / Mowich Lake area which requires navigating unpaved, gravel roads. Most visitors skip this part of the park, but it can be a great place to escape crowds!
Mount Rainier National Park is expansive. Driving between parts of the park can take hours. I’ve organized this list of hikes by region to help you make the most of your time.
Here’s a glance at the drive times between regions, moving in a counterclockwise direction:
- Mowich Lake to Longmire: 2 hours 45 minutes, 85 miles
- Longmire to Paradise: 25 minutes, 11 miles
- Paradise to Ohanapecosh: 45 minutes, 23 miles
- Ohanapecosh to Sunrise: 1 hour, 32 miles
- Sunrise to Mowich Lake: 2 hours 50 minutes, 84 miles
Best Hikes in Mt Rainier National Park
Mount Rainier National Park has no shortage of incredible and scenic trails. This guide breaks down the best hikes in the park by region:
- Best Hikes in Paradise in Mount Rainier
- Best Hikes in Sunrise in Mount Rainier
- Best Ohanapecosh Hikes in Mount Rainier
- Best Mowich Lake / Carbon River Hikes in Mount Rainier
- Best Hikes in the Longmire area in Mount Rainier
Paradise Area Hikes
Paradise is the most visited area of Mount Rainier National Park and for good reason! This part of the park offers excellent views of the mountain, abundant wildflowers in summer, and some incredible hiking trails.
Trails here are snowy, even in mid-July. For the best experience hiking in Paradise, plan your trip from late July to September.
1. Skyline Loop Trail
- Distance: 5.6 miles
- Elevation Gain: 1,771 feet
- Difficulty: Moderate
- Time to Hike: 3-5 hours
- Trailhead: Henry M. Jackson Memorial Visitor Center
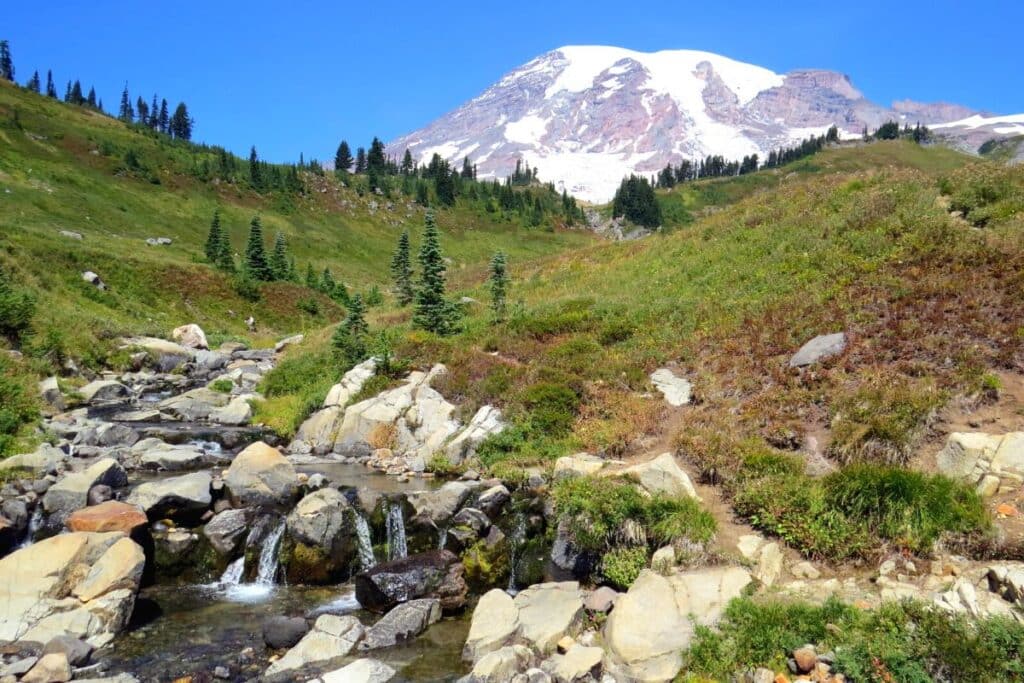
The Skyline Trail is the most popular hike in Mount Rainier National Park, filled with panoramic landscapes. The 5.6-mile hike begins in the heart of Paradise, taking hikers through wildflower-filled meadows and past glacial and mountain vistas, with plenty of opportunities to see wildlife.
Start the hike behind the visitor center, following the trail in a counter-clockwise direction for the best views of Mount Rainier as you hike.
About halfway through the hike, you’ll reach Panorama Point, a stunning south-facing viewpoint overlooking Mount Adams, Mount St. Helens, and Mount Hood.
The trail is incredibly popular, so if you’re hiking in the summer, start your hike before 8 AM to avoid crowds!
2. Myrtle Falls
- Distance: 0.7 miles
- Elevation Gain: 154 feet
- Difficulty: Easy
- Time to Hike: 30 minutes
- Trailhead: Henry M. Jackson Memorial Visitor Center
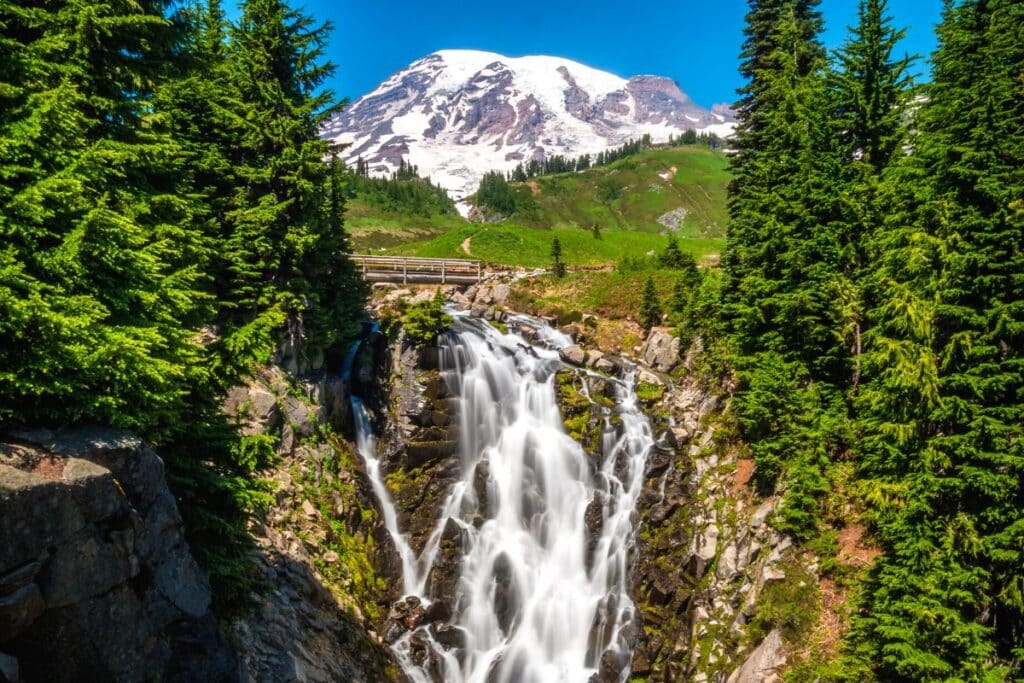
The Myrtle Falls Trail is a shorter hike with a big payoff, perfect for those with limited time or seeking a less strenuous hike. This trail is shy of one mile and leads you to a stunning 72-foot waterfall.
Begin your hike from the Henry M. Jackson Visitor Center and follow the paved trail east. The trail gently ascends, offering unobstructed views of Mount Rainier.
Once you reach Myrtle Falls, you’ll find an overlook that’s a photographer’s dream.
Best viewed during July and August when the falls are at their peak, and the trail is snow-free, this hike can be crowded due to its easy access and iconic views. Therefore, starting your hike early in the morning is advisable to avoid the crowds.
The trail is paved the entire way, making it wheelchair accessible and a fantastic choice for all visitors.
3. Camp Muir
- Distance: 8.8 miles
- Elevation Gain: 4,665 feet
- Difficulty: Strenuous
- Time to Hike: 8 to 10 hours
- Trailhead: Henry M. Jackson Memorial Visitor Center
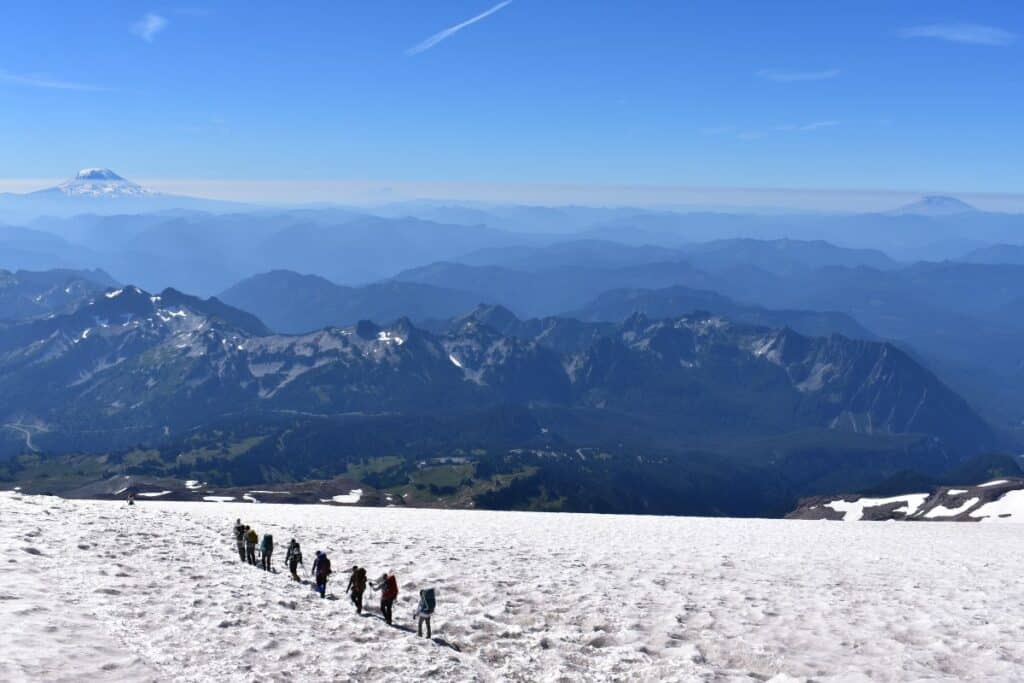
The Camp Muir Trail is a must for experienced hikers seeking a challenging hike with stunning views. This strenuous, nearly 9-mile hike is the closest you can get to Mount Rainier without technical climbing!
The trail initially follows the Skyline Trail counterclockwise, quickly ascending to a whopping 4,680 feet of elevation gain when you reach the Camp Muir base camp.
As you hike, expect breathtaking views of the Nisqually Glacier, Mount St. Helens, and even Mount Adams on a clear day. Once at Camp Muir, the Cowlitz Glacier and Little Tahoma views are unparalleled.
The Camp Muir Trail is not for the faint of heart, ascending to 10,188 feet at the base camp and requiring excellent fitness and special gear like crampons and ice axes to reach.
4. Nisqually Vista Trail
- Distance: 1.1 miles
- Elevation Gain: 180 feet
- Difficulty: Easy
- Time to Hike: 30 minutes to 1 hour
- Trailhead: Paradise Lower Parking Lot
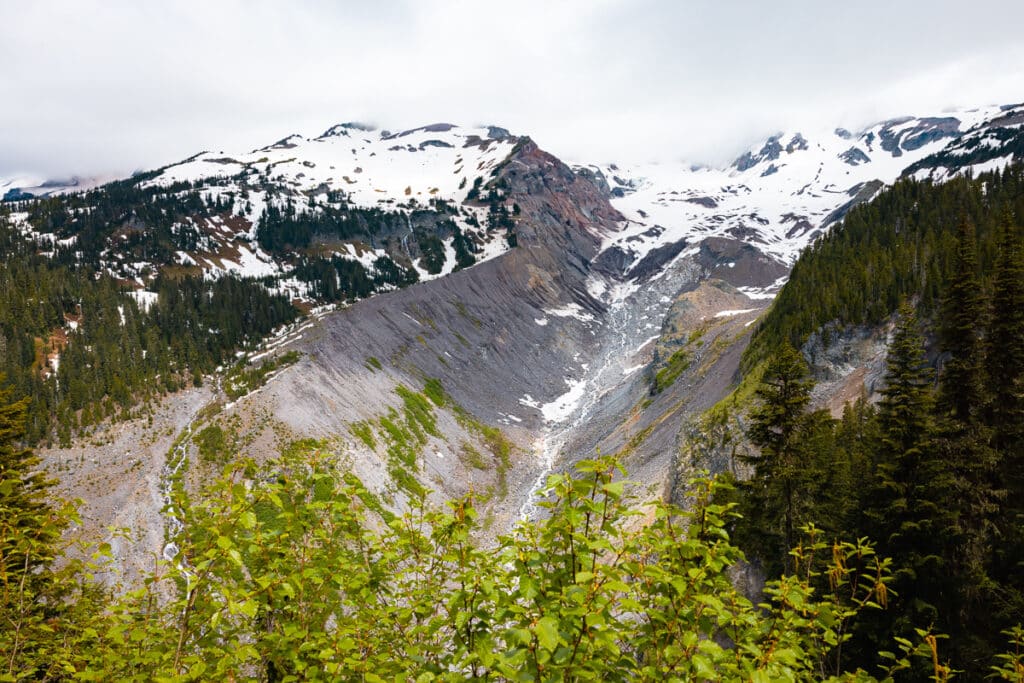
The Nisqually Vista Trail is an excellent family-friendly hiking option, showcasing the majestic beauty of Mount Rainier. This 1-mile loop trail starts at a small parking lot a short walk from the Henry M. Jackson Visitor Center in Paradise.
It is known for its splendid views of the Nisqually Glacier.
Follow the well-marked path through the meadows, where you’ll find plentiful wildflowers of all hues blooming in August. The trail culminates at the vista point with a fantastic view of Mount Rainier and the Nisqually Glacier.
This trail is accessible and paved the entire way, making it a great option for families with strollers. While not as crowded as some other trails, it’s still popular, so starting early or hiking on weekdays can help you avoid the busiest times.
5. Bench and Snow Lakes Trail
- Distance: 2.2 miles
- Elevation Gain: 449 feet
- Difficulty: Moderate
- Time to Hike: One hour
- Trailhead: Bench and Snow Lake Trailhead on Stevens Canyon Road
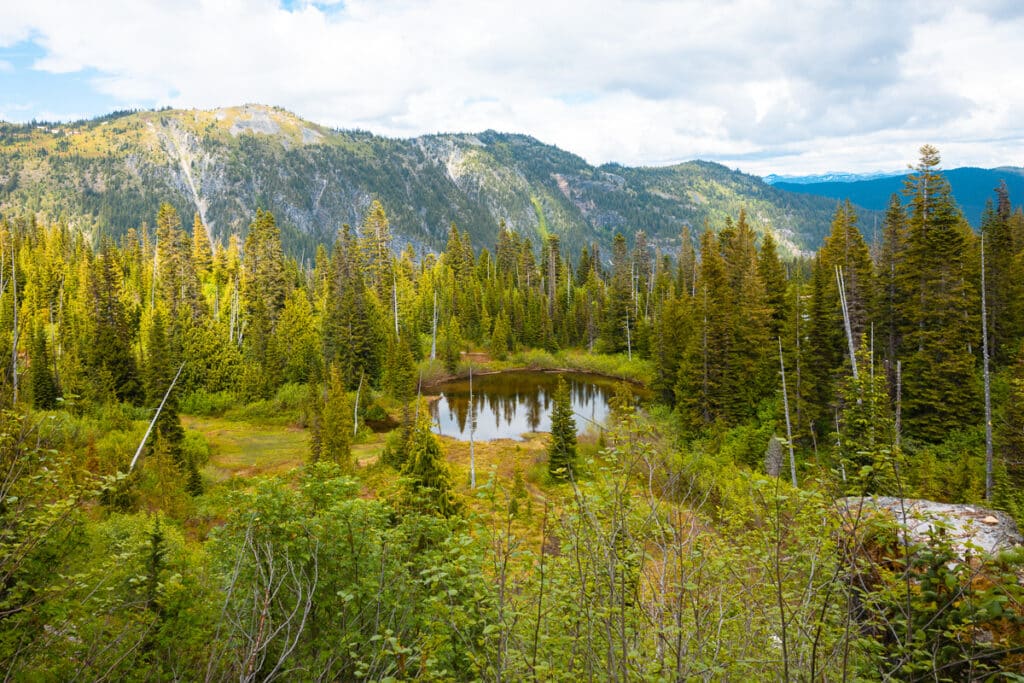
The Bench and Snow Lakes Trail is a 2-mile hike to two pristine alpine lakes in Mount Rainier’s serene meadows.
The trail begins with a gentle descent through a green forest before arriving at an overlook of Bench Lake, which offers reflections of Mount Rainier from the shoreline on calm days. Another half mile further will bring you to Snow Lake, surrounded by wildflower meadows in summer.
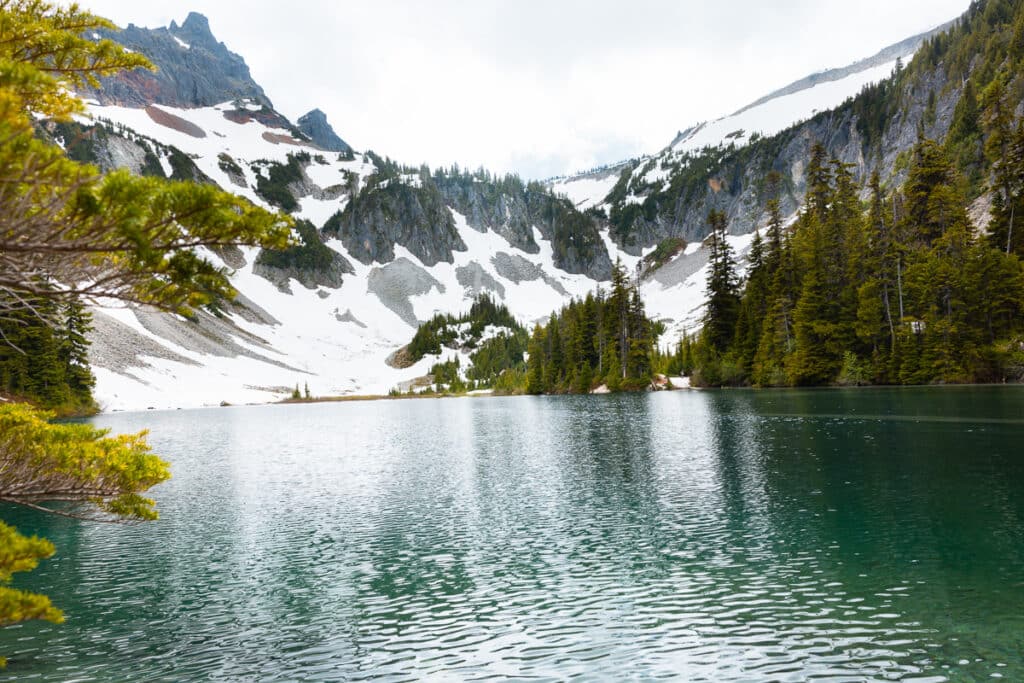
This trail is typically clear of snow from late June to October. Still, it’s best to check trail conditions in advance due to occasional downed trees. It’s an excellent choice for those seeking a quieter hike, as it receives less traffic than trails starting in the heart of Paradise.
Remember your bug spray, especially during the peak of summer!
6. Pinnacle Peak Trail
- Distance: 2.9 miles
- Elevation Gain: 1,584 feet
- Difficulty: Strenuous
- Time to Hike: 2 to 3 hours
- Trailhead: Pinnacle Peak Trailhead across from Reflection Lakes
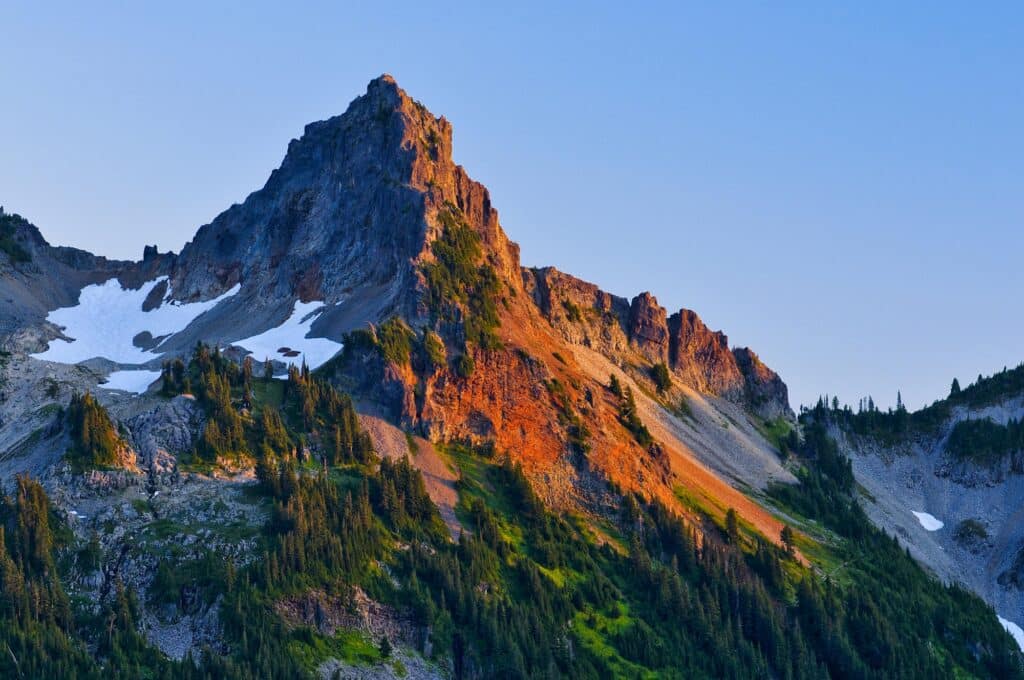
The Pinnacle Peak Trail is an excellent choice for hikers looking for a challenging yet rewarding adventure. Don’t be deceived by the distance of only 3 miles. This hike packs in the elevation!
Starting at the Reflection Lakes parking area in the Tatoosh Range just south of Paradise, the trail ascends steeply through subalpine meadows and past rocky outcrops, providing spectacular views of Mount Rainier and the surrounding peaks.
The trail ends at the saddle, rewarding you with panoramic Mount Adams, Louise Lake, and Pinnacle Glacier vistas. While the maintained trail ends here, there is another 0.2-mile rock climb that some hikers will undertake to reach the summit.
While less crowded than some other trails due to its rugged nature, starting your hike early in the day is advisable to secure a spot in the small parking area.
7. Alta Vista Trail
- Distance: 1.6 miles
- Elevation Gain: 567 feet
- Difficulty: Moderate
- Time to Hike: One hour
- Trailhead: Henry M. Jackson Memorial Visitor Center
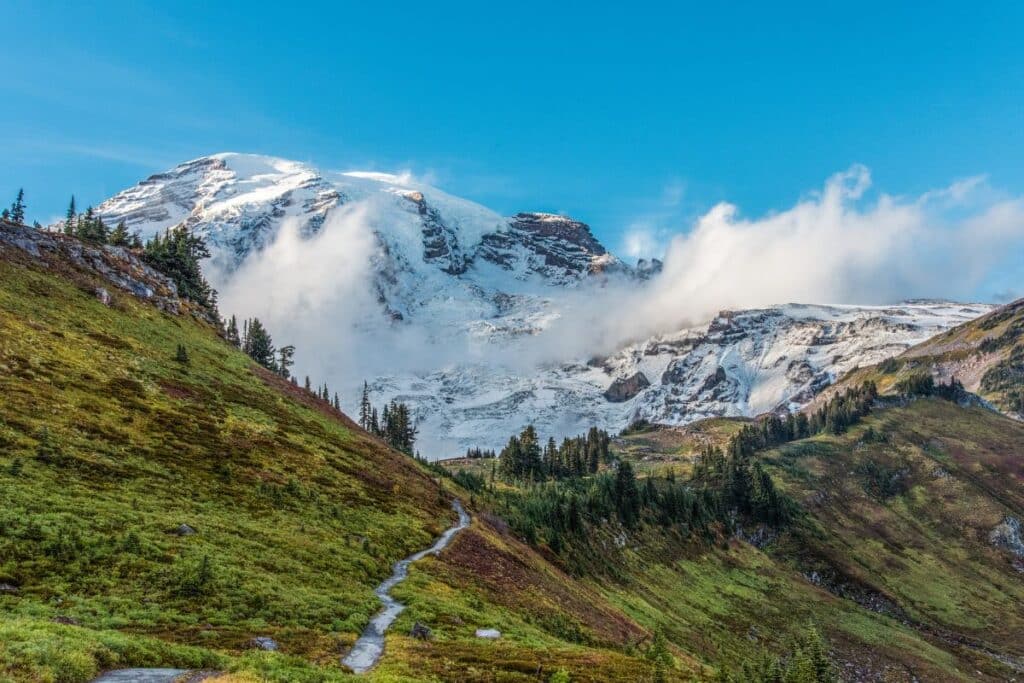
The Alta Vista Trail, nestled in the Paradise area of Mount Rainier National Park, is a popular 1.6-mile round-trip hike offering unbeatable views. The trail takes hikers through picturesque wildflower meadows and provides panoramic views of Mount Rainier and the Tatoosh Range.
Beginning near the Henry M. Jackson Visitor Center, the trail winds uphill, sharing the same route as the Skyline Trail for a time, reaching the peak of Alta Vista, where you’ll be met with 360-degree views.
This trail also offers the chance to spot wildlife, particularly the furry brown marmots. If you want to experience the Skyline Trail and a lesser-visited route, this hike is a great option with less distance.
Are you planning a national park trip but don’t know where to start? Get my free 28-page national park ebook where I break down everything you need to know to visit all 63 USA national parks.
Download your free ebook here.
Sunrise Area Hikes
The Sunrise area is one of the best areas in the park for hiking, with excellent views of Mount Rainier. Located along Rainier’s northeastern face, Sunrise is the highest part of the park accessible by vehicle, which means the hikes found here bring you even closer to Rainier!
Trails here stay snowcovered into early July. For the best experience hiking in Sunrise, plan your trip from late July to September.
8. Mount Fremont Lookout Trail
- Distance: 5.6 miles
- Elevation Gain: 1,108 feet
- Difficulty: Moderate
- Time to Hike: 3 to 4 hours
- Trailhead: Behind Sunrise Day Lodge
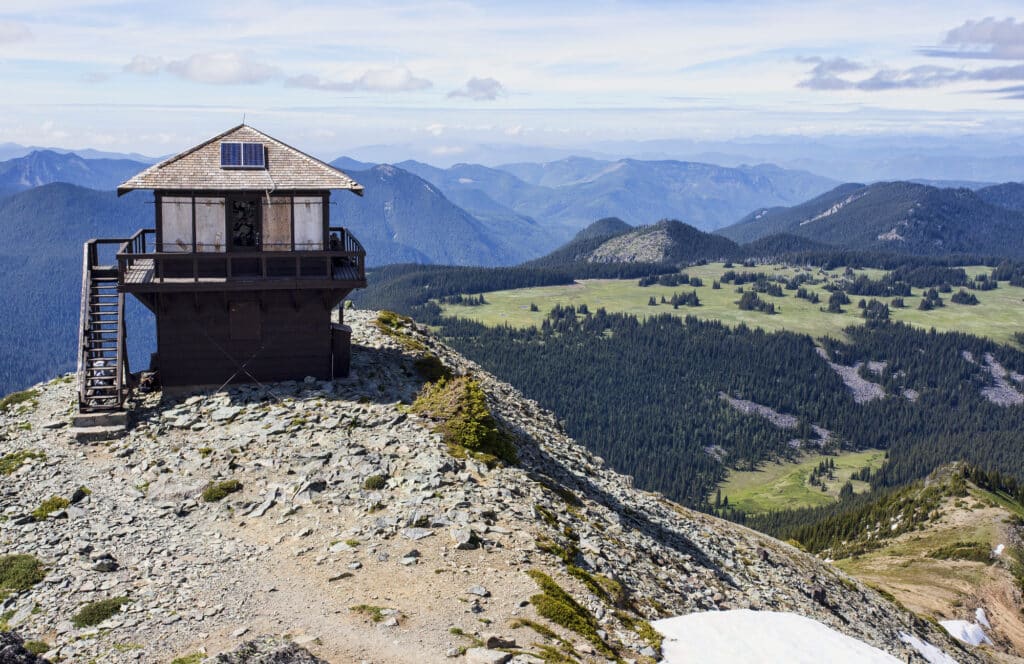
The Mount Fremont Lookout Trail is a 5.6-mile round-trip hike offering some of the most impressive views in Mount Rainier National Park.
Beginning at the Sunrise Visitor Center, this trail winds through subalpine meadows and past Frozen Lake on the Sourdough Ridge Trail.
The trail concludes at the historic fire lookout built in the 1930s. From the lookout, enjoy breathtaking views of Mount Rainier, Grand Park, and on clear days, even Mount Baker. Watch for mountain goats and marmots often spotted along the trail.
Despite its length and elevation gain, it’s popular for sunrise and sunset. Ensure you have sunscreen and plenty of water, as sections of the trail are exposed with little shade.
9. Burroughs Mountain Trail
- Distance: 9.5 miles
- Elevation Gain: 2,601 feet
- Difficulty: Strenuous
- Time to Hike: 6 to 8 hours
- Trailhead: Behind Sunrise Day Lodge
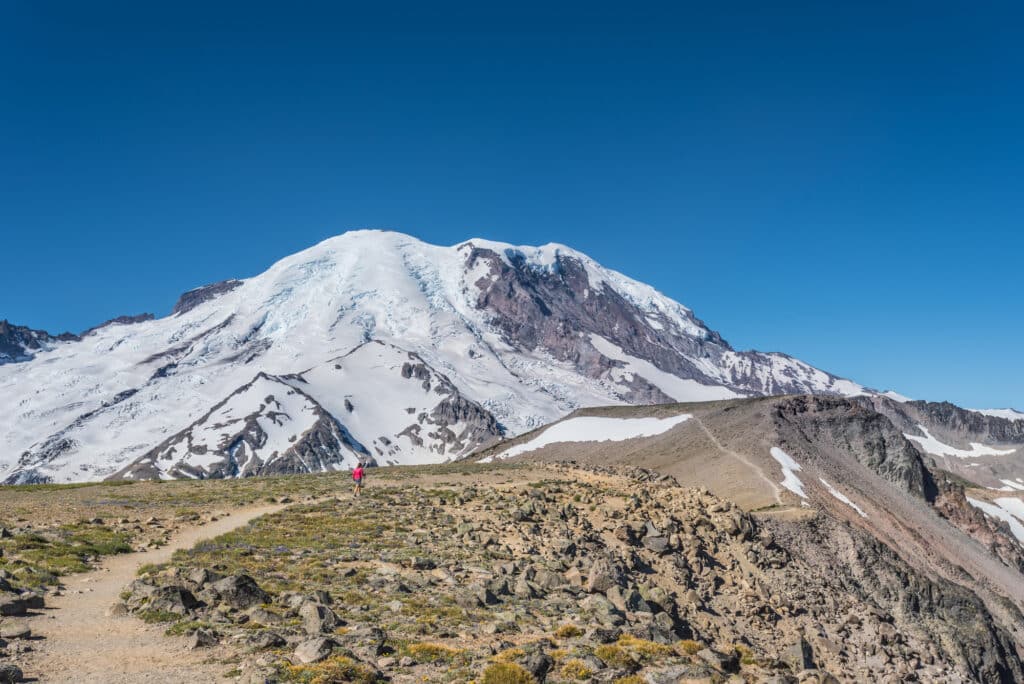
The Burroughs Mountain Loop Trail is a nearly 10-mile round-trip trail offering some of the closest views of Mount Rainier.
Starting near the Sunrise Visitor Center on the Sourdough Ridge Trail, this trail takes you across rolling wildflower-filled meadows, offering unparalleled views of Mount Rainier’s north face and the Emmons Glacier.
The trail covers the First, Second, and Third Burroughs, offering unique perspectives of the surrounding landscape. While reaching Third Burroughs requires a strenuous climb, it rewards you with exceptional, less crowded views.
On the return route, you can take the loop, passing through the Sunrise Camp on part of the Wonderland Trail. You can also combine this hike with a trip to Mount Fremont Lookout!
10. Sourdough Ridge Trail to Frozen Lake
- Distance: 2.8 miles
- Elevation Gain: 534 feet
- Difficulty: Moderate
- Time to Hike: 2 hours
- Trailhead: Behind Sunrise Day Lodge
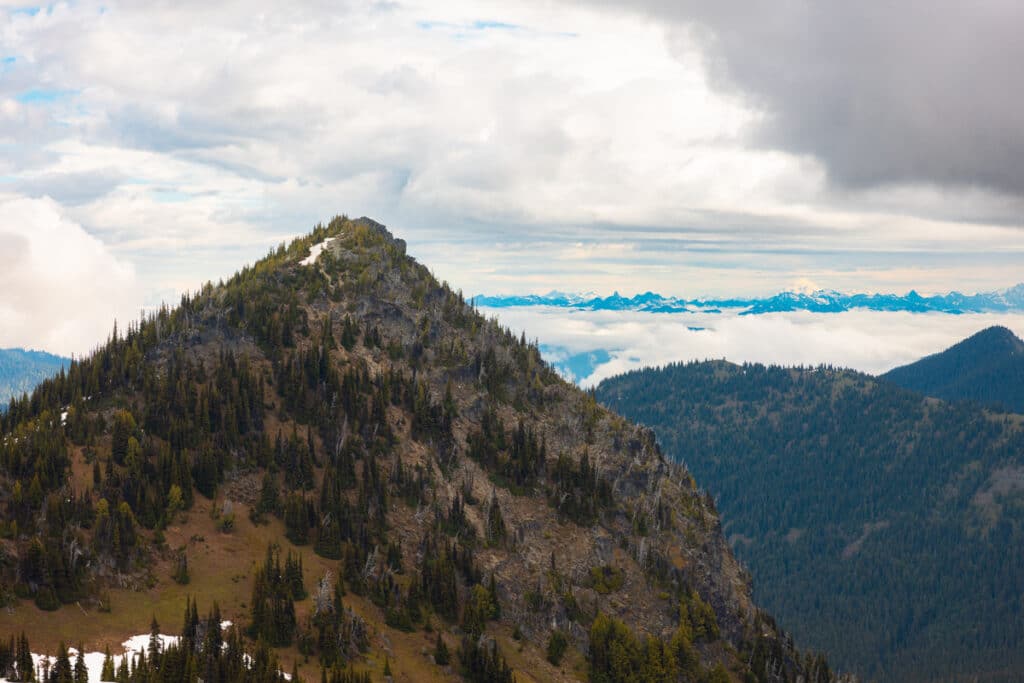
The Sourdough Ridge Trail to Frozen Lake is a fantastic 3-mile round-trip hike perfect for families and hikers seeking a less strenuous route.
Starting at the Sunrise Visitor Center, the trail takes you through colorful wildflower meadows. It offers stunning views of Mount Rainier and the surrounding peaks.
The trail climbs gently to the ridge and then descends towards Frozen Lake, a small body of water serving as the Sunrise area’s primary drinking water source.
Since the Sourdough Ridge Trail is the start of the popular Mount Fremont Lookout and Burroughs Mountain trails, expect this hike to be crowded!
11. Naches Peak Loop
- Distance: 3.5 miles
- Elevation Gain: 659 feet
- Difficulty: Moderate
- Time to Hike: 2 to 3 hours
- Trailhead: Naches Peak Loop Trailhead off Highway 410 at Chinook Pass
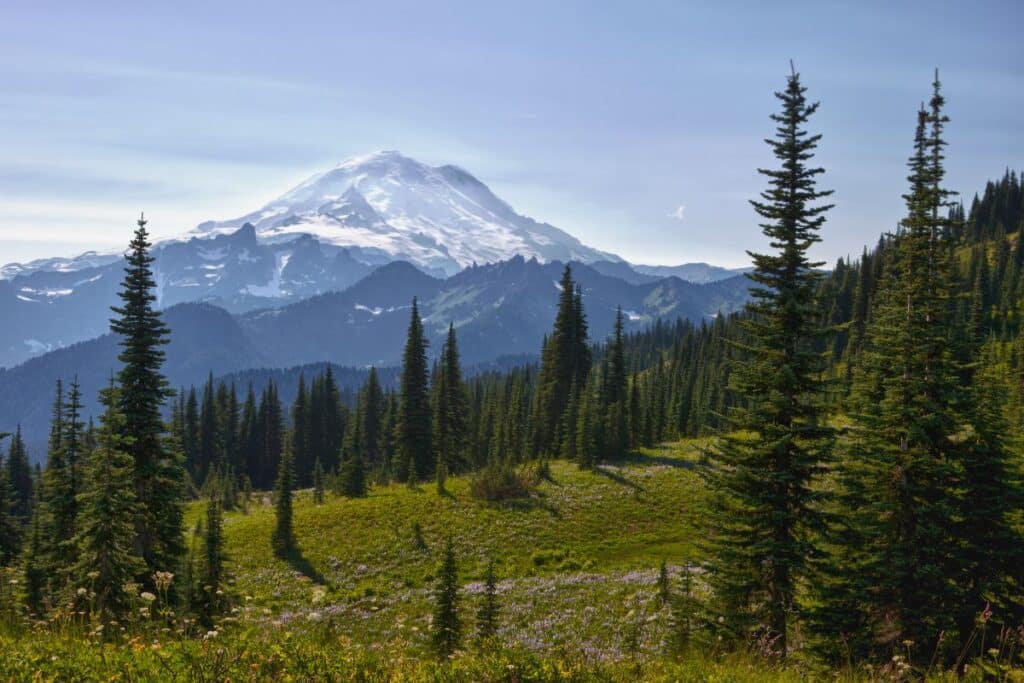
The Naches Peak Loop is another 3-mile trail with excellent Mount Rainier National Park views. This loop trail begins at the Tipsoo Lake picnic area. It travels around Naches Peak, boasting stunning views of Mount Rainier, vibrant wildflower displays, and the crystal-clear Dewey Lake.
The trail intersects with the famed Pacific Crest Trail, where you may see long-distance hikers making their journey north or south. Hike the trail in the clockwise direction for the best views of Mount Rainier as you go.
12. Tipsoo Lake Loop Trail
- Distance: 0.7 miles
- Elevation Gain: 19 feet
- Difficulty: Easy
- Time to Hike: 30 minutes
- Trailhead: Tipsoo Lake Parking Area
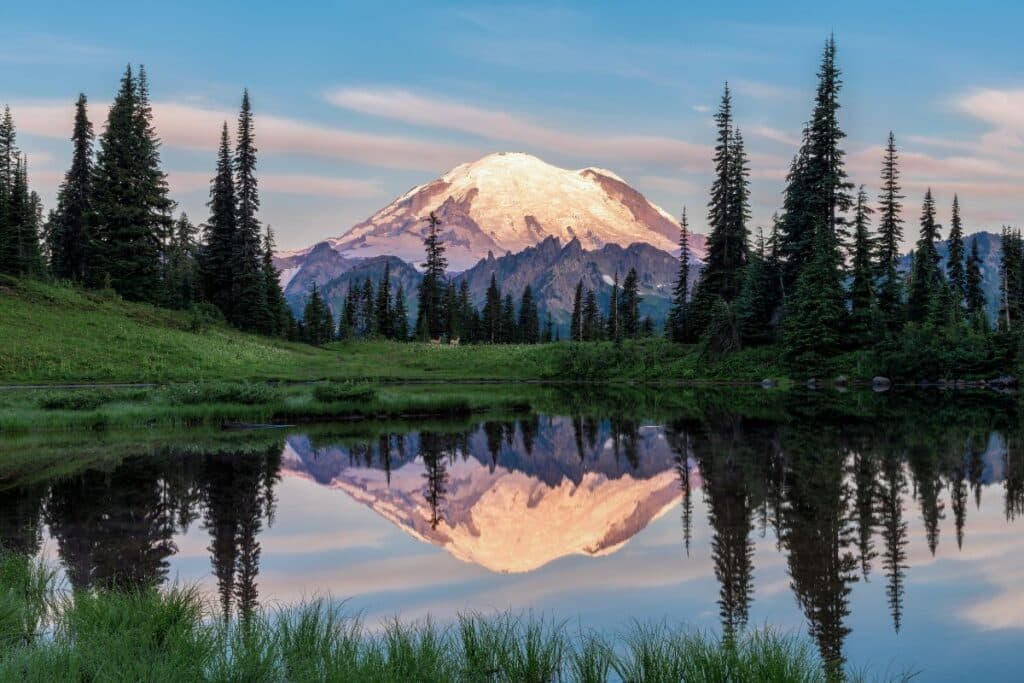
The Tipsoo Lake Loop Trail is a tranquil 0.7-mile loop, offering one of Mount Rainier National Park’s easiest and most scenic lakeside walks.
Located near the Chinook Pass Entrance, this trail takes you around the serene Tipsoo Lake, providing breathtaking views of Mount Rainier reflected in the water.
Begin your walk at the parking area and follow the well-maintained, wheelchair-accessible trail. The trail offers a spectacle of wildflowers in the summer, with the mountain’s reflection in the lake making this an excellent photography spot.
This trail is the perfect easy hike or family-friendly trail in Mount Rainier National Park.
13. The Summerland Trail
- Distance: 8.4 miles to Camp Summerland, 11.4 miles to Panhandle Gap
- Elevation Gain: 2,132 feet to Camp Summerland, 2,972 feet to Panhandle Gap
- Difficulty: Strenuous
- Time to Hike: 5 to 9 hours, depending on how far you hike
- Trailhead: Frying Pan Creek Trailhead off Sunrise Park Road
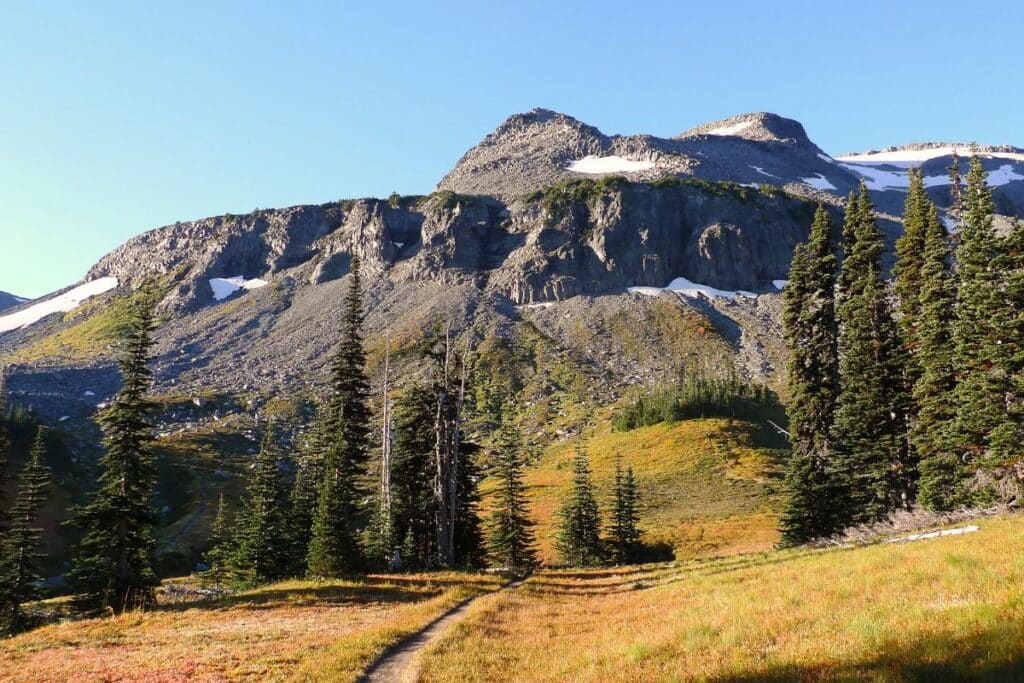
The Summerland Trail is a challenging trail ranging from 8-11 miles, depending on how far you hike. The trail starts off Sunrise Park Road, several miles before reaching the road’s peak.
The route winds through old-growth forests, subalpine meadows, and rocky lunar landscapes. While you can turn around at Camp Summerland, another 1.5 miles and 840 feet of elevation takes you to Panhandle Gap, the highest point on the Wonderland Trail (6,750 feet!).
As you ascend to Panhandle Gap, you’ll be treated to mesmerizing views of Mount Rainier and several glaciers. The hike culminates in panoramic views of the Ohanapecosh River Valley and the surrounding peaks from the Gap.
Be aware that snow and ice can linger at higher elevations, even in summer. Ensure you check trail conditions beforehand, as portions of the trail can be challenging to navigate.
14. Glacier Basin Trail
- Distance: 8.1 miles
- Elevation Gain: 2,345 feet
- Difficulty: Moderate
- Time to Hike: 5 to 6 hours
- Trailhead: Glacier Basin Trailhead at White River Campground
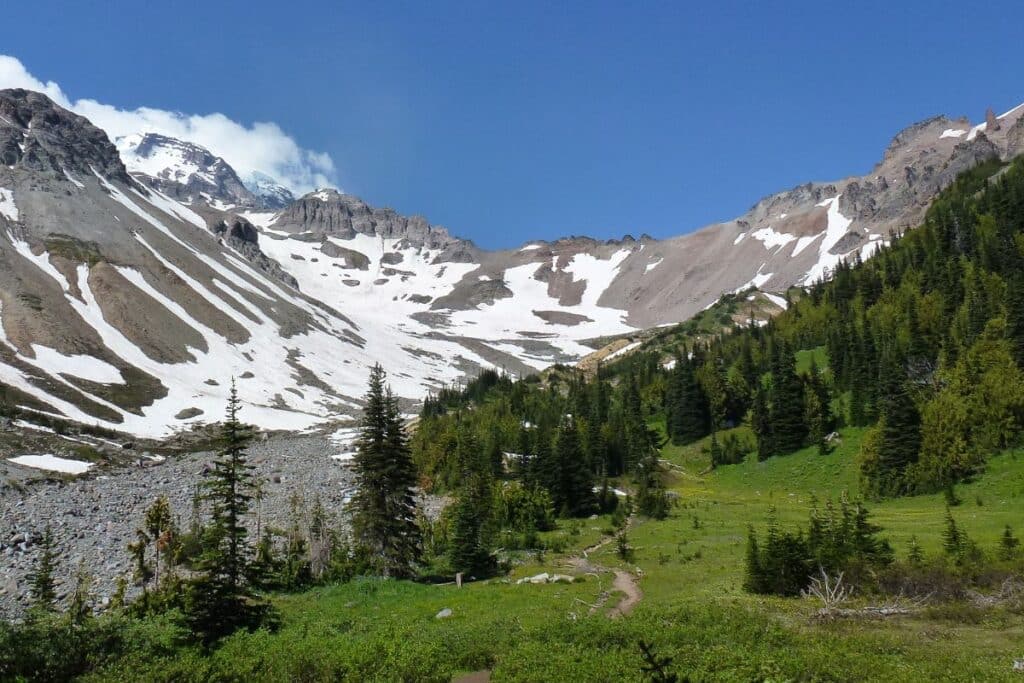
The Glacier Basin Trail journeys through lush forests and wildflower meadows alongside the rushing Inter Fork of the White River, finally reaching the Glacier Basin Campground with stunning views of Mount Rainier and the Emmons Glacier, the largest glacier on Mount Rainier!
Starting near the White River Campground, the trail offers an excellent hiking experience, with the opportunity to spot wildlife like elk and black bears.
Though it’s a moderate hike, the trail has a few rough sections, so wearing sturdy hiking boots is recommended. It’s also less crowded than other hikes in the park, making it ideal for those seeking a more tranquil experience.
Remember to carry bug spray, as mosquitos are plentiful along the water in the summer.
15. Sunrise Nature Trail
- Distance: 1.5 miles
- Elevation Gain: 370 feet
- Difficulty: Moderate
- Time to Hike: 1 hour
- Trailhead: Behind Sunrise Day Lodge
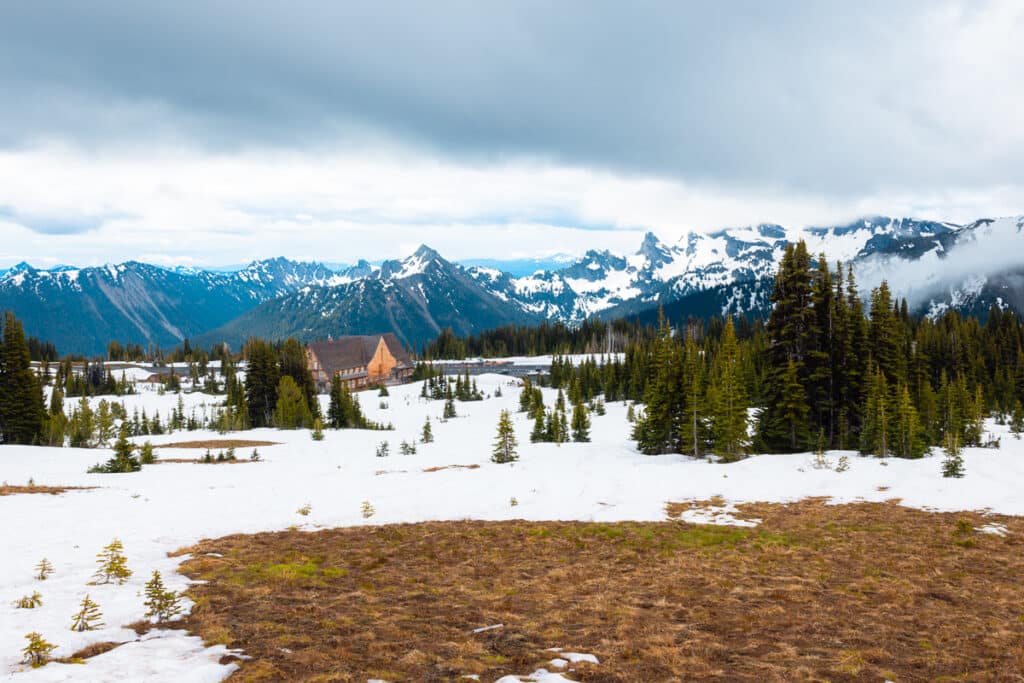
The Sunrise Nature Trail is a delightful, family-friendly loop located in the Sunrise area of Mount Rainier National Park. It’s an excellent alternative to longer trails in the area, like Mount Fremont Lookout or the Burroughs Mountain Trail.
The hike ventures through beautiful subalpine meadows with interpretive signs, providing valuable insights into the park’s geology and ecosystems. Follow the well-maintained trail, taking in the stunning views of Mount Rainier and Emmons Glacier.
Ohanapecosh Area Hikes
The Ohanapecosh area looks much different than Mount Rainier National Park’s Paradise and Sunrise regions. Ohanapecosh is home to ancient, old-growth forests, more reminiscent of other areas of the Pacific Northwest.
Trails here are more accessible in the early summer months, thanks to lesser snowfall. The best time to hike in Ohanapecosh is from May through October.
16. Grove of the Patriarchs
- Distance: 1.1 miles
- Elevation Gain: 52 feet
- Difficulty: Easy
- Time to Hike: 30 minutes
- Trailhead: Grove of the Patriarchs Trailhead
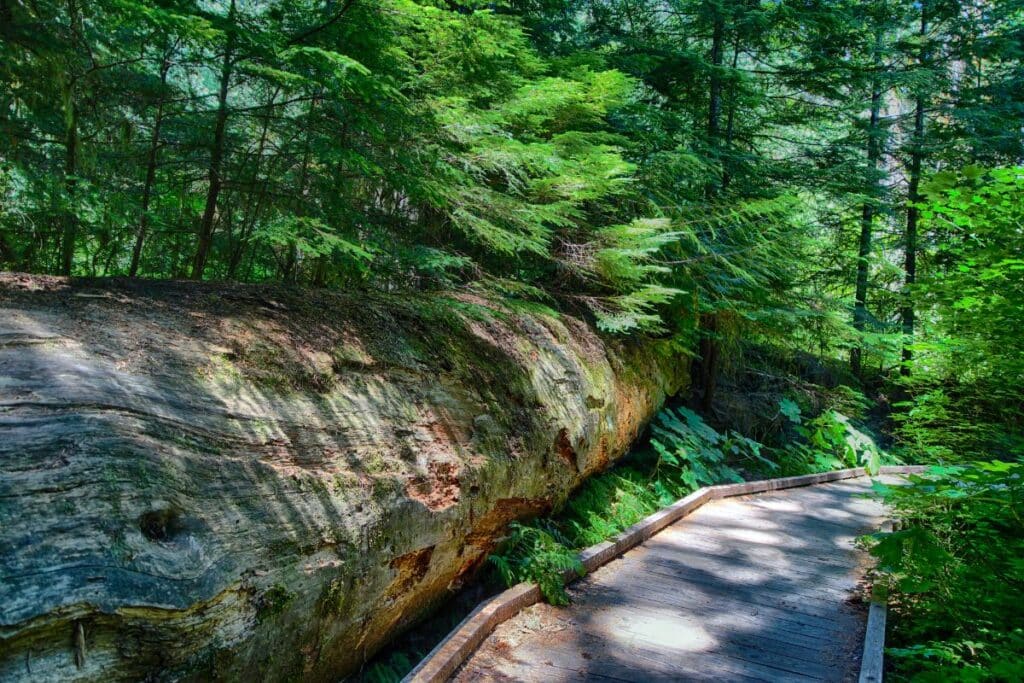
The Grove of the Patriarchs Trail is a unique 1-mile loop that offers a serene escape into an old-growth forest in the southeastern part of Mount Rainier National Park.
The trail takes you across the Ohanapecosh River on a suspension bridge. It leads you to an island of ancient, towering Western red cedars and Douglas firs.
The trail starts near the Stevens Canyon Entrance and is flat and well-maintained, suitable for all ages and abilities. Walking among these giants, some over 1,000 years old, is breathtaking.
Important Note: The Grove of the Patriarchs Trail has been closed since late 2021 due to flood damage. Instead of hiking the Grove of the Patriarchs, I recommend the Silver Falls Loop (see the next hike listed).
17. Silver Falls Loop
- Distance: 2.9 miles
- Elevation Gain: 521 feet
- Difficulty: Easy
- Time to Hike: 2 hours
- Trailhead: Silver Falls Loop Trailhead in the Ohanapecosh Campground
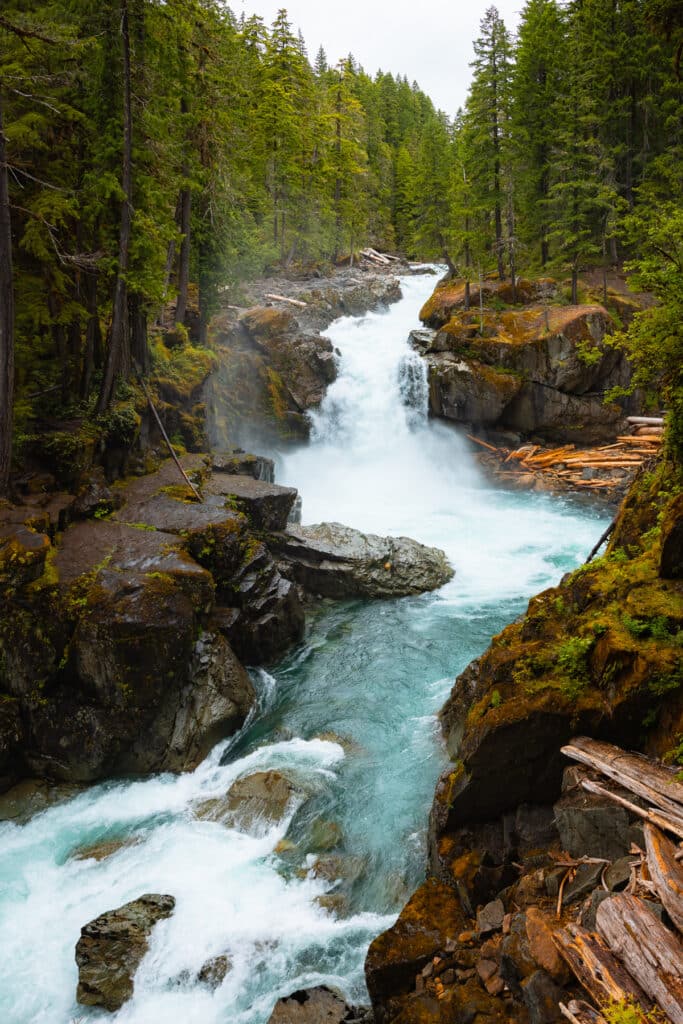
The Silver Falls Loop is a scenic 3-mile round-trip trail in the heart of the Ohanapecosh area of Mount Rainier National Park. The trail winds through an old-growth forest along the Ohanapecosh River.
It culminates in the stunning Silver Falls, a powerful 40-foot cascade tumbling down a rocky cliff face.
Start your hike a short walk from the Ohanapecosh Visitor Center and follow the trail, watching the variety of bird species that inhabit this area.
The trail’s highlight, Silver Falls, offers a refreshing mist from its icy blue waters that tumble into a deep gorge. Be cautious near the falls, as rocks can be slippery.
The trail is a loop and can be hiked in either direction!
18. Shriner Peak Lookout Trail
- Distance: 8.2 miles
- Elevation Gain: 3,408 feet
- Difficulty: Strenuous
- Time to Hike: 6 to 8 hours
- Trailhead: Shriner Peak Trailhead off Highway 123
The Shriner Peak Lookout Trail is an 8+ mile round-trip hike in the eastern section of Mount Rainier National Park, just north of Ohanapecosh. This strenuous trail is well worth the effort, offering breathtaking views of Mount Rainier, Mount Adams, and the surrounding valleys from the fire lookout at the summit.
The trail ascends through dense forest before breaking out onto wildflower-strewn slopes while climbing steadily towards the lookout. You’ll likely see wildlife on this hike, such as mountain goats and black bears.
Unlike other hikes in the Ohanapecosh area, this higher elevation trail remains snowcovered into July. The best time to hike the Shriner Peak Lookout Trail is from late July to September.
Mowich Lake / Carbon River Area
The Mowich Lake and Carbon River area of Mount Rainier is the least visited part of the park. Getting here requires navigating unpaved gravel roads, but those who make the trip are rewarded with more solitude than anywhere else in the park.
The roads in these areas are typically only open in summer, so plan your trip between late July and October to hike here.
19. Tolmie Peak Fire Lookout
- Distance: 5.6 miles
- Elevation Gain: 1,555 feet
- Difficulty: Moderate
- Time to Hike: 3 to 5 hours
- Trailhead: Near Mowich Lake Campground off Mowich Lake Road
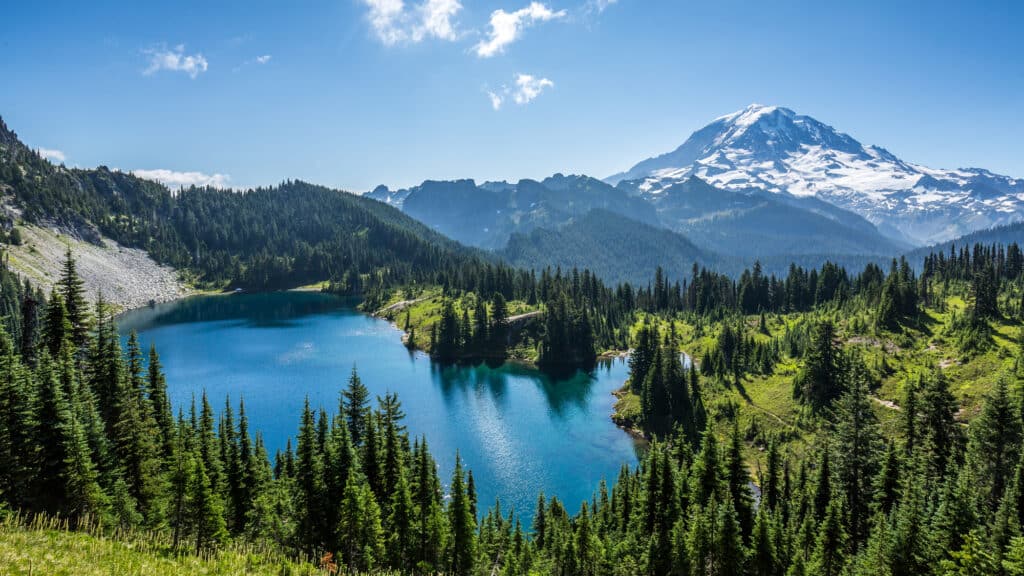
The Tolmie Peak Fire Lookout hike is a less visited, but incredibly stunning trail in the northwest corner of Mount Rainier National Park.
The trail leads you through old-growth forest, past the scenic Eunice Lake, and up to the Tolmie Peak Lookout, offering one of the most awe-inspiring views of Mount Rainier and the surrounding landscape.
Beginning along the shores of Mowich Lake, the trail provides plenty of opportunities for spotting vibrant wildflowers and wildlife before the final ascent to the fire lookout.
The last stretch to the lookout is steep and challenging, so take your time and carry plenty of water. Be sure to check road conditions to the trailhead, as the road is unpaved and rough.
20. Spray Park Trail
- Distance: 6.9 miles
- Elevation Gain: 2,198 feet
- Difficulty: Moderate
- Time to Hike: 4 to 6 hours
- Trailhead: Mowich Lake Campground
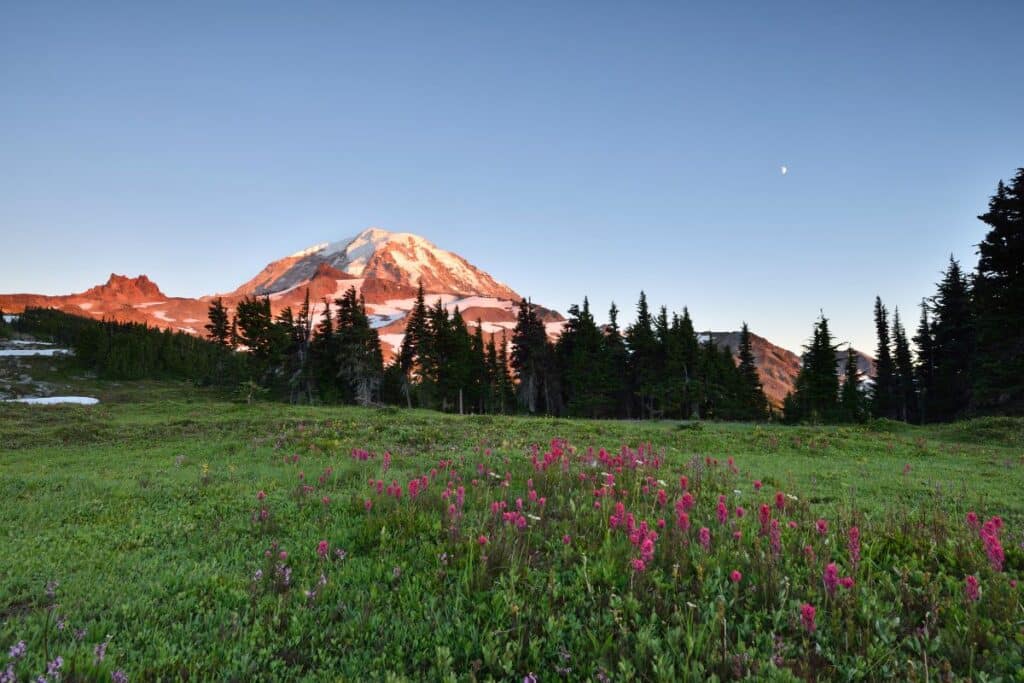
The Spray Park Trail is an amazing 7-mile round-trip hike located in the northwestern region of Mount Rainier. This trail navigates through lush forests, wildflower-filled meadows, cascading waterfalls, and ultimately to the alpine wonderland of Spray Park.
Starting at the Mowich Lake Campground, the trail follows the same route as the Tolmie Peak Trail before branching off to Spray Park. Here, you’re rewarded with stunning views of Mount Rainier, Echo Rock, Observation Rock, Spray Falls, and vibrant wildflowers.
Despite its moderate difficulty, be prepared for potentially steep and muddy sections. Also, remember to stay on the designated path to protect the fragile meadows. Bug spray is also a must!
Longmire Area Hikes
The Longmire area was home to the park’s headquarters in 1899 when Mount Rainier became a national park. Today it is home to several historic sites, forested trails, and waterfalls.
This region is one of the best areas of the park to explore during early summer. The trails here are snow-free much earlier in the season thanks to its lower elevation.
21. Comet and Christine Falls Trail
- Distance: 3.5 miles
- Elevation Gain: 1,286 feet
- Difficulty: Strenuous
- Time to Hike: 2 to 4 hours
- Trailhead: Comet Falls & Van Trump Park Trailhead

The Comet and Christine Falls Trail is a spectacular 4-mile round-trip hike that winds through old-growth forests, leading to several mesmerizing waterfalls, including Comet Falls and Christine Falls, one of the most photographed waterfalls in the park.
Before starting the hike, stop at the viewpoint of Christine Falls along Paradise Valley Road. Here you can see the waterfall framed by the quaint stone bridge.
Afterward, park at the trailhead and begin the hike, where you can see Christine Falls from above.
You’ll continue through the lush old-growth forest alongside the gushing Van Trump Creek, culminating at the majestic Comet Falls. This waterfall is one of the tallest and most impressive in the park, with cascades tumbling down 320 feet.
The parking lot at the trailhead is small, so plan to arrive early or late in the afternoon to secure a parking spot and beat the crowds!
22. Van Trump Park Trail
- Distance: 7.8 miles
- Elevation Gain: 3,339 feet
- Difficulty: Strenuous
- Time to Hike: 6 to 8 hours
- Trailhead: Comet Falls & Van Trump Park Trailhead
The Van Trump Park Trail is a breathtaking 8-mile round-trip hike that shares much of the trail with the route to the impressive Comet Falls. However, you’ll continue past the falls into the meadow-filled expanse of Van Trump Park.
This area offers astounding views of Mount Rainier, the Kautz Glacier, and the surrounding valleys. On clear days, you may even spot Mount St. Helens, Mount Adams, and Mount Hood in the distance.
Be prepared for a challenging hike with significant elevation gain and occasional rough terrain. Start early to avoid crowds and secure parking.
23. Narada Falls Trail
- Distance: 0.2 miles
- Elevation Gain: 59 feet
- Difficulty: Easy
- Time to Hike: 15 minutes
- Trailhead: Narada Falls Parking Area
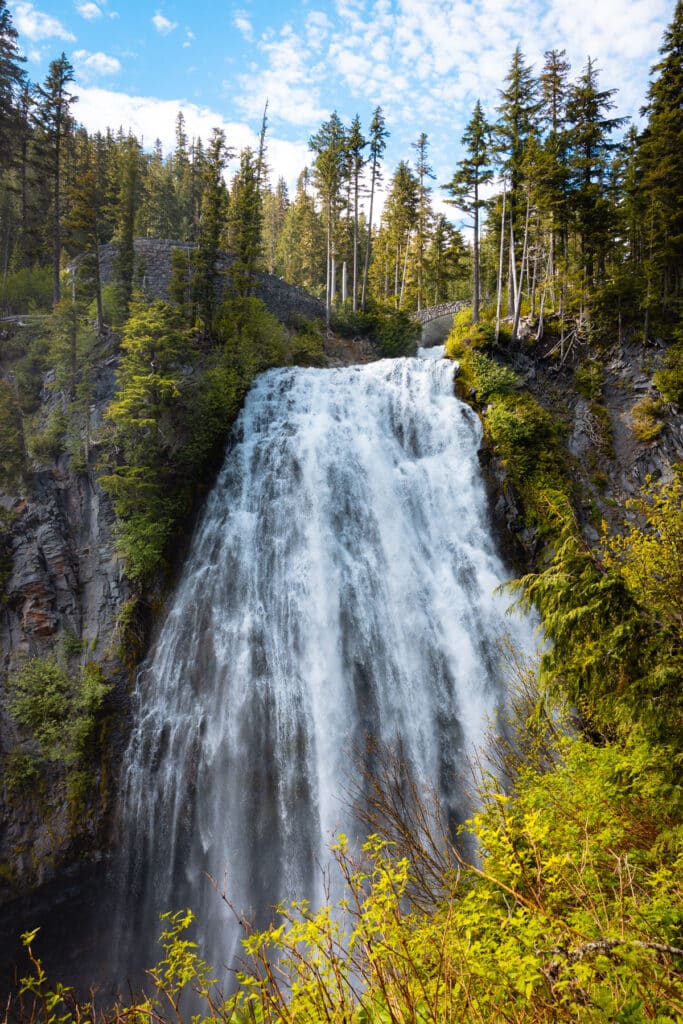
The Narada Falls Trail is an easy yet rewarding 0.2-mile round-trip hike, perfect for all types of travelers. This short trail descends from the parking area to a viewing platform overlooking the dramatic Narada Falls plunging 168 feet.
This trail can get crowded due to its easy access and proximity to the park’s main road, so consider visiting early or later in the day. Wear sturdy shoes as the path can be slippery, especially in winter or after rain.
Despite its short length, the views of Narada Falls are truly memorable, making this a must-visit spot in the park when driving between Longmire and Paradise.
24. Trail of the Shadows
- Distance: 0.7 miles
- Elevation Gain: 39 feet
- Difficulty: Easy
- Time to Hike: 30 minutes
- Trailhead: Across from the National Park Inn
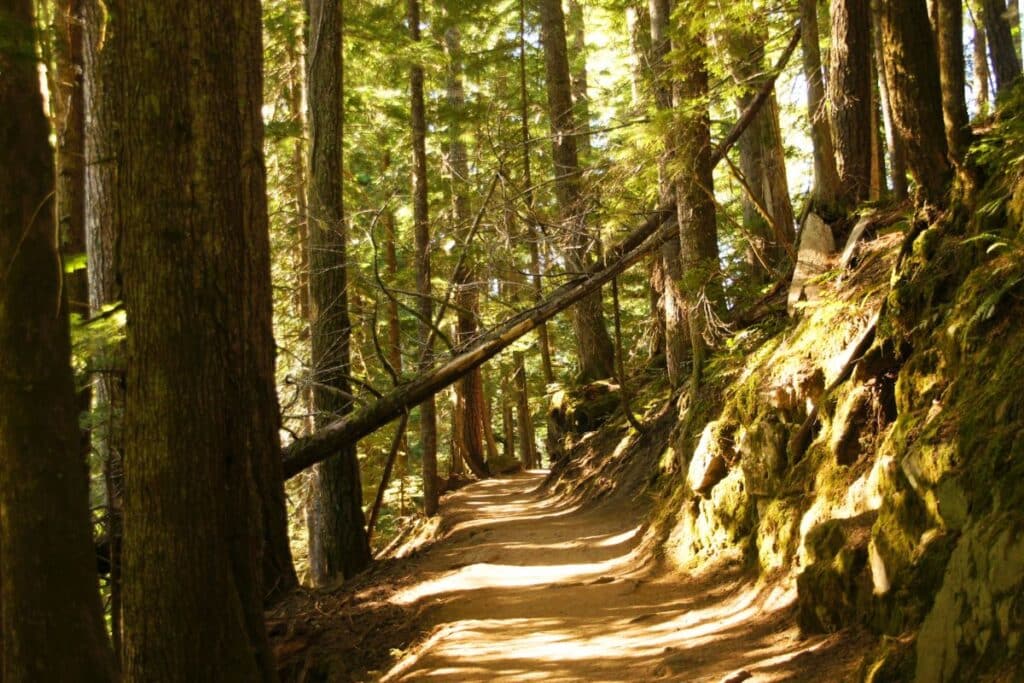
The Trail of the Shadows is a peaceful 0.7-mile loop in the Longmire Historic District of Mount Rainier National Park. This easy trail provides a unique journey into the park’s history, passing by 19th-century homesteads, a historic mineral springs resort, and an old-growth forest.
Begin your walk across from the National Park Inn and follow the well-maintained trail, interpreting the signs to learn about the area’s human and natural history.
This trail is accessible year-round, providing different delights in every season. It’s an easy, wheelchair-accessible trail, making it a great option for all ages and abilities.
Backpacking in Mount Rainier
25. Wonderland Trail
- Distance: 93 miles
- Elevation Gain: 25,000 feet
- Difficulty: Strenuous
- Time to Hike: 5 to 13 days
- Trailhead:
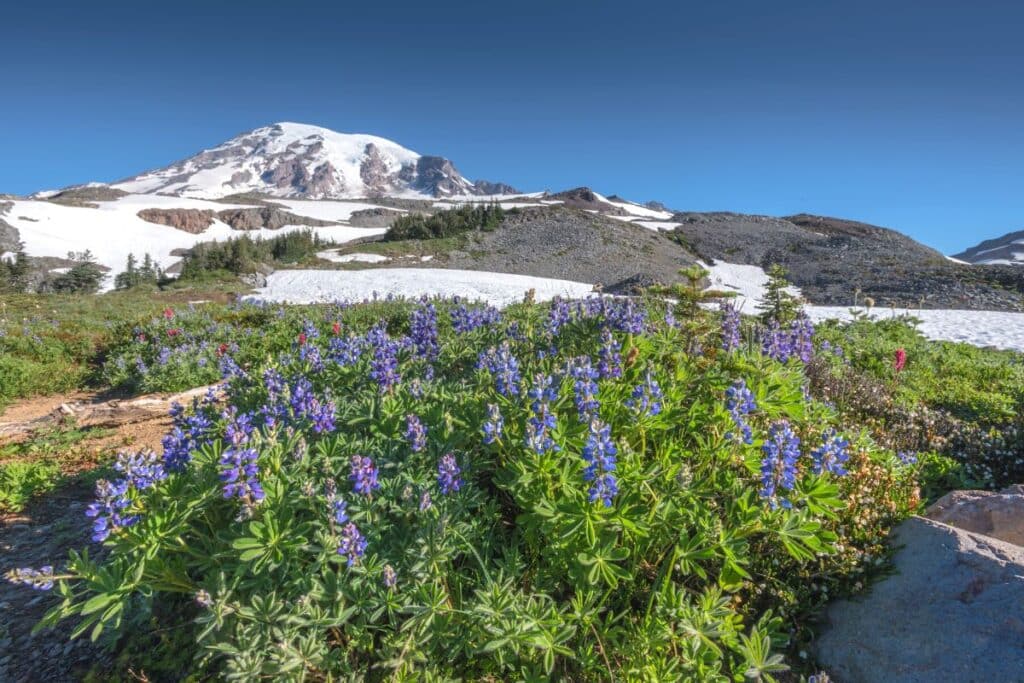
Renowned as a Mount Rainier National Park gem, the Wonderland Trail offers a true bucket list experience. This 93-mile loop encircles the base of Mount Rainier, taking you through old-growth forests, wildflower meadows, and icy blue rivers.
The route provides incredible views of Mount Rainier, particularly at Indian Bar, Summerland, and Sunrise.
You can access the trail from several trails in both Longmire and Mowich Lake areas. The hike requires lots of planning and a special backcountry camping permit. The path is usually free of snow from late July to September.
Best Time to Hike in Mt Rainier
Picking the right time to visit Mount Rainier is crucial. There is a very narrow window for hiking, given the heavy snowfall that is present most of the year.
I recommend visiting from mid-July to mid-September. Visiting before mid-July could mean trails are still snow-covered, and some parks roads are still partially closed.
To avoid crowds, consider visiting the week after Labor Day when the weather is still excellent, but crowds are fewer.
Here’s a breakdown of what to expect during each season in Mount Rainier:
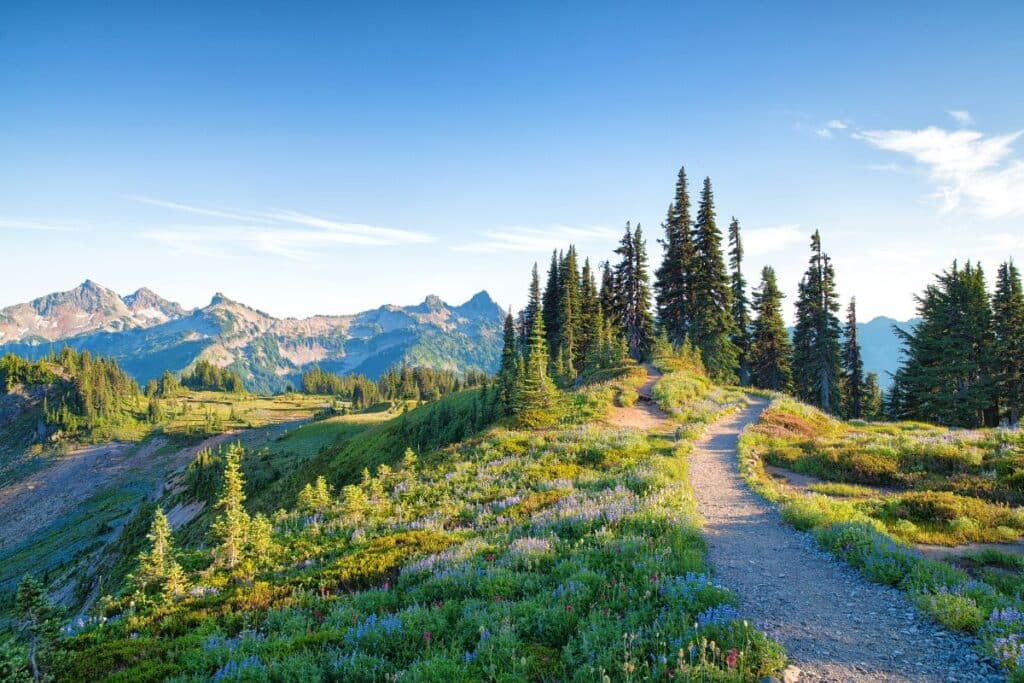
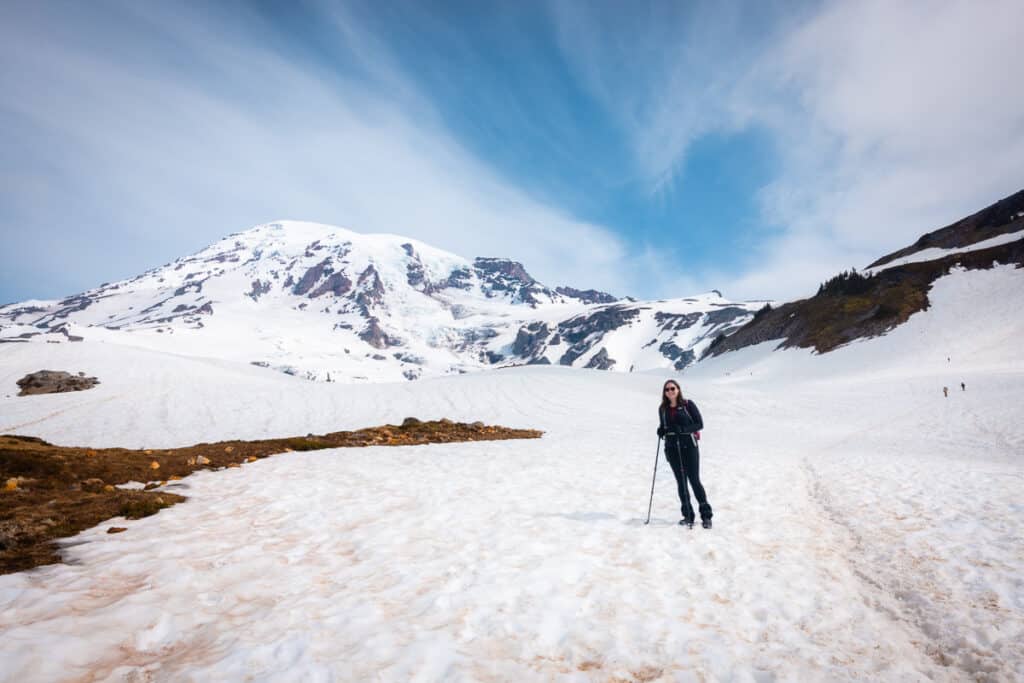
- Summer: Summer is the most popular time to visit Mount Rainier National Park, so expect plenty of crowds. The weather is generally mild and pleasant, with temperatures ranging from 60°F to 80°F during the day. However, snow remains on the ground through the end of June, sometimes even early July. To hike snow-free trails and see the wildflowers in bloom, visit from mid-July through August.
- Fall: Starting in September, the foliage transforms into shades of gold, orange, and red, creating a picturesque landscape. The weather starts to cool, with temperatures ranging from 40°F to 70°F. Fall offers a quieter and less crowded experience compared to summer. Many hiking trails remain open, and you can enjoy the stunning scenery without the peak season crowds.
- Winter: The park receives heavy snowfall, and many roads and facilities close during this time. However, if you enjoy winter sports such as snowshoeing or skiing, Mount Rainier offers excellent opportunities for outdoor winter activities.
- Spring: The snow begins to melt, but much of the park, particularly in Paradise and Sunrise, remains snow-covered through the Spring into Summer. Weather is unpredictable, with frequent last season snow storms and road closures. It’s essential to check road and trail conditions before planning a visit in the spring. The temperatures can vary from 30°F to 60°F, so dress in layers for cooler temperatures.
While exact road opening and closing dates change year to year depending on weather conditions and construction, here are some general guidelines on when roads are open:
- Stevens Canyon Road: June to September
- SR 123 (Cayuse Pass): June to October
- SR 410 (Chinook Pass): June to October
- Sunrise Road: Early July to September
- Paradise Valley Road: Open year-round with some limitations
Before planning your trip, check the park’s official website for the most up-to-date information on road and trail conditions, weather forecasts, and any closures or restrictions.
What to Pack for Hiking in Mount Rainier National Park
- Hiking Boots with Good Traction – I recommend hiking boots that provide ankle support and solid traction. At a minimum, you should wear trail shoes with excellent traction (not sneakers!). My favorite hiking boots are the Columbia Newton Ridge, while I sometimes opt for Altra Lone Peaks on short 1-2 mile hikes. Don’t forget to wear Merino wool socks to keep your feet dry and prevent blisters!
- Hiking Poles – While I don’t always hike with poles on trails with steep inclines, they provide much-needed stability and support, particularly on the way down. Therefore, I recommend investing in a lightweight pair of trekking poles.
- Layers – Temperature can change dramatically throughout the day. While you may start cold, you’ll want to remove layers as you hike the strenuous trail. Pack moisture-wicking hiking shirts and warm fleece layers to keep you comfortable.
- Rain Jacket – Always prepare for light Pacific Northwest rain. Be prepared and carry a rain jacket or poncho.
- Hiking Backpack & Safety Essentials – Pack the ten hiking essentials and bring a backpack like the Osprey Tempest for women or Osprey Talon for men with plenty of room for water and extra gear.
- Headlamp with Extra Batteries – If you’re hiking at sunrise or sunset, pack a headlamp with fresh batteries, plus an extra set of batteries in your bag. I highly recommend the Black Diamond headlamp for its long battery life and hands-free hiking!
- Sun Hat and Sunscreen – Many of the park’s trails are unshaded, so protecting yourself from the sun is essential. Sunscreen and a sun hat are highly recommended.
- Bug Spray – In the summer, the mosquitos can be relentless, particularly on trails with lakes and other standing bodies of water. I recommend bringing bug spray along in your hiking backpack.
Looking for more tips on what to pack for your trip? Check out my guides on the best hiking gear, what to pack for a road trip, and essential camping gear for all my favorite gear picks and tips to make packing for your trip a breeze!
Top Tips for Hiking in Mt Rainier
Mount Rainier National Park charges an entrance fee. You have a couple of options to cover this fee:
- Mount Rainier 7-Day Pass: This can be purchased upon arrival at the entrance station, is valid for seven days, and costs $30.
- America the Beautiful National Park Pass: This can be purchased in advance, is valid for 12 months and gets you into all 400+ national park sites. If you plan to visit the other Washington national parks on your trip, you’ll save money with the national park pass. Get your national park pass here for only $80.
Here are some additional tips to prepare you to hike in Mount Rainier National Park
- Start your day early. Crowds peak in July and August during Mount Rainier’s narrow peak season. Plan to arrive at popular trailheads in Paradise or Sunrise by 9 AM to avoid crowds and find parking.
- Always check the national park website before visiting. Mount Rainier gets lots of snow, often lasting until July. That means roads and trails can be closed well into the summer. The park regularly publishes closures and advisories for highways and hiking trails. Check the Mount Rainier NPS site for the latest information before heading out.
- Fill up on gas before entering the park. No gas stations are inside Mount Rainier National Park, so have a full tank before heading to the park for the day. If you’re heading to Paradise, the last gas station is in Ashford. If you’re heading to Sunrise, fill up on gas in Enumclaw.
- Cell service is limited inside the park. Be sure to download Google Maps offline on your phone before entering the park and pick up a physical map at the entrance station on your way into the park.
- Dress in layers. Temperatures fluctuate dramatically throughout the day and depending on elevation. Wear moisture-wicking hiking shirts and warm fleece layers to stay comfortable all day. And don’t forget a rain jacket!
- Pack a hiking backpack and the ten essentials. It’s crucial to carry safety gear every time you hike. So be sure to pack the ten hiking essentials and bring a hiking backpack with plenty of room for water and extra equipment.
- Stay on the trail. Keeping on the path helps preserve the park’s delicate ecosystems and wildlife habits. This rule is even more crucial in the early summer months when trails are still snow-covered as you risk unexpected water crossings and entering avalanche zones.
- Pets are not allowed on hiking trails and cannot be left unattended. Read more about pets in Mount Rainier National Park.
Are you visiting multiple national parks in the next year? The America the Beautiful National Park Pass gets you into 400+ national park sites, including all 63 national parks, for 12 months!
Get your national park pass ahead of time for only $80.
Frequently Asked Questions About Hikes in Mount Rainier
What is the easiest hike at Mount Rainier?
There are over 250 miles of trails in Mount Rainier National Park, many of which are easy hikes perfect for beginners! Some of the best easy hikes in Mount Rainier include Myrtle Falls, Grove of the Patriarchs, Narada Falls, and the Trail of the Shadows.
What is the shortest hike in Mount Rainier?
The shortest hike in Mount Rainier National Park is the Narada Falls Trail, which is only 0.2 miles roundtrip. This quick route is the perfect roadside leg stretch to one of the most scenic waterfalls in Mount Rainier.
What is the easy trail at Paradise Mount Rainier?
The easiest trails in the Paradise region of Mount Rainier are the Nisqually Vista Trail or the hike to Myrtle Falls. Both trails are around one mile with limited elevation gain, making these hikes perfect for a quick, non-strenuous leg stretch.
What is the hardest hike at Mount Rainier?
The hardest hike at Mount Rainier is the summit of Mount Rainier via the Liberty Ridge route. This trail is the hardest and most dangerous route to the summit and requires technical climbing experience. Most hikers in Mount Rainier do not opt for this route.
Where is the closest hike to Mount Rainier?
The trail to Camp Muir is the closest hike you can take to see Mount Rainier up close (without actually climbing the mountain!). This detour from the Skyline Trail takes you to the base camp for climbing Mount Rainier and provides excellent close-up views.
Final Thoughts on the Best Hikes in Mount Rainier National Park
There are so many incredible hiking trails in Mount Rainier National Park. However, you must pick from just a few top hikes if you’re short on time.
These are the top 10 hikes in Mount Rainier National Park:
- Skyline Loop Trail (Paradise)
- Myrtle Falls (Paradise)
- Bench and Snow Lakes Trail (Paradise)
- Mount Fremont Lookout (Sunrise)
- Burroughs Mountain Trail (Sunrise)
- Naches Peak Loop (Sunrise)
- Grove of the Patriarchs (Ohanapecosh)
- Tolmie Peak Lookout (Mowich Lake)
- Comet Falls Trail (Longmire)
- Trail of the Shadows (Longmire)
Remember, the hiking season in Mount Rainier is very short due to heavy snowfall. For the best experience, plan your trip between late July and September.
Are you looking for more ideas for your Mount Rainier National Park trip? Check out these posts!
- Day Trip Itinerary: How to Spend One Day in Mount Rainier
- Top-Rated Activities: 25 Best Things to Do in Mount Rainier
- Where to Stay: Best Hotels & Campgrounds Near Mount Rainier
- More in Washington: 3 Best National Parks in Washington State
Are you planning a national park trip but don’t know where to start? Get my free 28-page national park ebook where I break down everything you need to know to visit all 63 USA national parks.
Download your free ebook here.
Don’t Forget to Save This Post on Pinterest
