There’s a seemingly endless list of incredible things to do in Yosemite National Park, which may overwhelm you as you plan your trip. Well, this post is here to help!
I’m sharing the perfect Yosemite itinerary, whether you have one day or a whole week. This blog post features the best 1-day, 2-day, 3-day, and 4-day Yosemite National Park itineraries, plus plenty of ideas if you have more time!
I’m also covering all the must-know details about Yosemite’s reservation system for 2024, how to get around the park, and other essential tips for planning your trip. Let’s get started!
This post may contain affiliate links, where I may receive a small commission at no additional cost to you. Read more in this disclosure policy.
Yosemite National Park At-A-Glance
Before diving in, here are a few highlights to help you plan your trip:
- Best Time to Visit: Mid-Spring to Mid-Fall Late Fall is the best time to go to Yosemite. In the Spring, waterfalls are abundant. In the Fall, you’ll find plenty of Fall colors. The Summer months are the busiest time of year – be sure to book your trip in advance!
- Where to Stay: If you’re looking to stay in the park, I recommend choosing between The Ahwahnee or Yosemite Valley Lodge. Outside the park, book a spot at the nearby Rush Creek Lodge or the Tenaya Lodge at Yosemite.
- How to Get There: The closest airport is in Fresno, California, about 2 hours away. You can also fly into San Francisco or Oakland, both 4 hours away. Use Expedia to browse flights and find the best price.
- How to Get Around: The easiest way to get around Yosemite is in your own car. Use Expedia to browse deals on rental cars or rent an RV or campervan with Outdoorsy.
- Best Self-Guided Tour: My favorite way to learn more about the park is with Guide Along, a narrated self-guided tour perfect for road trips and scenic drives. The Yosemite Guide provides incredible commentary and detail about the history and geology of Yosemite.
- Don’t Forget: Be sure to get an America the Beautiful National Park Pass ahead of time. This $80 pass is valid for 12 months and get you into all 400+ national park sites (including Yosemite!).
How many days do you need in Yosemite National Park?
You should spend at least two days in Yosemite National Park. Two days will give you enough time to see the highlights of Yosemite Valley, the most visited part of the park. If you want to explore Mariposa Grove, Tioga Pass, or Yosemite’s more challenging hikes, dedicate at least four days.
That said, this guide shares itinerary ideas ranging from one to 4 or more days, plus some extra activities for those who can spend more time in the park.
Getting to and Around Yosemite National Park
Yosemite National Park is nestled in the Sierra Nevada Mountains in eastern California, several hours from any major city. The best way to get to Yosemite is by flying unless you live within driving distance. Some public transportation by bus and rail is available, but it is inconvenient and takes double the time.
The Bay Area’s three airports (Oakland, San Jose, or San Francisco) are located about 3.5 hours from Yosemite, are more budget-friendly, and have more direct flights. However, the smaller Fresno Airport is the closest, only 1.5 hours from the South Entrance.
If you’re flying, you’ll also need to rent a car. Since the roads in Yosemite are paved, renting a sedan is fine. If you’re visiting in winter, I recommend looking for a vehicle with all-wheel drive.
Driving and Parking in Yosemite
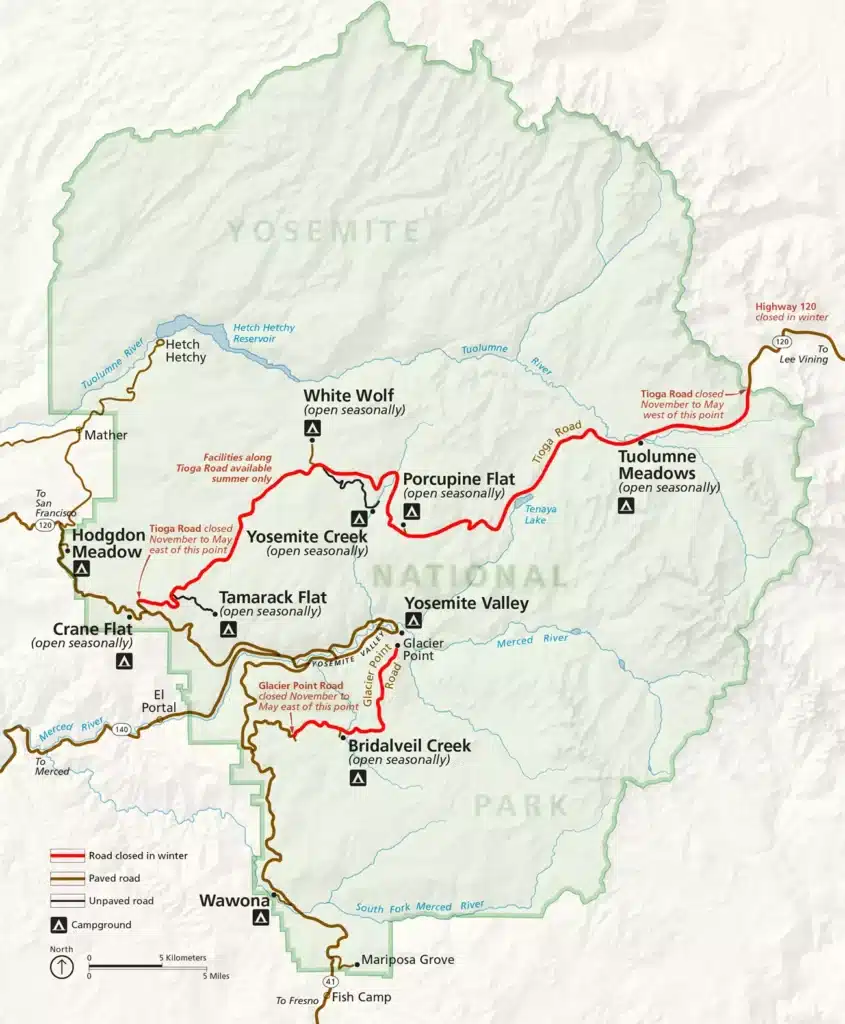
Yosemite National Park has five regions, each with varying seasonal road closures.
- Yosemite Valley: This is the only area of the park that is open year-round. Yosemite Valley has two primary roads, Northside Drive and Southside Drive. These two roads form a one-way loop throughout the valley. Yosemite Valley is accessible by both personal vehicle and shuttle.
- Glacier Point Road: This route traces the top of the canyon above Yosemite Valley and is only open seasonally, typically from May to November. This area is most easily accessible by personal vehicle, but a tour from Yosemite Valley Lodge can be purchased.
- Tioga Pass Road: Like Glacier Point, Tioga Pass is only accessible seasonally, usually open from June to early November. Hikers can purchase a shuttle ticket to various Tuolumne Meadow trailheads. Still, it is easier for most visitors to drive your vehicle to this area.
- Mariposa Grove: Another area that is open seasonally, Mariposa Grove is typically open from April to November. You’ll need to drive your vehicle to the Mariposa Grove Welcome Plaza and then take a free park shuttle to Mariposa Grove.
- Hetch Hetchy: This is the least visited area of the park and one I’m not covering in this itinerary. Hetch Hetchy Reservoir is open from sunrise to sunset most of the year, with some seasonal road closures.
Using the free park shuttle to get around Yosemite Valley and driving to the other park areas gives you the most flexibility. In the sample itineraries below, I’ll recommend when and how to use the shuttle to get between areas in Yosemite Valley!
Before diving into the itinerary, I want to share a few tips on finding parking and avoiding traffic:
- Avoid crowds and traffic by starting your day early, particularly if you stay outside Yosemite Valley. Plan to enter the park by 8 AM. It’s roughly an hour’s drive into Yosemite Valley from the park entrances, and you’ll want to arrive early to find parking before 9 AM. Arriving before 8 AM will also help avoid lines at the entrance stations.
- In Yosemite Valley, park in one of the large day-use lots and take the shuttle. There are ample parking spots at Yosemite Valley Welcome Center, Curry Village, or Yosemite Valley Lodge, each with a shuttle stop nearby. I’ll recommend parking areas for each part of the itinerary below.
- If you’re staying in Yosemite Valley, leave your car parked at your hotel or campground and use the park shuttle to get around the valley. The shuttle interconnects most destinations in the valley, so you’ll only need to move your car when traveling to other park areas.
- Visit Glacier Point Road during off-peak hours. Parking is limited in this part of the park, particularly between 10 AM and 4 PM in the summer. I recommend visiting Glacier Point Road in the late afternoon and staying for sunset.
Overview of the Yosemite Shuttle System
Yosemite National Park has a free shuttle that connects the most visited areas of Yosemite Valley. There are two shuttle routes:
- Valleywide Shuttle (Green Route): The larger route with 19 stops, the Green Route connects all areas of the valley from El Capitan to Curry Village to the Visitor Center. This route is best for reaching Yosemite Falls, The Ahwahnee, and El Capitan.
- East Valley Shuttle (Purple Route): Think of this as the “express route” through the valley, making a smaller loop between the campgrounds, the visitor center, and popular trails like the Mist Trail and Mirror Lake.
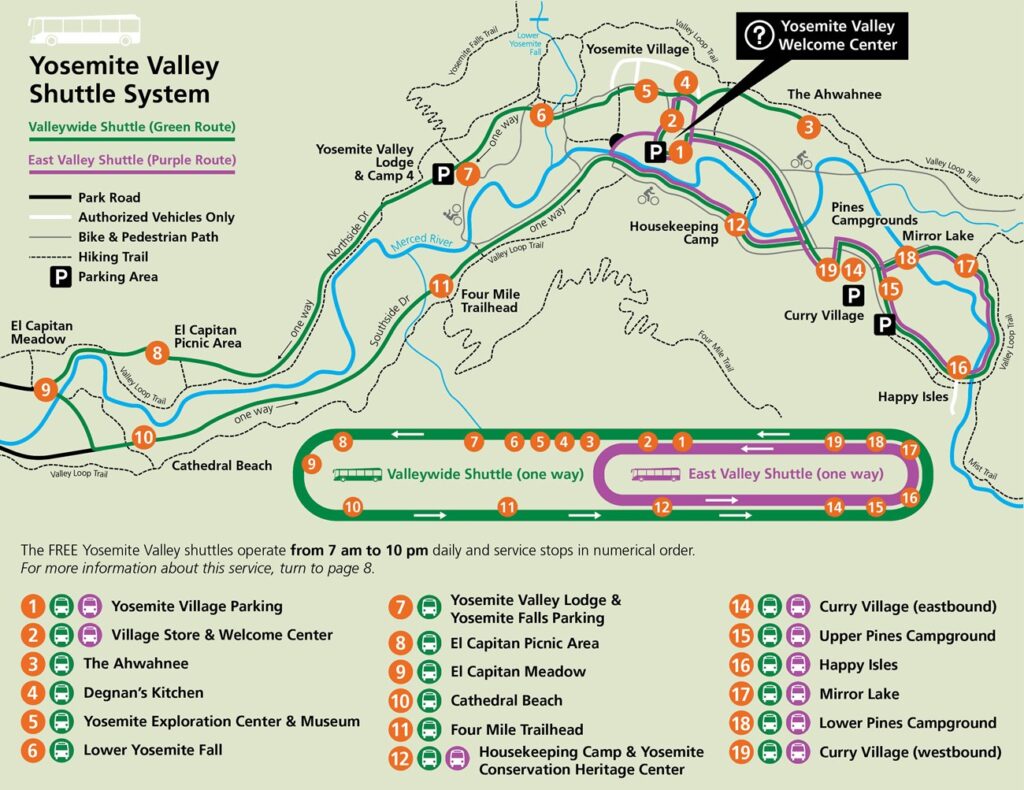
Shuttles and tours are also available in other areas of the park. Some are free, and some are an additional cost. Read more about shuttle routes to Glacier Point and Tuolumne Meadows for the details.
One Day in Yosemite Itinerary
This one-day Yosemite itinerary is perfect if you’re short on time and only passing through the area. This itinerary covers the highlights of Yosemite Valley and Glacier Point Road, the two most visited areas of the park.
Below is the sample itinerary of a day trip to Yosemite. If you’re looking for more details, I have an entire blog post covering how to spend one day in Yosemite.
How to Spend One Day in Yosemite National Park
Don’t miss the best things to do in Yosemite on your upcoming trip! This free, printable self-guided walking tour of Yosemite Valley covers all the best points of interest, plus a free map and exclusive tips!
Download your free self-guided Yosemite tour here.
Morning: Self-Guided Walking Tour of Yosemite Valley
Estimated Time: 4 hours
Start early to beat the crowds, arriving in Yosemite Valley by 8 AM. Park in the large lot near Yosemite Valley Lodge, across the street from the Lower Yosemite Falls Trailhead.
You’ll start your walking tour of Yosemite Valley at Lower Yosemite Falls. This iconic waterfall is one of the top attractions in the park. From late spring to early summer, the 2,500-foot waterfall gushes over the granite canyon wall, crashing onto a boulder field. It’s a short 0.25-mile walk along a paved path, providing excellent views as you near the falls.
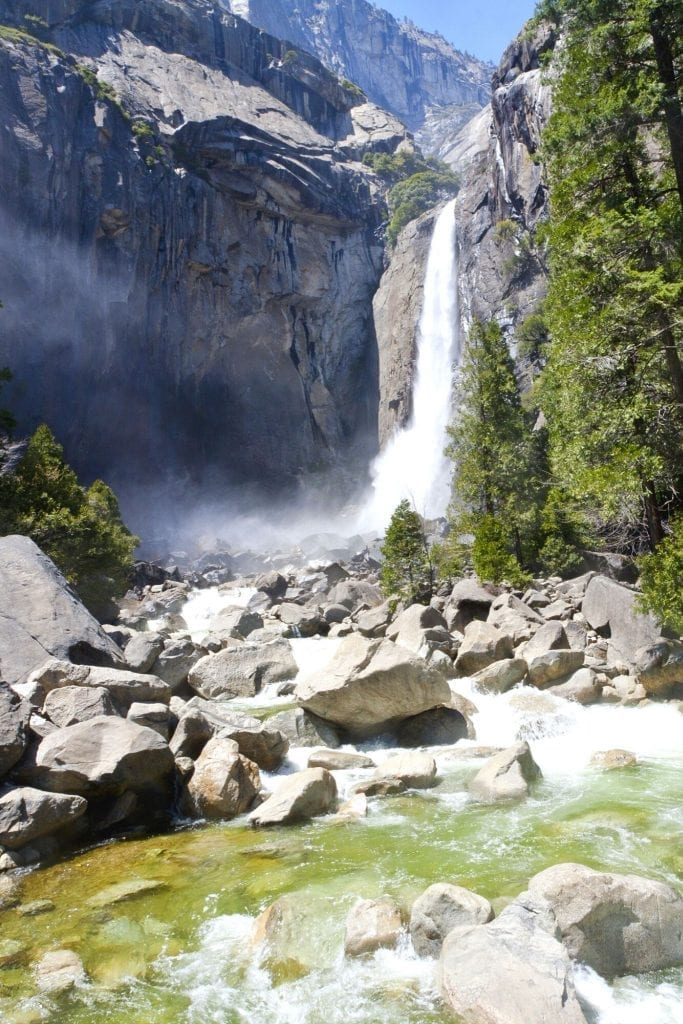
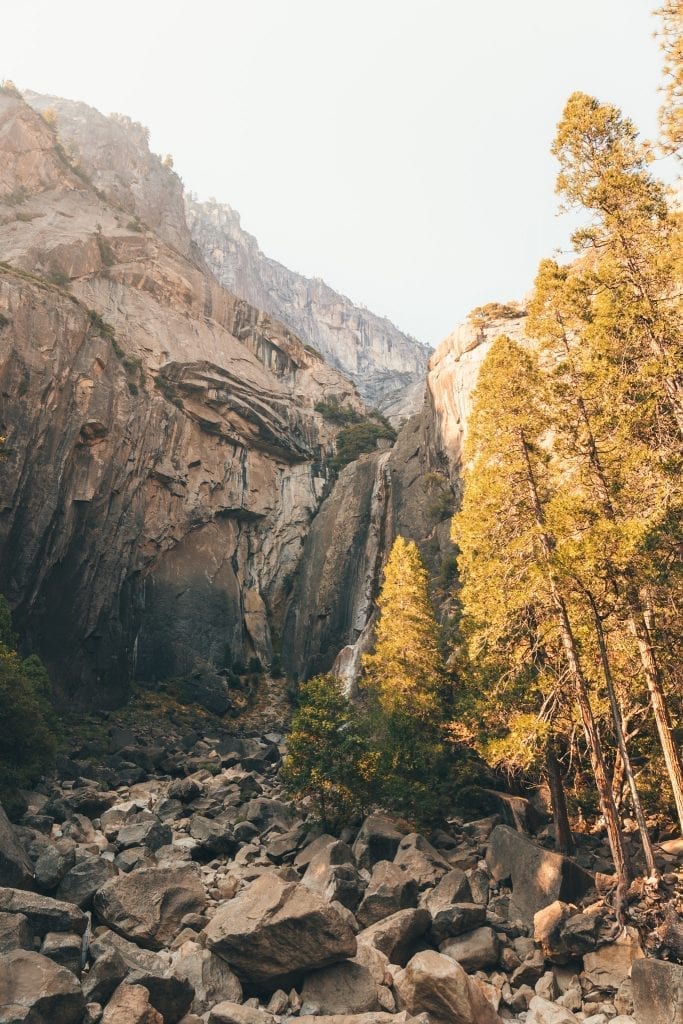
From here, you can either return the way you came or continue clockwise in a slightly longer loop. Returning to Northside Drive, you’ll reach the Sentinel/Cook’s Meadow Loop trailhead across the street from the Yosemite Falls shuttle stop.
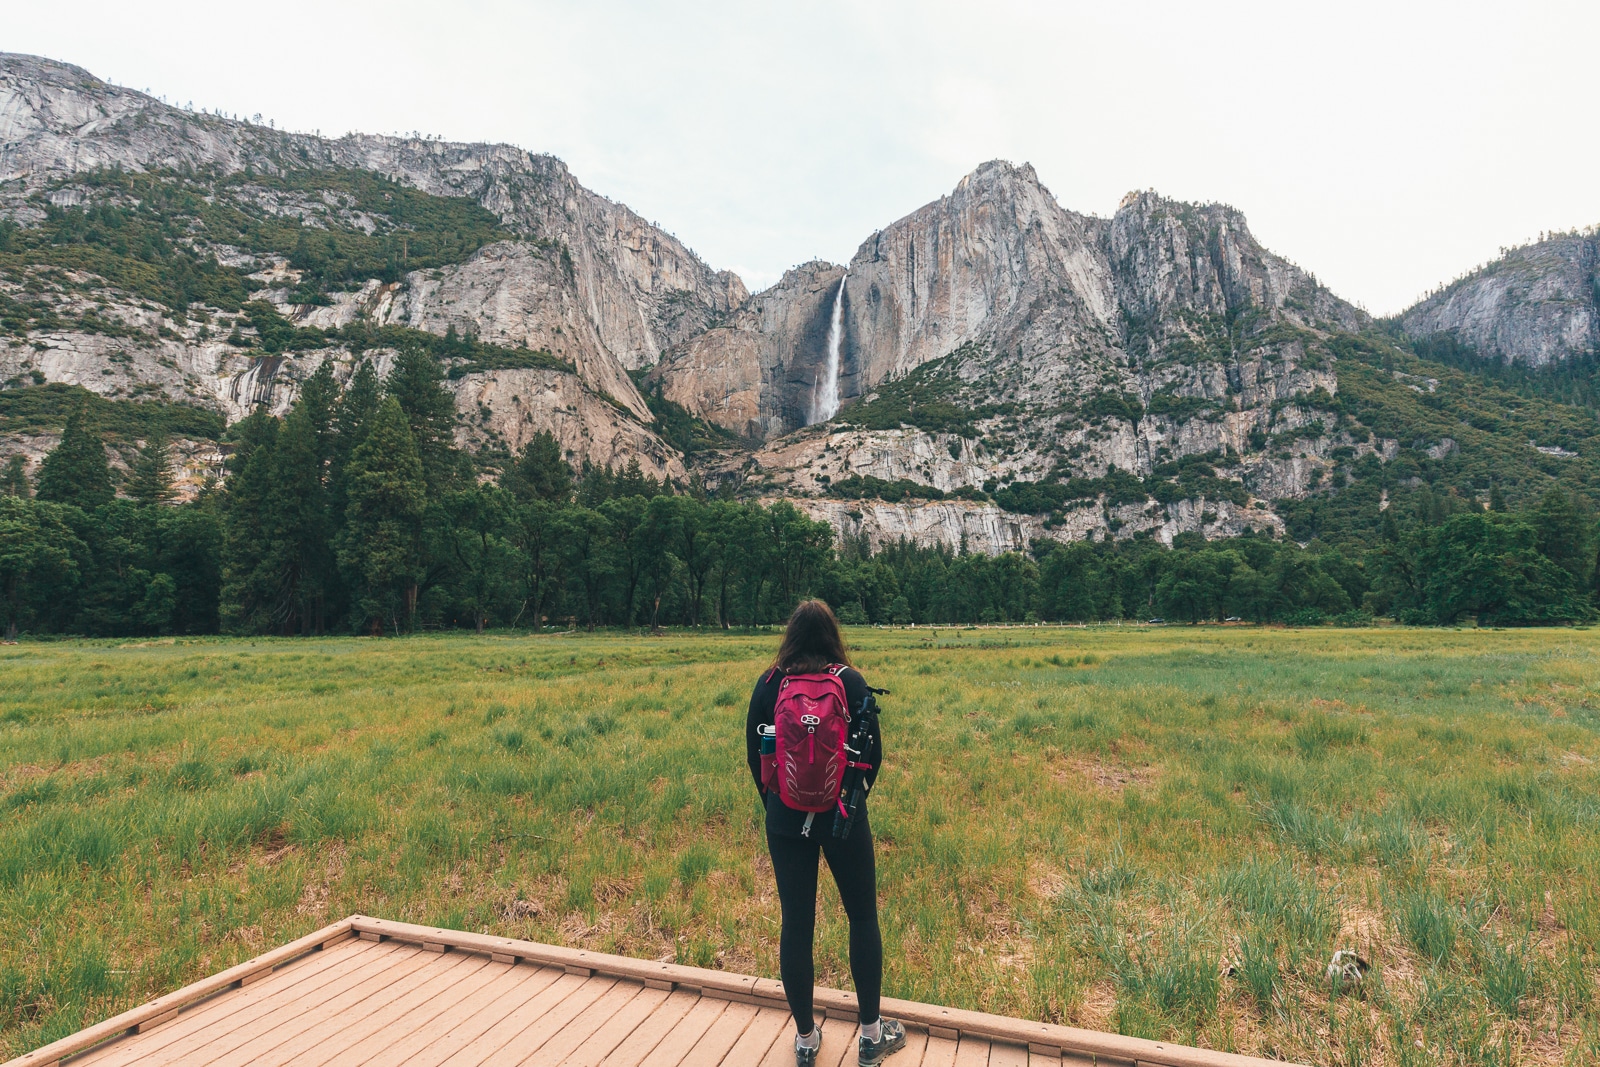
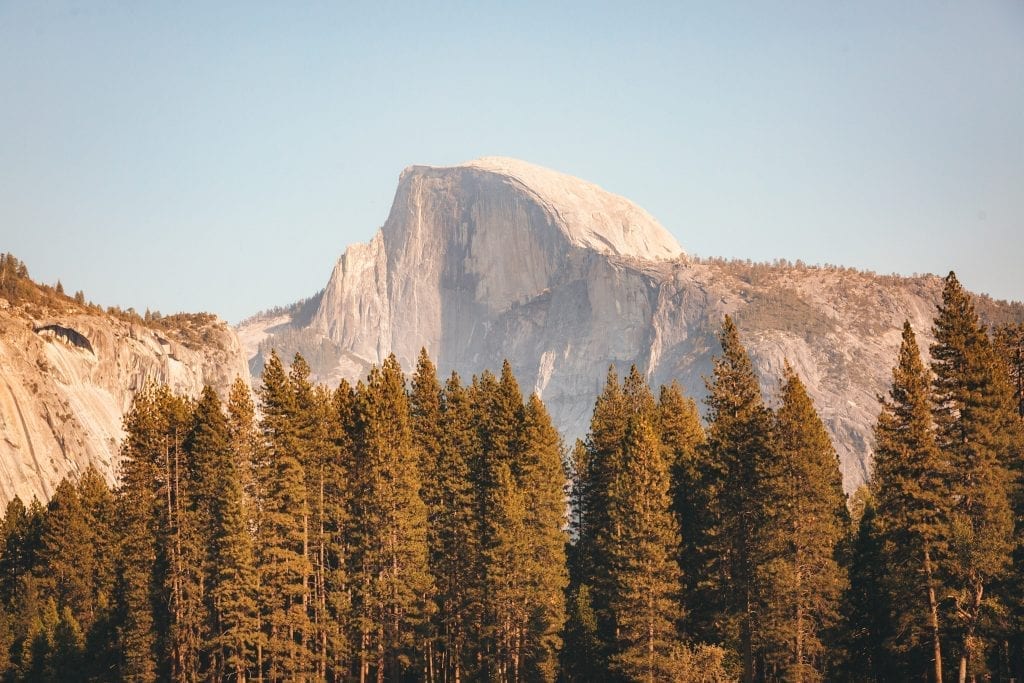
The Cook’s Meadow Loop follows a scenic path through the meadow on elevated boardwalks. The meadow’s grasses are lush green in the spring and summer. By fall, the meadow glows a rich, golden brown. As you stroll across the meadow, you’ll catch stunning glimpses of Yosemite Falls and Half Dome.
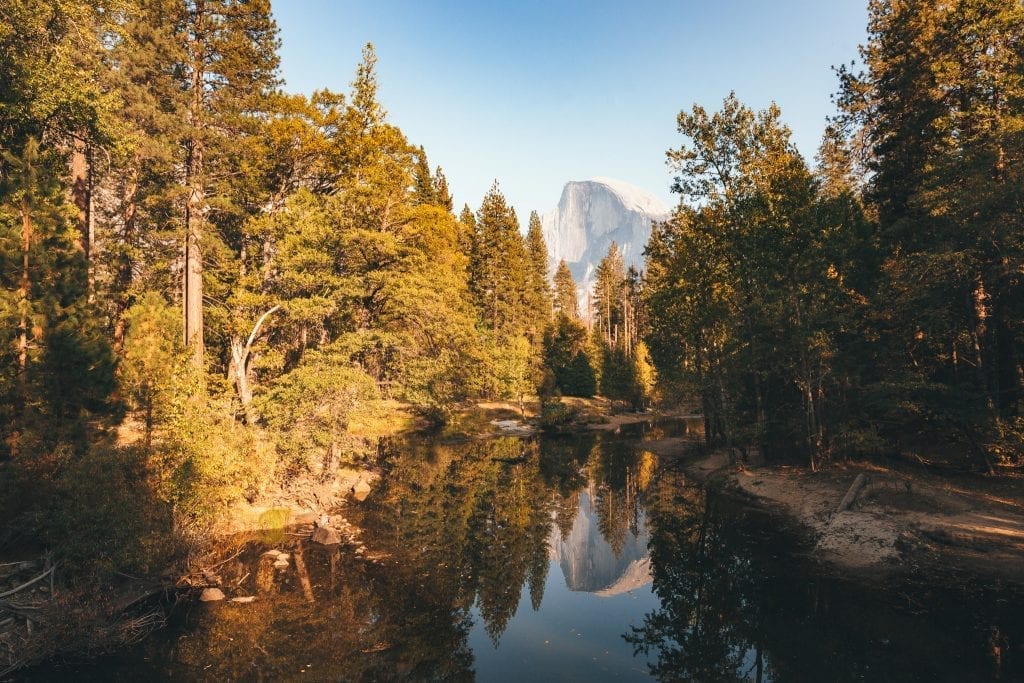
If you take the left fork on the Cook’s Meadow trail, you’ll dead end at Sentinel Bridge along Sentinel Drive, about a quarter mile from your starting point. Sentinel Bridge provides one of my favorite views of Half Dome, perfectly framed and reflected by the tree-lined Merced River.
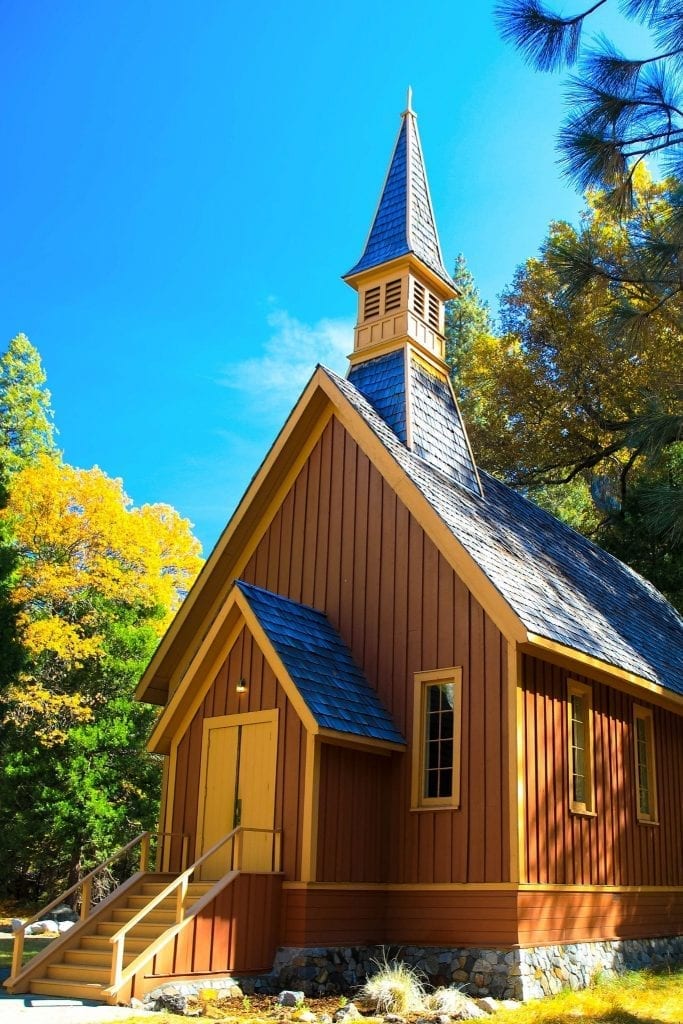
Continue walking along Southside Drive to visit the Yosemite Valley Chapel, one of the park’s historic landmarks. The chapel is still an active wedding venue!
Another half-mile down Southside Drive, you’ll reach Swinging Bridge. This picnic area is an excellent spot to access the Merced River or capture photos from the bridge of the towering valley cliffs.
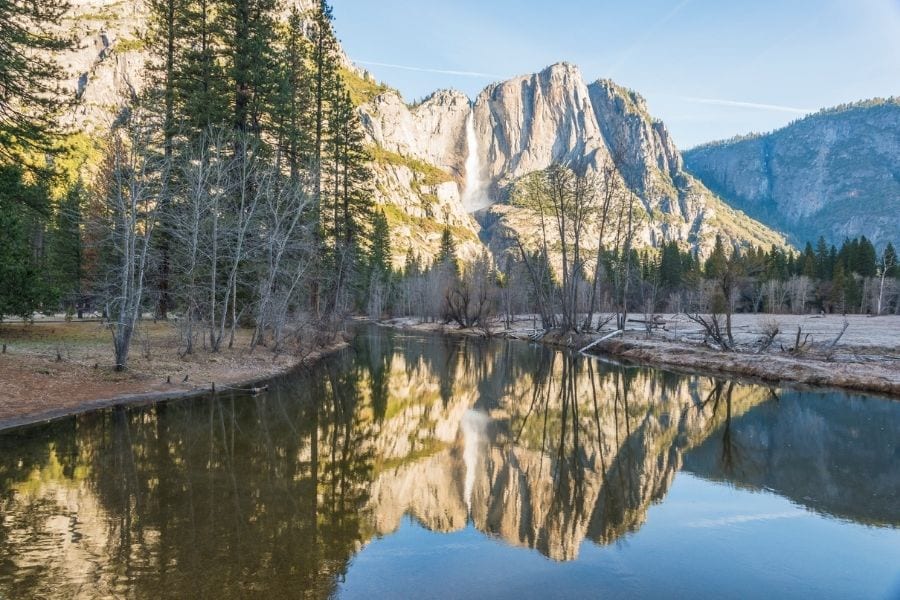
You’ll end your walking tour by returning to Yosemite Valley Lodge. You’ll continue along the paved path after the bridge, tracing the northern side of the Merced River. If you’re looking for a late breakfast or early lunch, consider stopping at the Base Camp Eatery or Mountain Room Lounge.
Mid-Day: El Capitan & More Valley Viewpoints
Estimated Time: 2 hours
After a morning of exploring Yosemite Valley on foot, it’s time to get back in your car and head towards El Capitan and Glacier Point Road. After leaving the lodge, you’ll head west on Northside Drive to El Capitan Meadow.
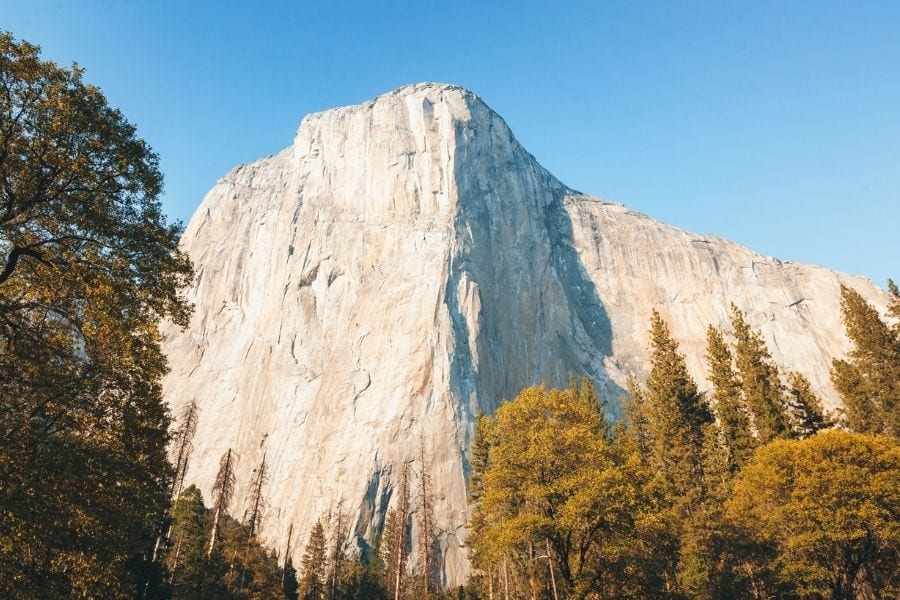
El Capitan Meadow is a scenic roadside stop providing up-close views of the towering El Capitan rock formation. This spot is well-known amongst rock climbers featured in movies like Free Solo and The Dawn Wall. If you pack your binoculars, you may even be able to spot climbers making their way up El Cap!
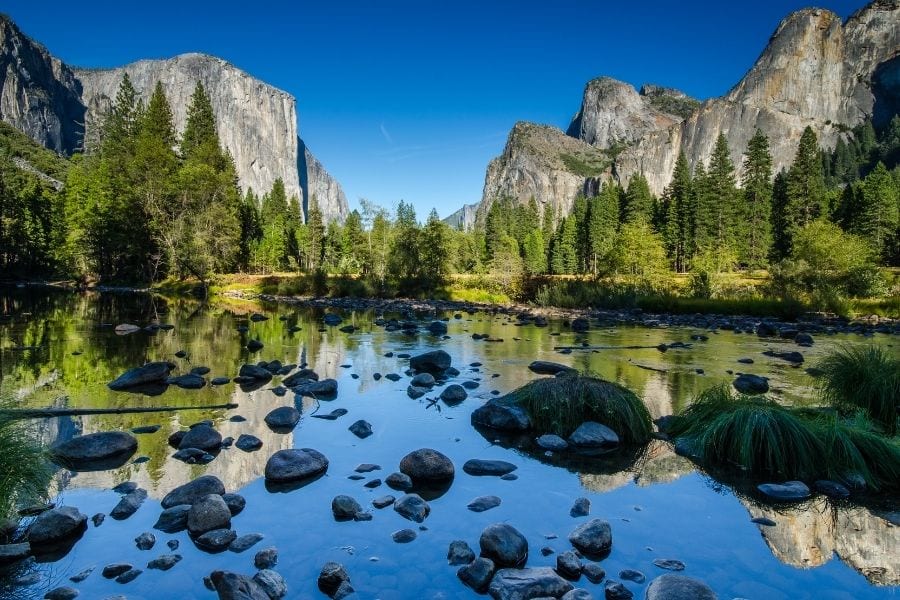
Your next stop is the picturesque Valley View. This viewpoint offers peaceful views of El Capitan and the Merced River. After getting a few photos, continue across the Pohono Bridge, turning left onto Southside Drive and right onto Wawona Road.
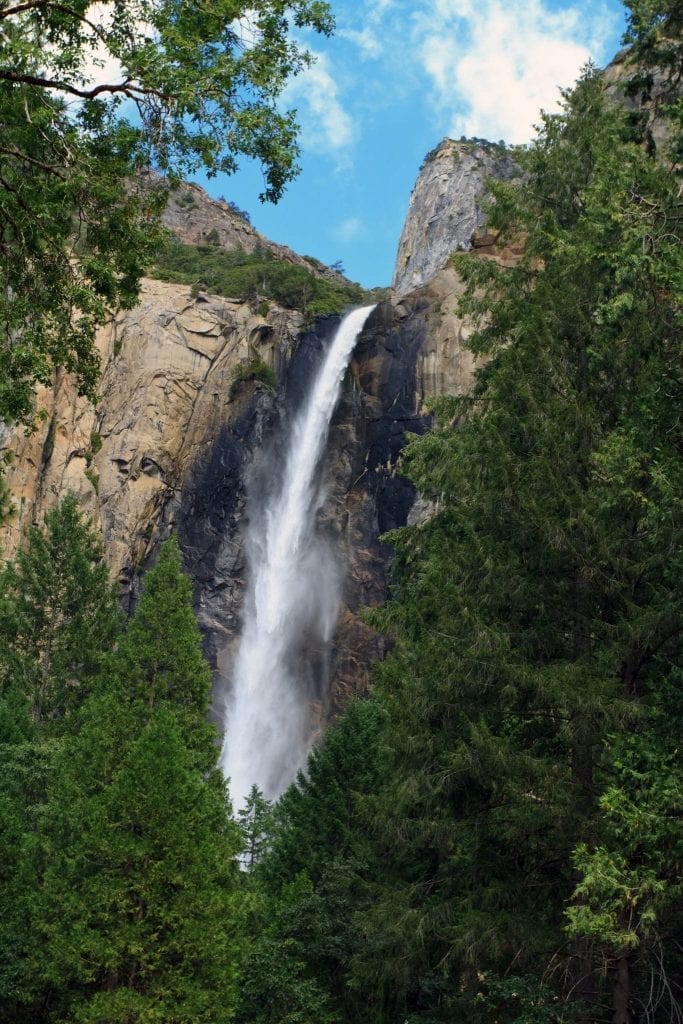
After turning onto Wawona Road, you’ll reach the parking area for Bridalveil Fall. This waterfall is one of the few in Yosemite with water flowing year-round. A short 0.8-mile roundtrip trail takes you to a close-up viewpoint of the waterfall. If you aren’t up for the hike, the parking lot also provides excellent views of Bridalveil Falls!
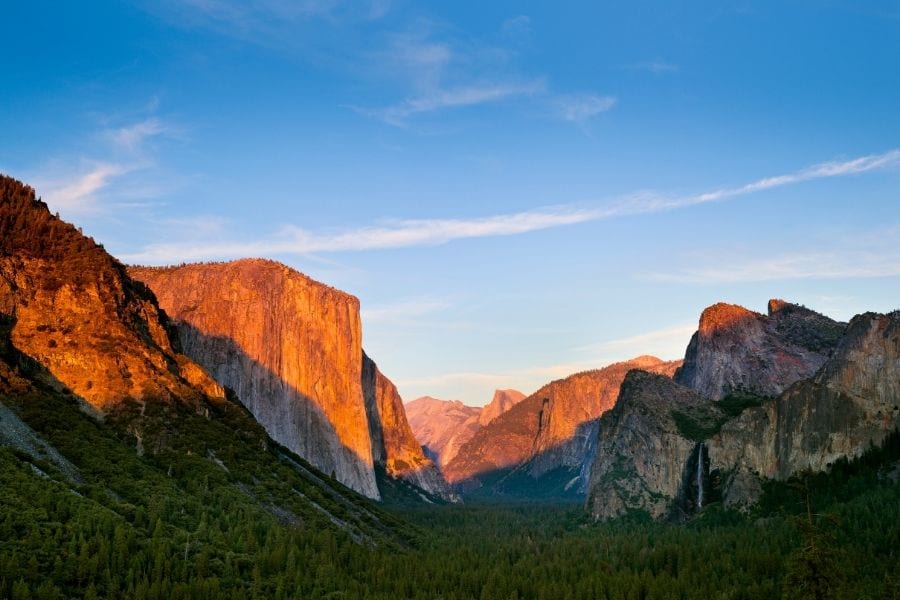
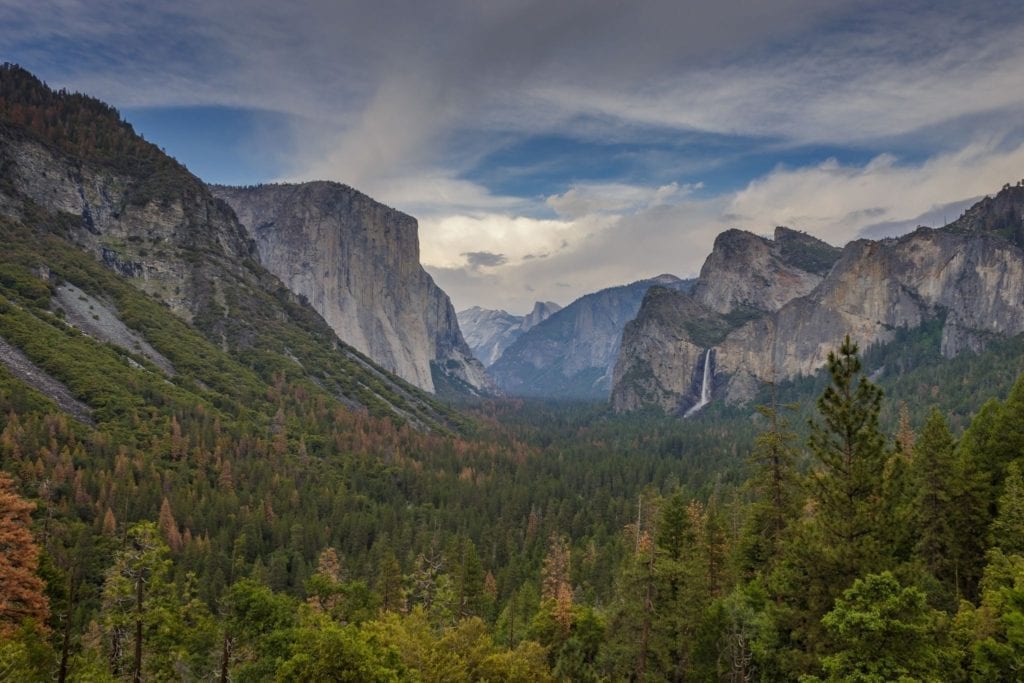
Next, you’ll make the short 5-minute drive up to Tunnel View, one of the most iconic vantage points in the park. This viewpoint overlooks the valley, including El Capitan, Half Dome, and Bridalveil Fall. A bronze 3D map helps you understand the magnitude of Yosemite Valley.
After snapping a few photos, head through the Wawona Tunnel (the longest highway tunnel in California!) towards Glacier Point Road.
Late Afternoon: Glacier Point Road
Estimated Time: 5 hours
Note: This area is typically only open from May to November, so if you’re visiting outside of that season, I recommend spending more time in Yosemite Valley. Stay up to date on the road status here.
It’s a windy 45-minute drive to Glacier Point, the dead end of Glacier Point Road. As you near the end of the drive, you’ll make a sharp hairpin turn as the road opens up to incredible views of Half Dome dead ahead.
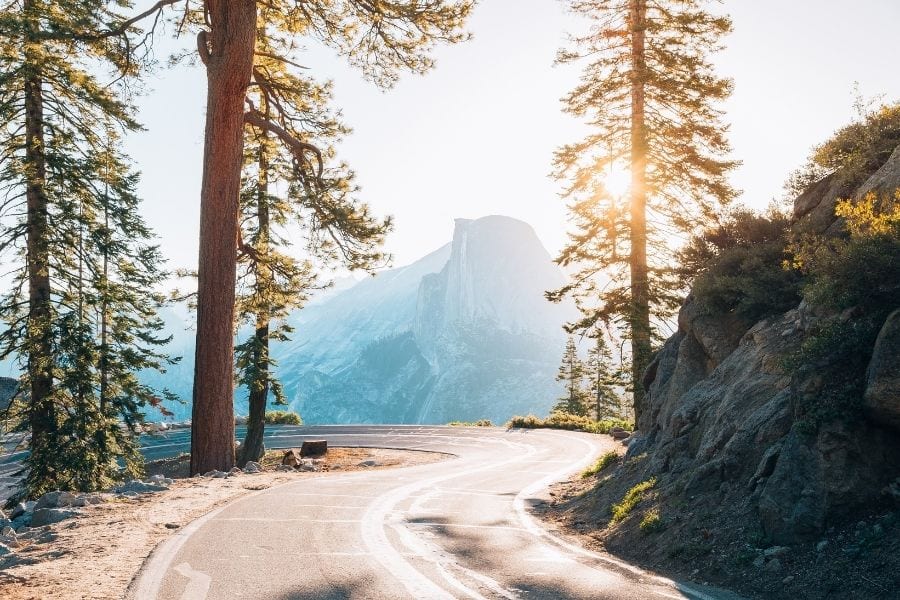
A short drive later, you’ll reach the end of the road at Glacier Point. The viewpoint towers high above Yosemite Valley, looking down on the area you explored in the morning. A 0.5-mile roundtrip walk from the large parking area takes you to an incredible overlook of the valley, the High Sierras, and Half Dome.
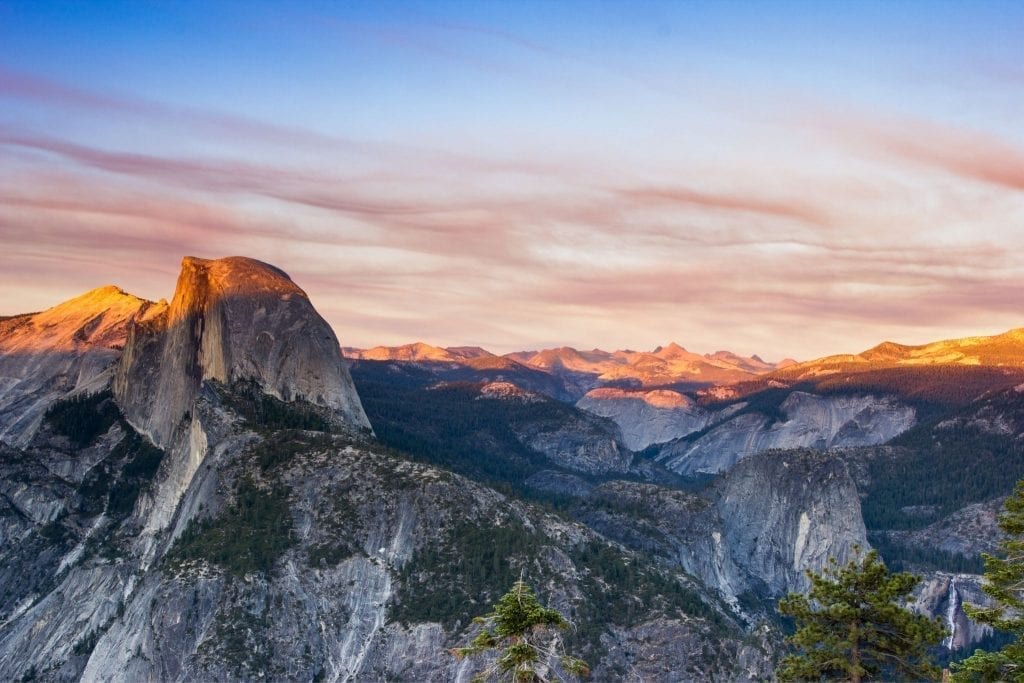
Next, you’ll head out on a moderate hike for sunset: Sentinel Dome & Taft Point. Sentinel Dome provides 360-degree views of the Sierras, while nearby Taft Point juts out above the valley floor for one of the most spectacular and colorful sunsets in the park.
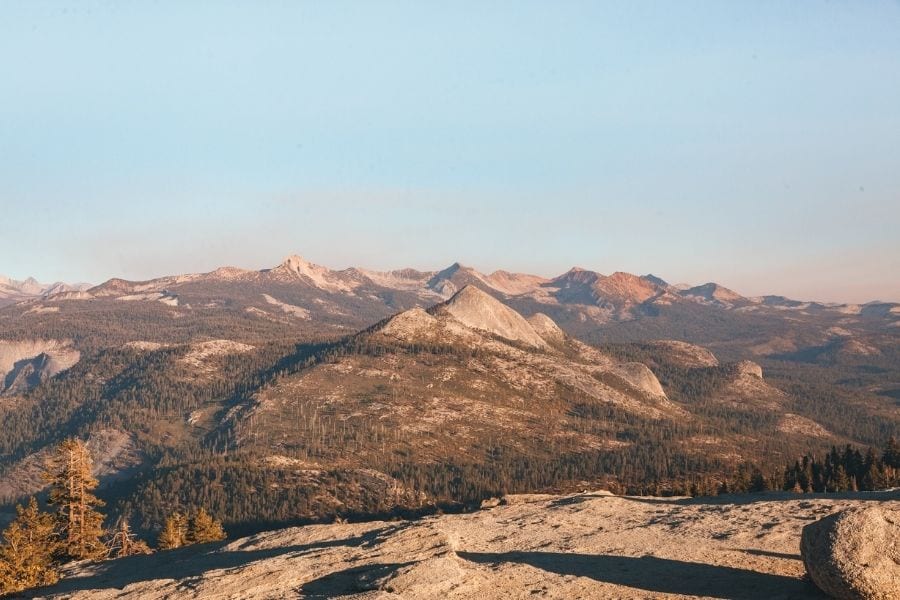
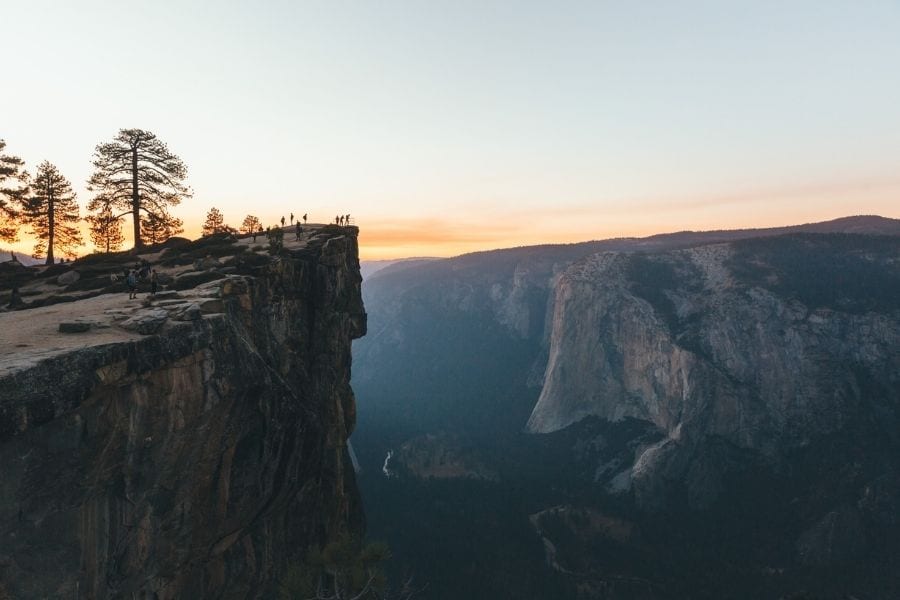
You have a couple of options for this hike, depending on your interests and activity level:
- Sentinel Dome to Taft Point Loop: This is my preferred route. You’ll drive back down Glacier Point Road to the Sentinel Dome Trailhead. There is only a small parking lot here, so you’ll likely end up parking along the road. Go to Sentinel Dome first, then finish at Taft Point for sunset (5.1 miles, 1105 feet, 3 hours)
- Glacier Point to Sentinel Dome to Taft Point Loop: This option starts from the Glacier Point parking lot and is the best option if you don’t want to move your car or can’t find parking near the Sentinel Dome Trailhead (7.2 miles, 1860 feet, 4 hours)
- Taft Point Only: If you want a less strenuous hike option, skip Sentinel Dome and head straight to Taft Point. You can either wait for sunset or return to your car early. (2.3 miles, 354 feet, 1 hour)
If you have clear skies, consider sticking around for stargazing at Glacier Point. Be sure to pack a headlamp and warm blanket!
Where to Stay: Yosemite Valley, Yosemite West, or near the South Entrance
Since you’re ending this one-day itinerary on Glacier Point Road, I recommend finding lodging close to this park area. The best options are either in Yosemite Valley, near the South Entrance, or in the Airbnb communities inside the park.
These are the best lodges and campgrounds inside the park:
- Lodges: Yosemite Valley Lodge, The Ahwahnee, or Wawona Hotel
- Glamping: Curry Village or Housekeeping Camp
- Campgrounds: Upper Pines, Lower Pines, North Pines, Camp 4, or Wawona
Here are the best options outside of Yosemite Valley:
- Rentals Inside the Park: Airbnbs in Yosemite West or Wawona
- Hotels near the South Entrance: Fish Camp or Oakhurst
2 Day Yosemite Itinerary
With two days in Yosemite, you’ll have more time to explore the best of Yosemite Valley and get out on some of Yosemite’s famed hiking trails. I highly recommend spending at least two days in Yosemite to avoid feeling rushed!
Below is the itinerary I’d propose for two days in Yosemite. For your first day in Yosemite, you’ll follow the same one-day itinerary I laid out before. For all the details on day 1, refer to the previous section, but you’ll find a quick recap below.
Is two days in Yosemite enough?
Two days in Yosemite is enough to see the highlights of Yosemite Valley and Glacier Point Road. With two days, you have time for a few of the best hikes and scenic drives, enough to see most of the highlights of the most visited parts of the park. Two days is the minimum amount of time I recommend for Yosemite.
Day One: Yosemite Valley & Glacier Point Road
- Morning: Self-Guided Walking Tour of Yosemite Valley
- Mid-Day: El Capitan Meadow, Valley View, and Tunnel View
- Late Afternoon: Glacier Point, Sentinel Dome, and Taft Point for Sunset
Day Two: Hiking Yosemite Valley
Morning: Hike the Mist Trail or Mirror Lake Trail
Estimated Time: 1 to 6 hours, depending on which trail you pick
After a busy first day in Yosemite Valley and driving Glacier Point Road, you’ll start your second day with a hike exploring the park’s renowned waterfalls and lakes. If you’re staying outside Yosemite Valley, I recommend parking in the Curry Village Visitor Parking lot.
Start by picking the hike or hikes that best align with your interests and fitness level. I’ve ranked these trails below from easiest to most challenging:
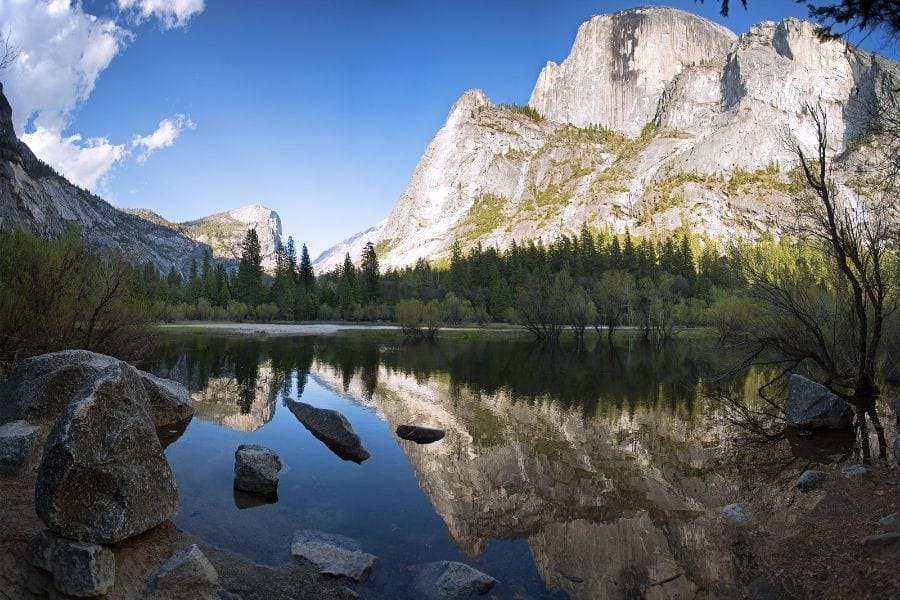
- Mirror Lake Trail: This is an accessible and family-friendly trail. There is a paved access road, making Mirror Lake one of the few accessible trails in the park. However, if you prefer to walk on a trail, an unpaved trail runs on the other side of the lake. The still lake reflects Yosemite’s high canyon walls in spring and summer. By late summer, the lake dries up, and the trail features a meadow in the stream bed instead. (2 miles, 100 feet, 1 hour)
- Mirror Lake Loop Around the Lake: Take the entire loop around Mirror Lake for a longer yet easy trail. The trail continues across Tenaya Creek and winds through a forest underneath the towering granite walls. (5 miles, 301 feet, 2 hours)
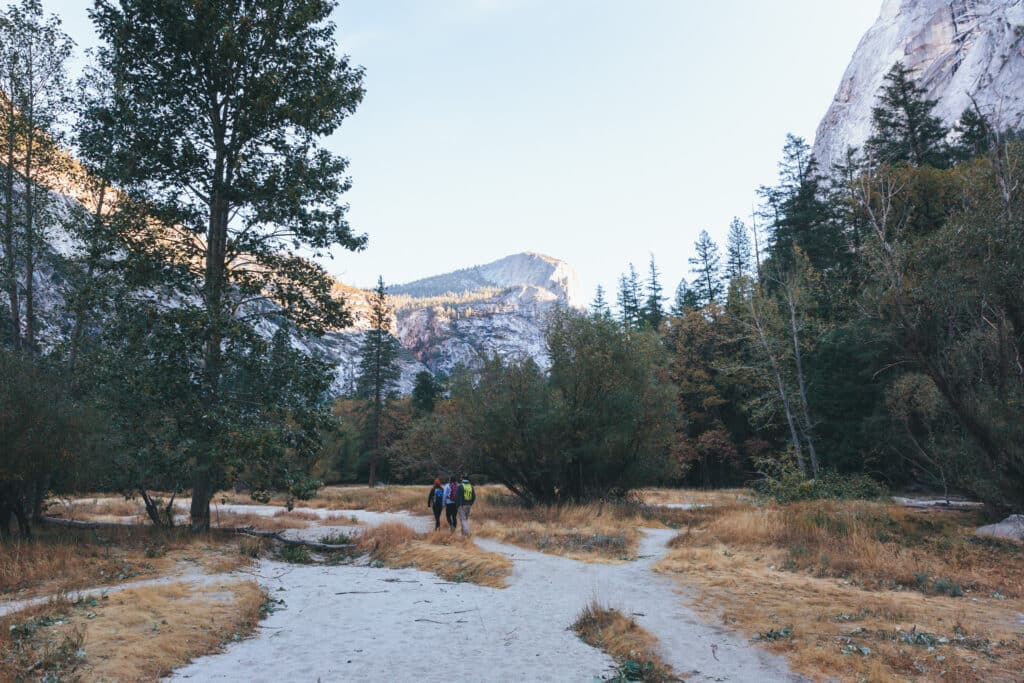
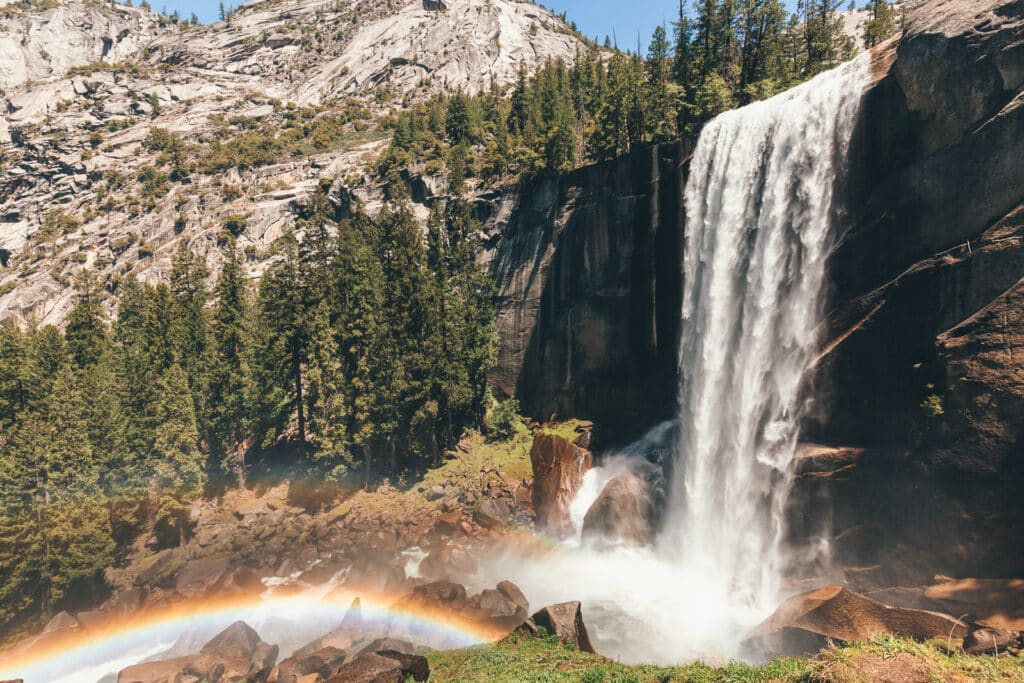
- Mist Trail to the Vernal Falls Footbridge: This moderate trail allows you to see one of Yosemite’s most iconic waterfalls without more strenuous hiking. The hilly path to the Vernal Falls Footbridge takes you to a view of Vernal Falls in the distance and is a short enough hike that most tourists can make the journey. (1.8 miles, 495 feet, 1-2 hours)
- Mist Trail to Vernal Falls: This is the most famous stretch of the Mist Trail, where it gets its name. As you continue along the Mist Trail to Vernal Falls, you’ll climb a mist-covered rock staircase. The 650 granite steps take you to the waterfall’s top for unparalleled views and an iconic Yosemite experience. Be careful on the stairs as they’re crowded, and the mist makes it incredibly slick. I recommend all hikers return via the John Muir Trail instead to avoid going down these slick stairs and fighting the flow of foot traffic. (4.5 miles, 1,614 feet, 3-4 hours)
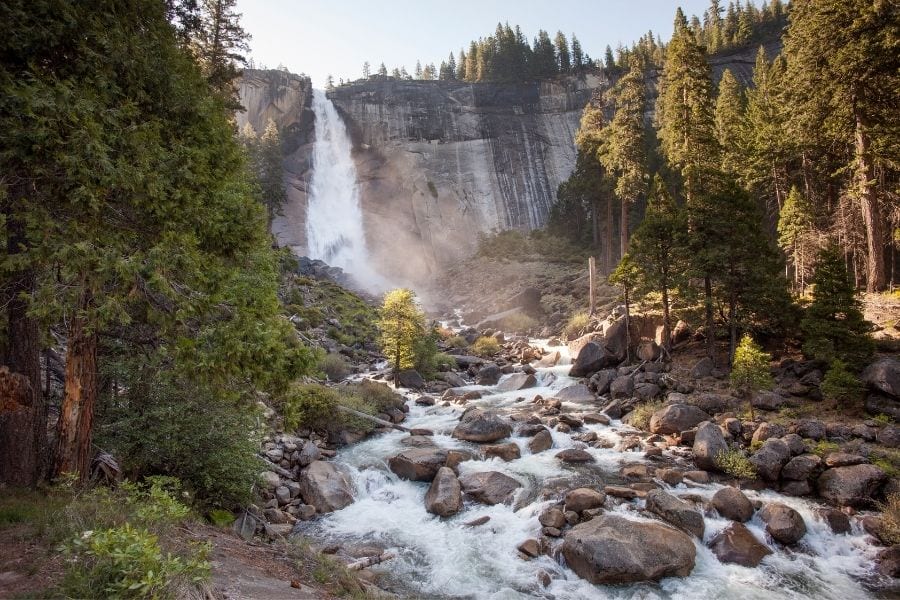
- Mist Trail to Vernal & Nevada Falls: As you continue past Vernal Falls, you’ll see yet another magnificent Yosemite waterfall – Nevada Falls! This route adds more elevation as you climb to the top of Nevada Falls and then return via the John Muir Trail. The waterfall and stunning views of Yosemite’s backcountry make this my favorite hike in Yosemite National Park! (6.4 miles, 2,208 feet, 4-6 hours)
The Mist Trail and the Mirror Lake Trail start in the same area, behind Upper Pines Campground in Yosemite Valley. If taking the shuttle, get off at Stop #16 (Happy Isles) for the Mist Trail or Stop #17 for Mirror Lake.
If you’re a regular hiker, it’s reasonable to be able to hike both the Mist Trail to Vernal Falls and Mirror Lake in the morning. If you are intimidated by the additional distance up to Nevada Falls, this can be a great option instead!
Afternoon: Explore Yosemite Village
Estimated Time: 3 hours
After a busy morning of hiking, it’s the perfect time to relax and unwind. The Ahwahnee is one of Yosemite’s most iconic and historic lodges. Built in 1927, the Ahwahnee is listed as a National Historic Landmark and a must-see for those who love visiting national park lodges.
Don’t miss walking through The Ahwahnee’s Grand Lobby or grabbing a casual meal at The Ahwahnee Bar. For a more luxurious experience, consider booking a dinner reservation in The Ahwahnee Dining Room. However, be aware the dress code requires collared shirts for men and dresses or nice pants for women.
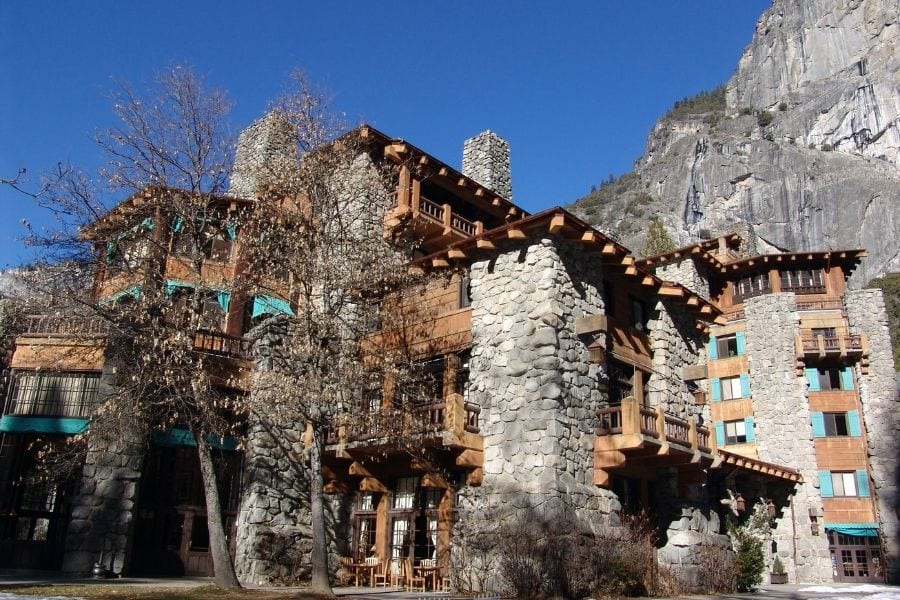
From the trailheads for Mirror Lake or the Mist Trail, it’s about a mile walk to The Ahwahnee. Alternatively, you can take the Green Route Valleywide shuttle from either trailhead to Stop #3, which drops you off at the hotel.
After a break at The Ahwahnee, head to the Yosemite Valley Visitor Center. The visitor center is an excellent spot to learn more about the park, speak to park rangers, or stamp your national park passport. It’s a short 15-minute walk from the lodge to the visitor center. If you prefer to take the shuttle, get off at Stop #5 for Yosemite Exploration Center & Museum.
Next door to the visitor center, you’ll find the Yosemite Museum, offering an opportunity to learn more about the Ahwahneechee people, the park’s early tourism, and Yosemite’s conservation history.
The Ansel Adams Gallery is also a must-visit. The gallery is a tribute to iconic black-and-white photographer Ansel Adams, who spent much of his life capturing Yosemite’s iconic landscapes. Visitors can participate in guided photography walks and workshops and admire art in the gallery.
Evening: Dinner and Watching Sunset
Estimated Time: 1-2 hours
If you want an early dinner before sunset, consider dining at The Loft at Degnan’s or the Village Grill. The Village Store also has several options for pre-made to-go food.
For sunset, you have a few options:
- Tunnel View: One of the most iconic sunset spots in the park, providing views of Half Dome, El Capitan, and Bridalveil Falls. If you followed the day one itinerary, you’ve already visited Tunnel View. Still, it’s worth a return trip, especially if you stay outside the park and have to head that way anyway.
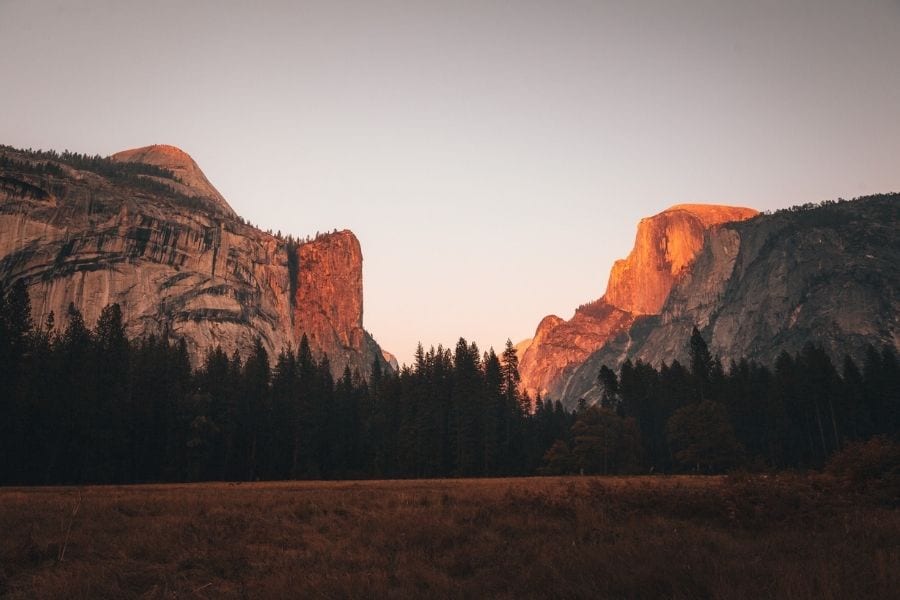
- Stoneman Meadow Boardwalk: The area at the Junction of Southside Drive, Northside Drive, and Curry Village Drive has one of the best views of Half Dome. At sunset, Half Dome glows a fiery red, illuminated by the fading sun. This spot is perfect for sunset if you stay at The Ahwahnee, Curry Village, Housekeeping Camp, or the Pines campgrounds since you won’t need to move your car. When the weather is nice, bring a camp chair to sit along the road and watch the sunset.
- Sentinel Bridge: If you’re staying at the Yosemite Valley Lodge, a closer sunset option is Sentinel Bridge, which is only a half-mile walk away. This spot also provides beautiful views of the glowing Half Dome reflected in the Merced River.
Read More: Best Viewpoints in Yosemite National Park
Where to Stay: Yosemite Valley or Near the West Entrances
For this 2-day Yosemite itinerary, I recommend picking one place to stay for both nights. The most convenient place to stay is Yosemite Valley. However, you’ll need to book well in advance to stay in the valley.
Outside Yosemite Valley, I recommend finding a hotel or rental near the Arch Rock or Big Oak Flat entrances.
Here are the best options in Yosemite Valley:
- Lodges: Yosemite Valley Lodge or The Ahwahnee
- Glamping: Curry Village or Housekeeping Camp
- Campgrounds: Upper Pines, Lower Pines, North Pines, or Camp 4
These are the best options outside of Yosemite Valley:
- Rentals Inside the Park: Airbnbs in Yosemite West
- Near the Arch Rock Entrance: Hotels in El Portal, Midpines, or Mariposa
- Near the Big Oak Flat Entrance: Hotels in Groveland
3 Day Yosemite Itinerary
If you’re looking to see the highlights of Yosemite and aren’t interested in any of the more strenuous, all-day hikes Yosemite offers, three days is the perfect time to spend in the park.
In 3 days, you can see many of the popular regions of the park, including Yosemite Valley, Glacier Point Road, and Tioga Pass Road.
For this 3-day itinerary, follow the 2-day itinerary from above and then add a third day exploring the Tioga Pass area. Read the previous sections for all the details of the first two days. I’ve also included a quick recap below.
Is three days in Yosemite enough?
Three days is enough to visit Yosemite. In 3 days, you have enough time to see Yosemite Valley, Glacier Point, Tioga Pass, and Tuolumne Meadows, all the major areas of the park. You’ll have enough time to see plenty of scenic viewpoints, take a few hikes, and see all the highlights.
Day One: Yosemite Valley & Glacier Point Road
- Morning: Self-Guided Walking Tour of Yosemite Valley
- Mid-Day: El Capitan Meadow, Valley View, and Tunnel View
- Late Afternoon: Glacier Point, Sentinel Dome, and Taft Point for Sunset
Day Two: Hiking in Yosemite Valley
- Morning: Hike the Mist Trail and/or the Mirror Lake Trail
- Afternoon: Explore Yosemite Village, including The Ahwahnee, Yosemite Valley Visitor Center, and Ansel Adams Gallery
- Evening: Dinner in Yosemite Valley and Sunset at Tunnel View, Stoneman Meadow, or Sentinel Bridge
Day Three: Tioga Pass & Tuolumne Meadows
Note: This area is typically only open from June to November, so if you’re visiting outside of that season, I recommend spending more time in Yosemite Valley. Stay up to date on the road status here.
Early Morning: Drive Tioga Pass Road
Estimated Time: 2 hours
For your third day, you’ll explore the breathtaking Tioga Pass Road. This high-elevation road is the gateway to Yosemite’s High Sierras, only open from June to early November. The Tioga Pass area offers beautiful views of granite domes, alpine meadows, and alpine lakes.
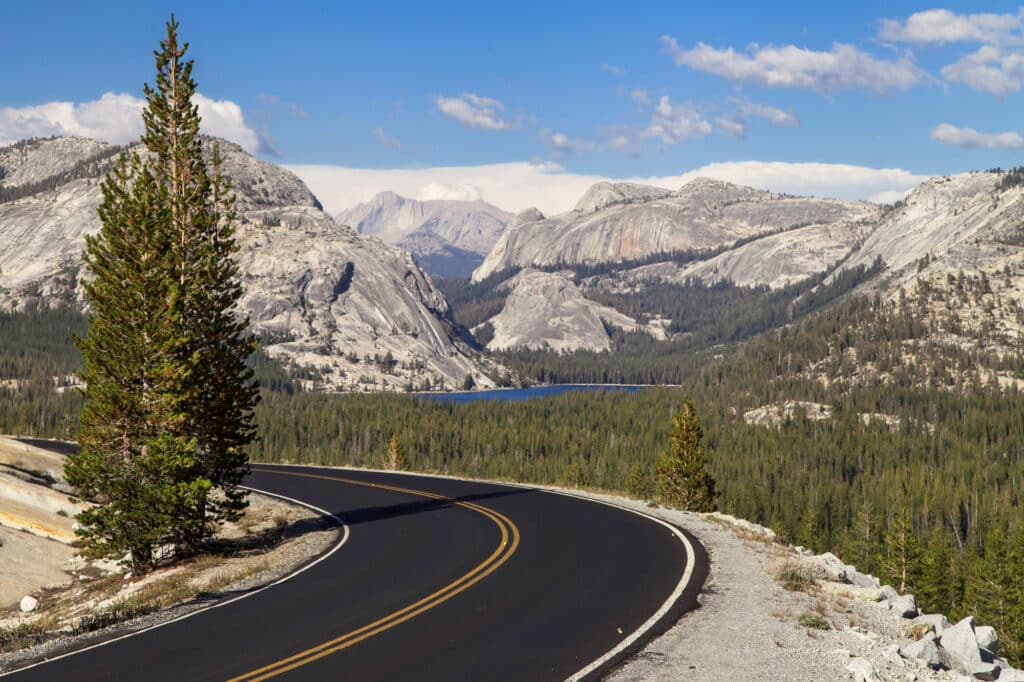
Your first stop on Tioga Pass Road is Olmsted Point, about an hour from Yosemite Valley and the Big Oak Flat Entrance. This viewpoint provides incredible panoramic views of Clouds Rest and Half Dome.
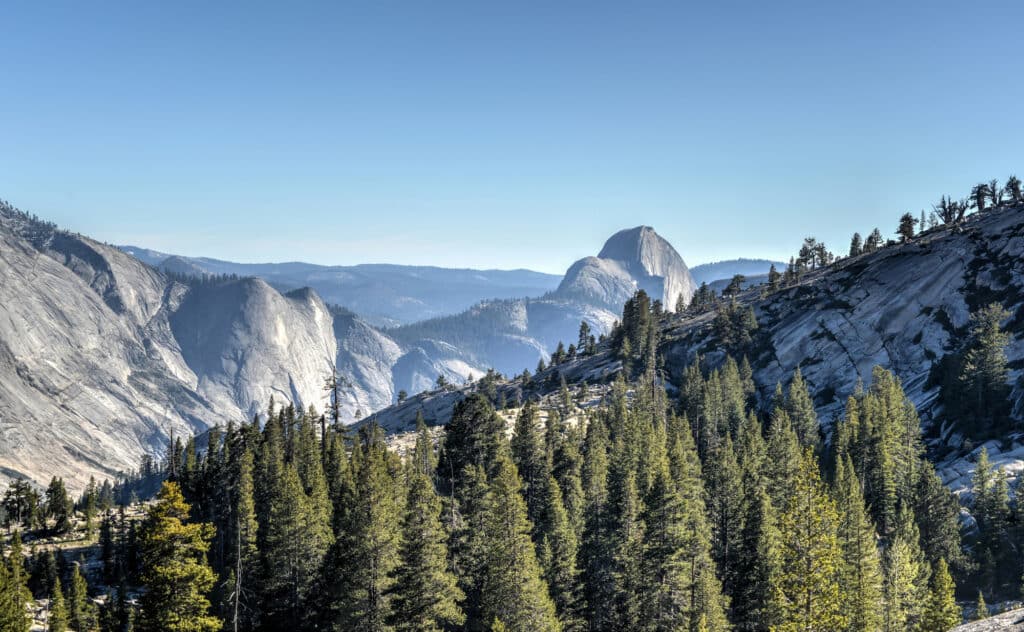
From Olmsted Point, continue east along Tioga Pass Road towards Tuolumne Meadows.
Mid-Morning: Take a hike in the Tuolumne Meadows area
Estimated Time: 2 to 6 hours, depending on the hike you choose
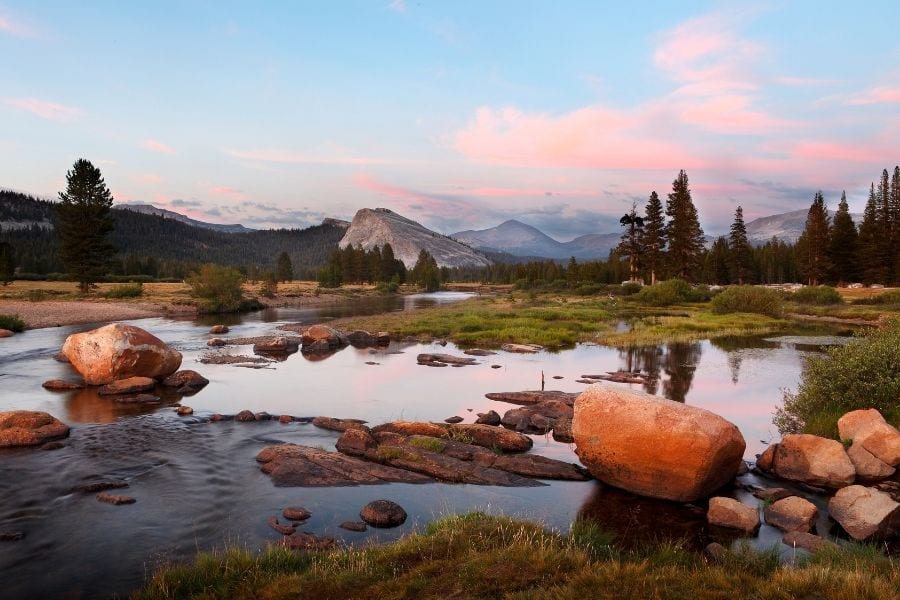
Tuolumne Meadows is a change in scenery from the rest of Yosemite National Park. This part of the park is located at 8,600 feet elevation. It is home to an expansive subalpine meadowland surrounded by granite peaks.
There are several incredible hiking trails in the Tuolumne Meadows area. Pick a trail to hike based on your interests and activity level. I’ve ranked these options below from easiest to most challenging:
- Lembert Dome Trail: This shorter, moderate trail offers spectacular 360-degree views over Tuolumne Meadows and its surrounding peaks. The Lembert Dome trail is one of the easier hikes to reach a Yosemite summit. (3.8 miles, 839 feet, 2-3 hours)
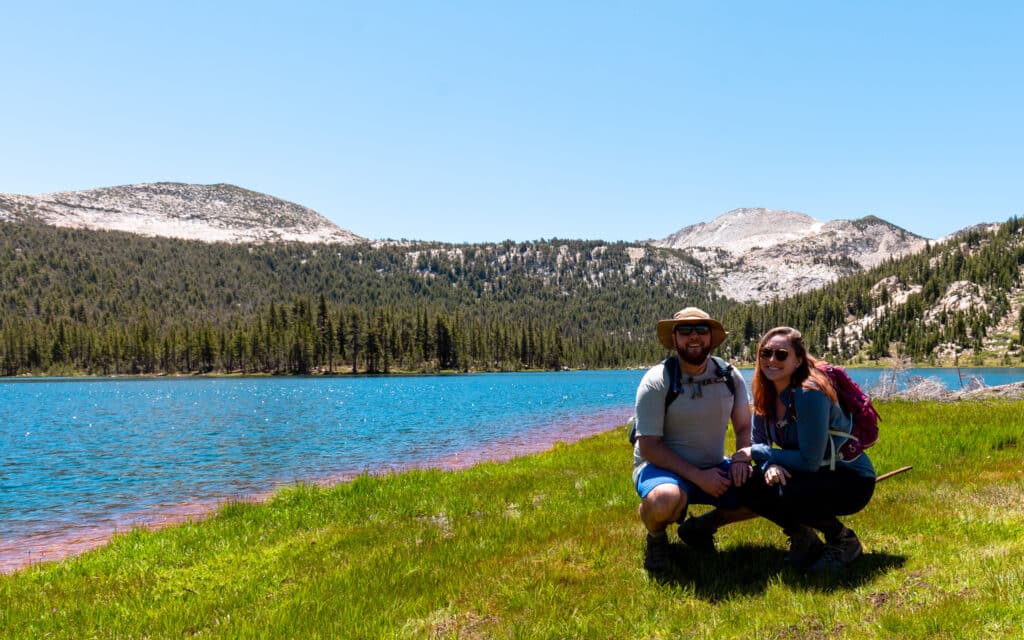
- Elizabeth Lake Trail: This moderate trail takes you along a creek to the picturesque Elizabeth Lake, set at the base of Unicorn Peak. It’s a peaceful hike with fewer crowds – just beware of the mosquitos in the heat of summer! (5 miles, 853 feet, 3-4 hours)
- Cathedral Lakes Trail: For a more challenging hike, this trail climbs 1,000 feet of elevation through the alpine landscape to the stunning Cathedral Lakes, set against the backdrop of Cathedral Peak. (9.5 miles, 1,663 feet, 5-6 hours)
Afternoon: Tenaya Lake
Estimated Time: 2 to 3 hours
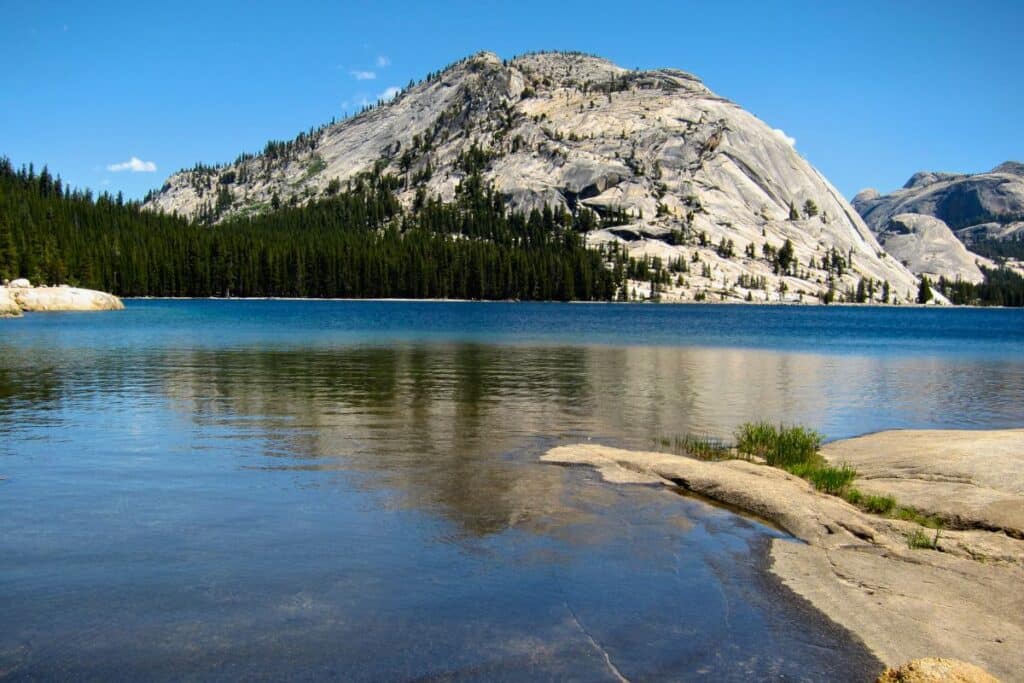
After your morning hike, head west along Tioga Pass to Tenaya Lake. This subalpine lake is known as the “jewel of the high country”. The sandy beaches are my favorite spot for an afternoon picnic or swimming on a hot summer day.
Park in the lot for Tenaya Lake Picnic Area and bring a camp chair or blanket to relax along the lake shore.
Late Afternoon: Tuolumne Grove
Estimated Time: 2 to 3 hours
Finish your third day in Yosemite by walking through Tuolumne Grove as you drive west across Tioga Pass Road. This peaceful grove of giant sequoias is best explored on a 2.7-mile hike that descends 600 feet into the grove.
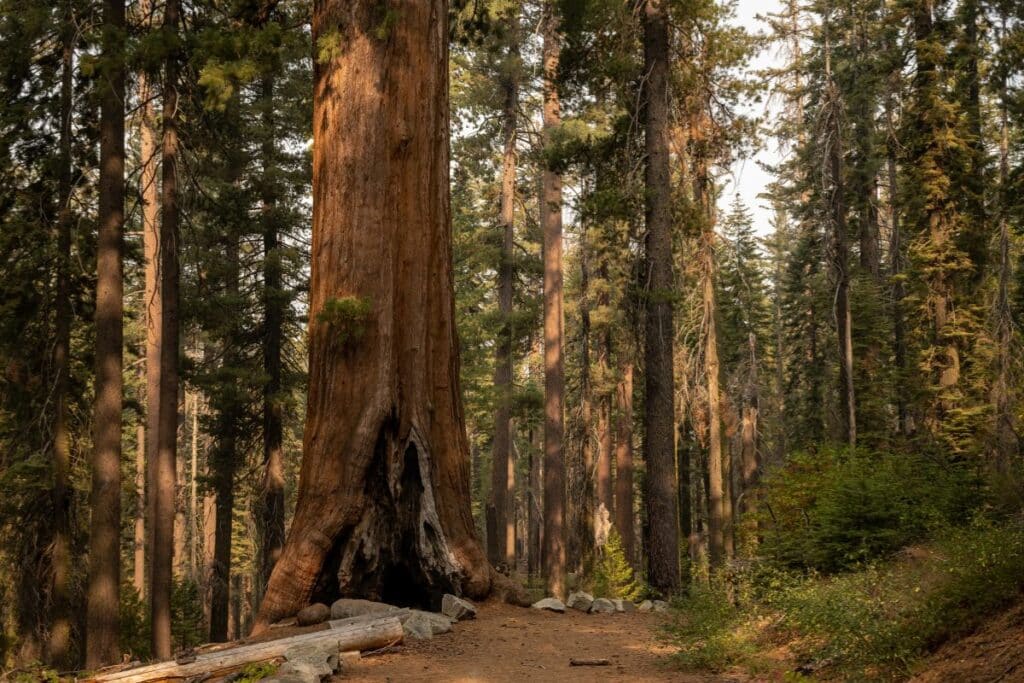
If you aren’t visiting Mariposa Grove (which I only recommend if you have 4+ days), Tuolumne Grove is an excellent spot to see Sequoia trees. Don’t miss the Tunnel Tree, a dead Sequoia that has been tunneled out to appreciate the size of these massive trees.
Where to Stay: Yosemite Valley or near the Big Oak Flat Entrance
For this 3-day itinerary, I recommend staying in the same place for all three nights in most cases. Yosemite Valley will be the most central and convenient location. However, you need to book your lodging well in advance. If you stay outside the park, look for hotels near the Big Oak Flat Entrance.
Here are the best options in Yosemite Valley:
- Lodges: Yosemite Valley Lodge or The Ahwahnee
- Glamping: Curry Village or Housekeeping Camp
- Campgrounds: Upper Pines, Lower Pines, North Pines, or Camp 4
These are the best options outside of Yosemite Valley:
- Rentals Inside the Park: Airbnbs in Yosemite West
- Near the Arch Rock Entrance: Hotels in El Portal
- Near the Big Oak Flat Entrance: Hotels in Groveland
If you’re visiting Mammoth Lakes, Lake Tahoe, or Death Valley afterward, spend your final night in the Tioga Pass area:
- Glamping near Tioga Pass: Tuolumne Meadows Lodge or White Wolf Lodge
- Campgrounds near Tioga Pass: Hodgdon Meadow, Crane Flat, Tamarack Flat, White Wolf, Yosemite Creek, Porcupine Flat, Tuolumne Meadows
- Near the East Entrance: Hotels in Lee Vining
4+ Day Yosemite Itineraries
If you have four or more days in Yosemite, you have several options, depending on your interests. I recommend following the 3-day itinerary above and adding additional activities as you have more time.
Here are some of my favorite options:
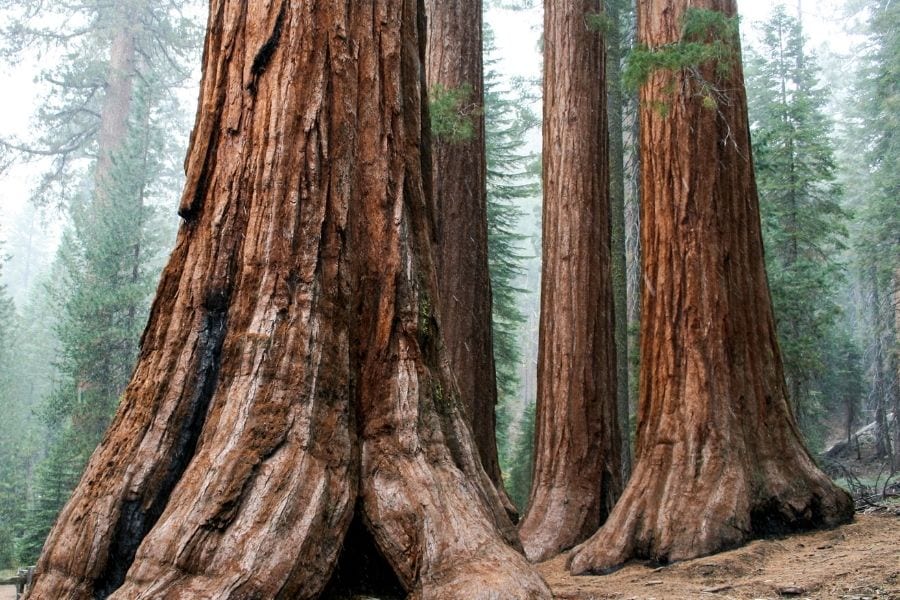
- Spend one day in the Wawona area. Visiting this part of the park is the perfect option for non-hikers or those only interested in shorter trails. You can explore the giant sequoias in Mariposa Grove on the 0.3-mile, wheelchair-accessible Big Trees Loop Trail or the 2-mile Grizzly Giant Loop Trail. After that, visit the Wawona Visitor Center, Wawona Hotel, and Yosemite History Center. End the day with an afternoon walk along the 3.6-mile Wawona Meadow Trail.
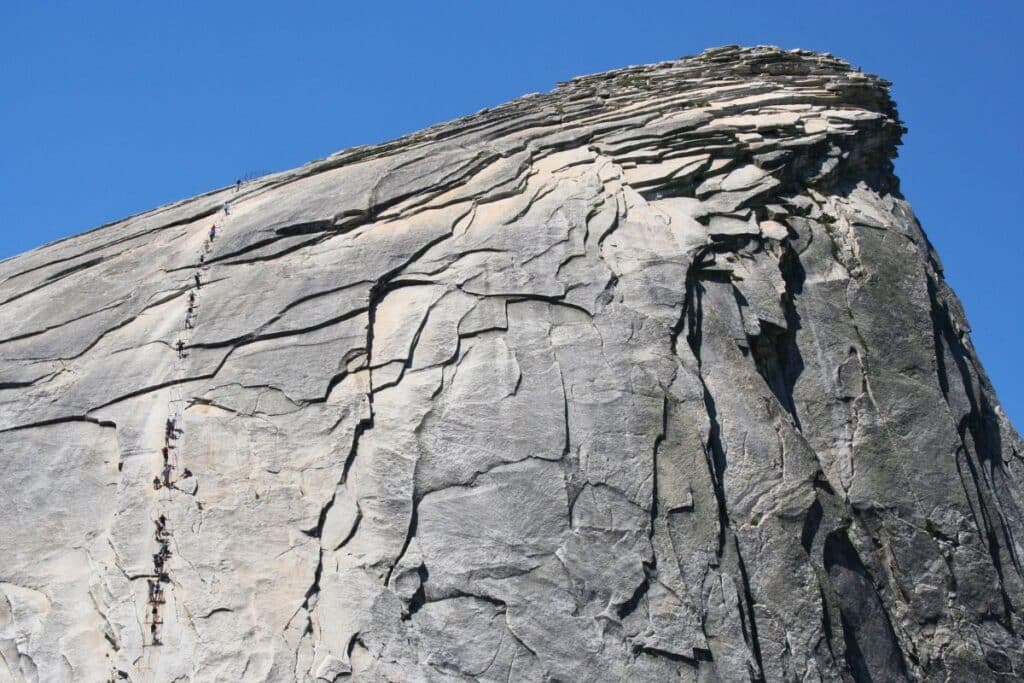
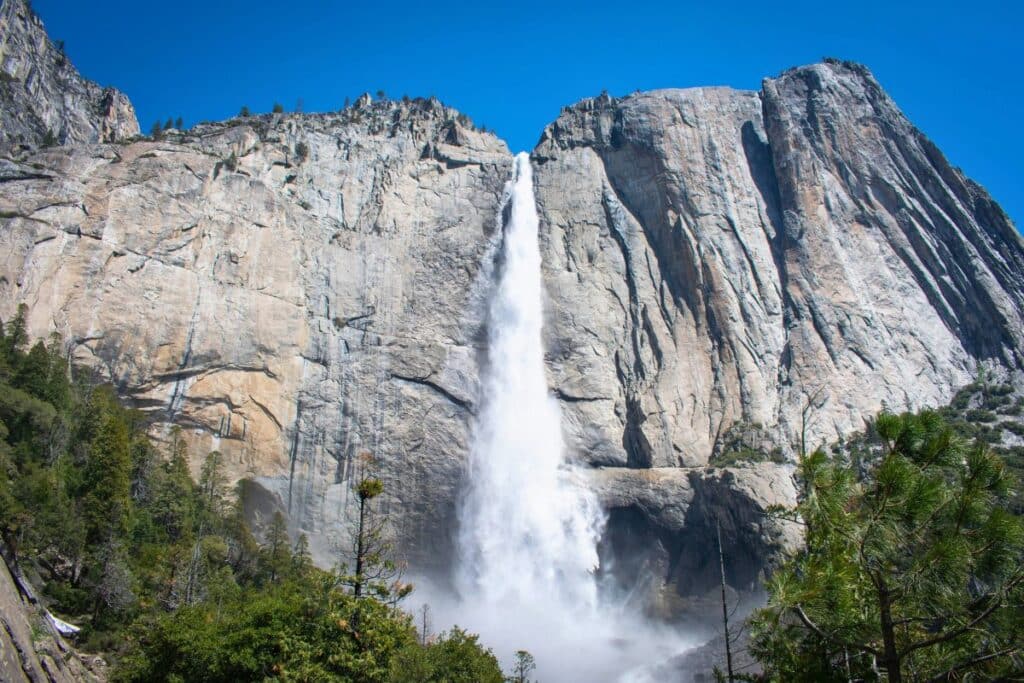
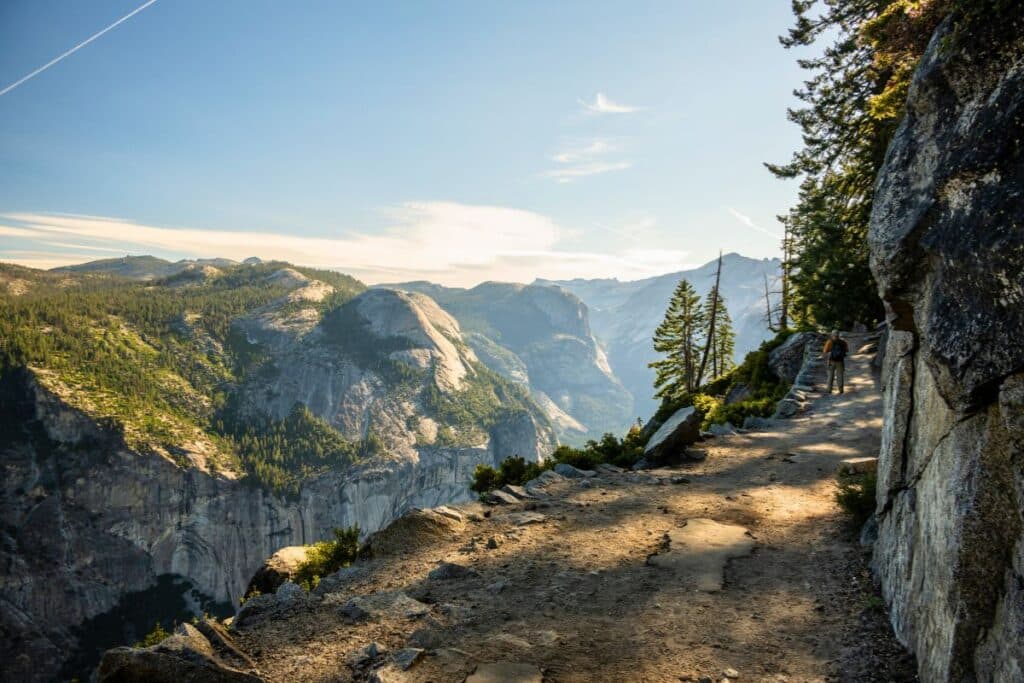
- Hike Yosemite’s more challenging trails. There’s no shortage of incredible hikes in Yosemite. However, many of these trails are all-day activities. If you have at least four days in the park and have seen the highlights, spend some time hiking these strenuous but scenic trails:
- Half Dome (16.5 miles, 5305 feet, 12+ hours, permit required)
- Upper Yosemite Falls (6.6 miles, 3254 feet, 6-8 hours)
- Four Mile Trail To Glacier Point (9.7 miles, 3418 feet, 7-9 hours)
- Cloud’s Rest Trail (13.5 miles, 3152 feet, 9-11 hours)
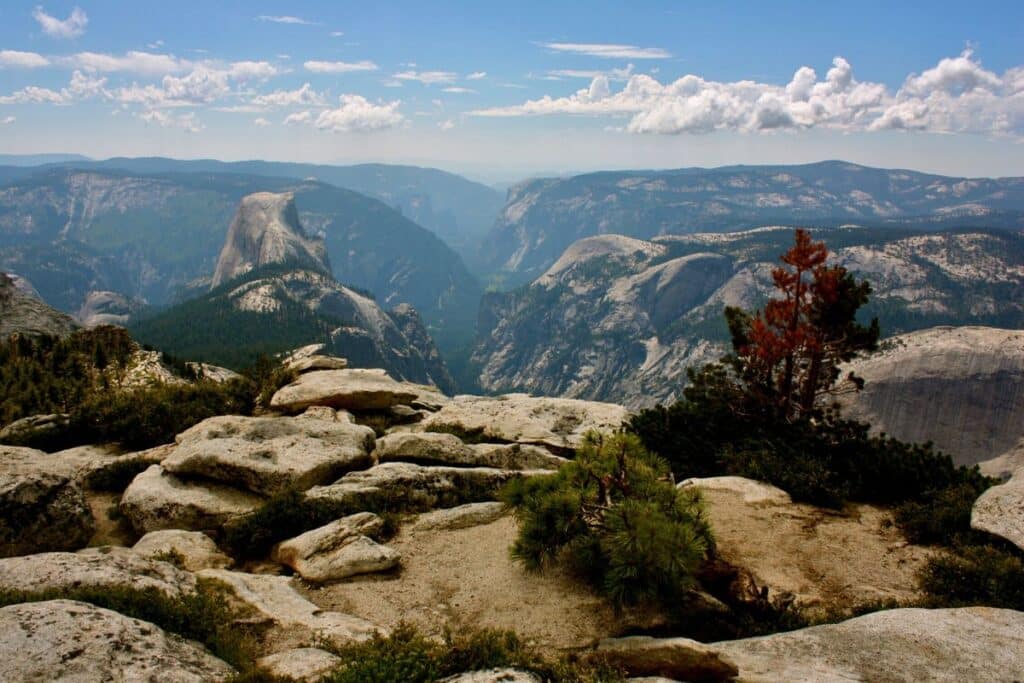
- Bike the Valley Loop Trail. This paved trail circles Yosemite Valley, connecting many of the valley’s most famous viewpoints. Depending on how much biking you want to do, there is a 12-mile full loop or a 7-mile half loop. You can rent bicycles from Yosemite Valley Lodge, Curry Village, or the Yosemite Village Store from March to October.
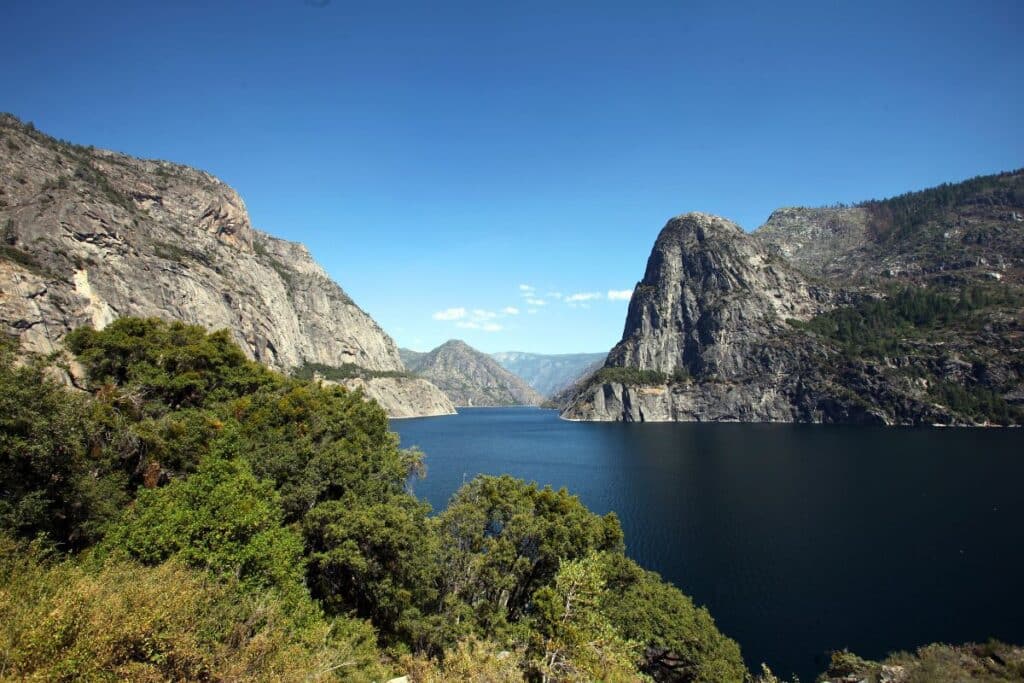
- Visit Hetch Hetchy. This area is the least visited in Yosemite National Park and is perfect for those interested in avoiding crowds. The Hetch Hetchy Reservoir provides drinking water for the San Francisco Bay Area. Start your day visiting the O’Shaughnessy Dam, then hike along the reservoir to Wapama Falls on a 4.7-mile moderate trail.
Is four days in Yosemite enough?
Four days in Yosemite is ideal, allowing you to see each part of the park leisurely: Yosemite Valley, Glacier Point Road, Tioga Pass, and Mariposa Grove. If you’re a hiker, you’ll have more time to explore Yosemite’s challenging hiking trails, like Half Dome and Upper Yosemite Falls.
Best Time to Visit Yosemite National Park
The best time to visit Yosemite National Park is late May through October. While Yosemite Valley is open year-round, other parts of the park close due to winter snowfall. Visiting late spring to early fall is the best option to see most of Yosemite.
However, these are also the most visited months in Yosemite, with 75% of the park’s nearly 4 million annual visitors coming during these six months. The peak months are July to mid-September, so expect crowds and traffic when visiting.
To avoid crowds but still see the best attractions in Yosemite, consider visiting from late May to mid-June or late September to October.
Here’s a quick overview of what to expect each season in Yosemite National Park.
- Spring: Waterfalls and rivers run at full force in May and June due to runoff from snow melt. Temperatures are comfortable during the day but remain cold overnight. Spring is also the rainiest time of year in Yosemite. Spring is the best time to see attractions like Yosemite Falls, Bridalveil Falls, and Vernal Falls. However, Glacier Point, Tioga Pass, and Mariposa Grove are closed until late spring or early summer.
- Summer: This is the busy season at Yosemite, with July and August receiving nearly 20,000 visitors daily. Daytime highs are often above 90 degrees, and mosquitos are plentiful. However, all park amenities, trails, and roads are open in the summer, making it an ideal time to visit despite the heat and crowds.
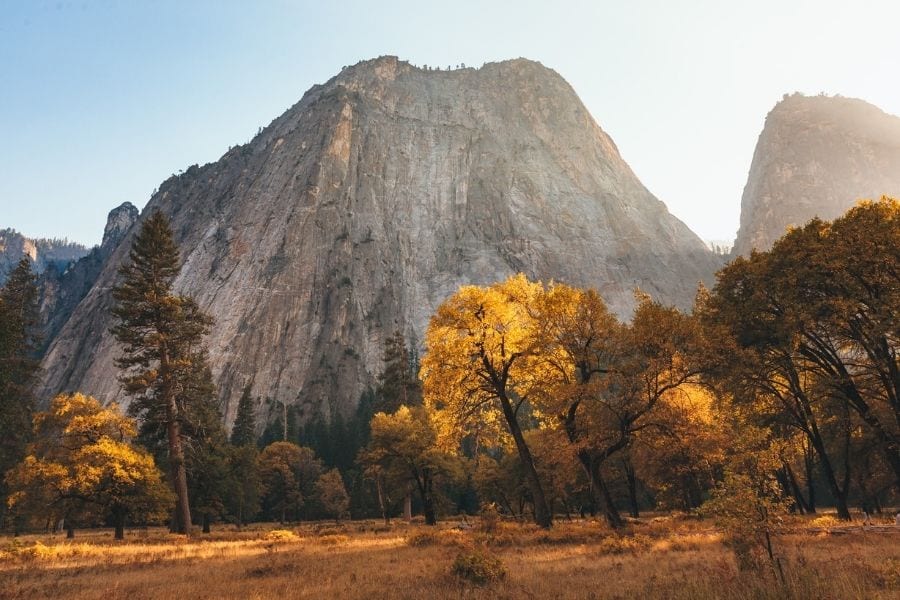
- Fall: By fall, the park’s famous waterfalls and some lakes have dried up, but the golden-hued meadows, fall foliage, and comfortable temperatures make up for it. Most park areas remain open through November, making fall the perfect time to visit for hiking and seeing all park areas without crowds if you don’t mind missing the waterfalls.
- Winter: This is the quietest time of year in Yosemite, with much of the park blanketed in snow and visitation slowing to only 3,500 people per day. Winter is a great time to visit if you’re interested in winter sports or catching the famous Yosemite Firefall. However, you’ll only be able to visit Yosemite Valley as all other areas of the park are closed.
Read more about seasonal closures in Yosemite.
Tips for Planning a Trip to Yosemite National Park
Here are some of my top tips to remember as you plan your trip, plus an overview of the entrance fees and 2024 reservation system in place for Yosemite.
- Book lodging inside the park well in advance. Reservations for lodges inside the park are released a year in advance. The most popular campgrounds in Yosemite Valley are reserved five months in advance. Lodging inside the park books up quickly, so plan ahead if you want to stay there.
- Start your day early to avoid crowds. By 10 AM, crowds form at the entrance stations, parking lots, and trails. Avoid crowds by getting an early start shortly after sunrise. After 4 PM, crowds start to clear out, and reservations are no longer required to enter the park.
- Check road and trail conditions before your trip. Many roads and parts of the park are closed seasonally. In addition, wildfires, wildlife, weather, and construction can cause delays or closures throughout the park. Stay current on the latest conditions in Yosemite via the Yosemite National Park website.
- Allow extra time to get places, especially in Yosemite Valley. Yosemite Valley is filled with one-way roads, and crowds cause traffic. I recommend taking the park shuttle in the valley whenever possible and allowing extra time for traffic when driving throughout the park.
- Cell phone service in Yosemite is limited. Be sure to download all reservations, confirmations, and maps offline before entering the park. I like to save all information in an offline Dropbox or Google Drive folder and take a screenshot.
- Keep your distance from wildlife. While incredible to see, keep a safe distance and give all wild animals plenty of room. Stay 100 yards away from bears and at least 25 yards away from all other animals. However, bear spray is not allowed in Yosemite National Park.
Yosemite National Park Entrance Fees
Yosemite National Park charges an entrance fee to enter. There are a few different options to cover your entrance fee upon arrival:
- Yosemite Standard Entrance Fee: $35 and valid for seven days; this can be purchased in-person at the entrance station upon arrival
- America the Beautiful National Park Pass: $80 and valid for 12 months; this can be purchased online to save time and gets you into all US National Parks and Forests for an entire year. This is the best deal if you plan to visit multiple national parks!
- Senior National Park Pass: $20 per year or $80 for a lifetime; this is an incredible option for anyone 62 or older!
Additional passes are also available for military families, 4th graders, volunteers, and those with disabilities. Read more about the national park passes.
Yosemite National Park 2024 Reservation System
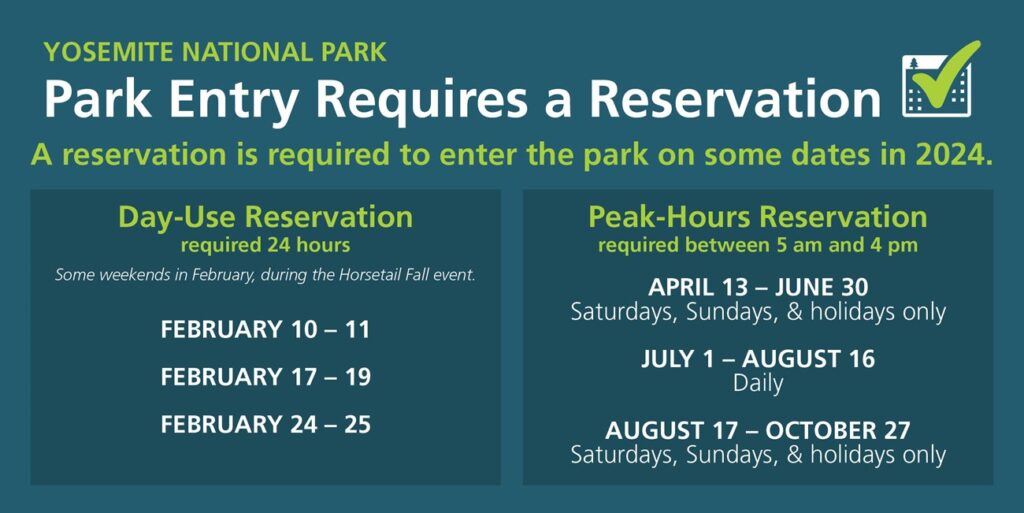
In 2024, in addition to the entrance fees, the National Park Service will require all visitors to Yosemite to make a reservation to enter the park, depending on the time of year and day.
The Yosemite Peak-Hours Reservation system is complex, to say the least, so you must understand whether or not you’ll need a reservation as you plan your trip to Yosemite.
Reservations will be required for all visitors on these dates:
- April 13 to June 30: Reservations are required only on Saturdays, Sundays, and holidays
- July 1 to August 16: Reservations are needed every day
- August 17 to October 27: Reservations are required only on Saturdays, Sundays, and holidays
Who is exempt from a peak-hours reservation?
- Anyone entering the park before 5 AM or after 4 PM. Reservations are only required during these hours, so if you enter early morning or late afternoon, you can avoid the reservation system.
- Anyone with in-park lodging reservations. This includes all Yosemite campgrounds, lodges, and vacation rentals in Wawona, Yosemite West, and Foresta.
- Anyone with a wilderness or Half Dome permit. These permits will exempt you from the reservation system only on the day(s) the permit is for.
- Anyone entering the park via Yosemite Area Regional Transportation System (YARTS). This public transit option runs from nearby towns and allows you to enter the park without a reservation.
Frequently Asked Questions About the Yosemite Reservation System
- Do I need to make a separate reservation for each day? It depends. Each Yosemite reservation is valid for three days. If your trip is three days or shorter, you only need to make a reservation for your first day in the park. If your trip is longer than three days, you must make multiple reservations (one for Day 1, one for Day 4, etc.).
- Do I need a reservation if I have an America the Beautiful National Park Pass or a Senior National Park Pass? Yes. You will still need a reservation even with a national park pass. The pass only covers the price of your admission to the park, and you will be required to show both your national park pass and your reservation upon entry.
- What do I do if reservations are booked on Recreation.gov for my trip dates? Reservations were released for the entire season on January 5, 2024, and some peak dates may be sold out. Additional reservations will be made available seven days in advance at 8 AM PT via Recreation.gov. These additional reservations will be a combination of full-day reservations and half-day afternoon-only reservations. If you do not get a reservation when planning your trip, be sure to try again seven days out. You can read more here.
How do I get a Yosemite peak-hours reservation?
- Go to Recreation.gov. Be sure you are on the Yosemite Peak Hour Plus Reservations page.
- Input your arrival date. The date will be the first day you arrive or the first day of your trip that will require a reservation. For example, if you arrive at the park on Friday, April 19, you will input Saturday, April 20, as this will be the first day a reservation is required. If you arrive on Tuesday, July 2, that will be the first day of your reservation since reservations are now required on weekdays.
- Click ‘Book Now’ to add to your cart. You then have 15 minutes to check out. You must input your ticket holder details in the cart, including your name and address.
- Add additional reservations if needed. You can add more reservation dates to your cart if you need to make multiple reservations. This may be the case if you have multiple vehicles or are visiting for over three days.
- Check out and pay the $2 fee per reservation. Complete the checkout flow and get your confirmation. The reservation is delivered digitally. However, I recommend printing a copy of the reservation to take with you and taking a screenshot on your phone.
Final Thoughts on Visiting Yosemite National Park
I recommend spending at least two days in Yosemite to see the highlights. However, ideally, I’d recommend a 3-4 day Yosemite itinerary to visit each of the park’s beautiful regions.
- With two days, split your time between Yosemite Valley and Glacier Point Road.
- With three days, add on a visit to Tioga Pass, Tuolumne Meadows, and Tenaya Lake.
- For four or more days, also visit Mariposa Grove and spend more time hiking in Yosemite.
To extend your trip, visit Sequoia & Kings Canyon National Parks, which are only a few hours’ drive away.
Are you looking for more ideas for your trip to Yosemite? Check out these blog posts!
- Day Trip: How to Spend One Day in Yosemite
- Viewpoints: Best Photography Spots in Yosemite
- Airbnbs: Best Airbnbs & Rentals Near Yosemite
Don’t Forget to Save This Post on Pinterest
Don’t miss the best things to do in Yosemite on your upcoming trip! This free, printable self-guided walking tour of Yosemite Valley covers all the best points of interest, plus a free map and exclusive tips!
Download your free self-guided Yosemite tour here.
